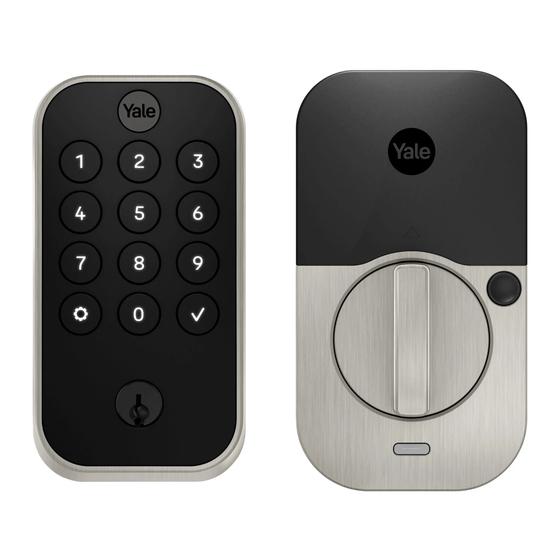
Yale Assure Lock YRD410 Installation Manual
2 keyed deadbolt
Hide thumbs
Also See for Assure Lock YRD410:
- Installation instructions manual (68 pages) ,
- Installation instructions (2 pages)
Advertisement
Quick Links
Yale Assure Lock® 2 Keyed Deadbolt Installation Guide
(Keypad YRD410 or Touchscreen YRD420)
Notice: Before installing your lock, be sure to follow the steps on the yellow Quick Start Guide.
Tools Needed
Tools Needed To Adjust An Existing Door
or Prep a New Door
Level
Standard Phillips
Drill
Utility
Pencil
Wood
Tape
Head Screwdriver
Knife
Mortise Chisel
Measure
Failure to follow these instructions could result in damage to the product, voiding the factory warranty and could lead to failure of the product to provide access.
1
Trusted every day
P/N YRD400-KD-0022 Rev A
Part of ASSA ABLOY
Advertisement

Related Manuals for Yale Assure Lock YRD410


Summary of Contents for Yale Assure Lock YRD410
- Page 1 Yale Assure Lock® 2 Keyed Deadbolt Installation Guide (Keypad YRD410 or Touchscreen YRD420) Notice: Before installing your lock, be sure to follow the steps on the yellow Quick Start Guide. Tools Needed Tools Needed To Adjust An Existing Door or Prep a New Door...
- Page 2 DoorSense DoorSense Screws Adjustable Deadbolt Strike Latch (AYRDB DRIVE Flush Mount Cap Plate Adjustable Drive-In Deadbolt Latch available for purchase) Yale Smart Module (with select models) Mounting Tape Housing Cover Guide Exterior Keypad Reset Pin Battery Cover Strike Plate Screw Set B...
- Page 3 Remove Existing Deadbolt Keep your old deadbolt until your new lock has been successfully installed. Door Frame Trusted every day P/N YRD400-KD-0022 Rev A Part of ASSA ABLOY...
- Page 4 Check Door Measurements and Adjust If Needed Check Door: Tear off the Door Checker page of this guide and follow CAUTION: If printed from electronic file, Blue Black Silver set print scale to 1:1. instructions to verify your door measurements and make any Check Your Door Guide Measure ruler to check scale.
- Page 5 (Your door is 2-3/4" (70mm) (Your door is not (Your door is not not a match for a match for a a match for a Yale a Yale smart Yale smart lock) smart lock) lock) Greater than D Greater than E or F...
- Page 6 CAUTION: If printed from electronic file, Blue Black Silver set print scale to 1:1. Measure ruler to check scale. Check Your Door Guide To ensure a successful installation, measure each aspect of your door and frame, as shown in panels (left side of sheet) using the ruler above.
- Page 7 Template to Mark a Door for 2-1/8" Face Bore For 1-3/ " Center 2-3/4" 70mm Backset (44.5 of 2-1/8" (54mm) hole through face Thick Door of door Center CAUTION: of 1" (25mm) If printed from electronic file, hole through set print scale to 1:1. edge of door Measure a dimension to check scale.
- Page 8 Template to Mark a Door for 1-1/2" Face Bore For 1-3/ " Center 2-3/4" 70mm Backset (44.5 of -1/ " Thick Door Center hole through of 1" (25mm) face of door CAUTION: hole through If printed from electronic file, edge of door set print scale to 1:1.
- Page 9 Install Deadbolt Latch and Strike Plate *Correct deadbolt latch length is based on backset. Choose 2-3/8" or 2-3/4". Door Checker measurements E and F can help you verify your backset measurement. 2-3/8"Backset, Out of Box Deadbolt latch must be in unlocked position. UP Security screws can be arrow must face upwards.
- Page 10 Verifying Bore Face Measurement for Exterior Keypad Install the lock with the door open. Do not close until all steps are completed. Measurement G on the Door Checker will help verify your bore face measurement. If hole is less than 2-1/8", remove adapter by Inside of Door Outside of Door unscrewing the two screws on either side, using a...
- Page 11 Install Mounting Plate and Exterior Keypad Inside and Outside of Door Position keypad on the IMPORTANT: outside of door, feeding wire There are 3 bolt sets with your as shown. lock. Choose the bolt length for Keypad Hold keypad to front of door, your door thickness.
- Page 12 Attach Wire to Inside of Interior Lock Ridges face outward Make sure wire is attached securely. Trusted every day P/N YRD400-KD-0022 Rev A Part of ASSA ABLOY...
- Page 13 Install Interior Lock Tailpiece must Screws are pre-installed. Tighten be horizontal. Tailpiece when lock is seated on plate. Thumbturn must When fully tightened, lock should be vertical. be flush to door. Insert tailpiece into the slot. Thumbturn Slot Push the lock towards the door, Thumbturn adjusting the...
- Page 14 Test Thumbturn and Key Smooth deadbolt latch operation will enhance your battery life. If deadbolt latch does If deadbolt latch not lock and unlock does not lock or when key is turned: unlock when turning thumbturn: Ensure deadbolt latch is centered in face Ensure tailpiece is bore hole.
- Page 15 Install Yale Smart Module Select Included with select models Models Batteries must not be installed when inserting or removing Yale Smart Module. Trusted every day P/N YRD400-KD-0022 Rev A Part of ASSA ABLOY...
- Page 16 5 minutes. After 5 minutes, simply touch the Yale logo to re-start the connection to the app. Congratulations, you’ve installed the Yale Assure Lock® 2 Keyed Deadbolt! Trusted every day P/N YRD400-KD-0022 Rev A Part of ASSA ABLOY...
- Page 17 Smart Module (if you are installing one). robust performance, but does require drilling a ⅝" hole into your door frame. What’s in the box? Ensure it is in the proper position with its center aligned with the Yale logo. DoorSense Door Frame 1.5" Screws 2"...
- Page 18 Installing DoorSense® Step 2. Attach mounting tape C. Remove the remaining piece of adhesive. A. Remove one side of the adhesive. Step 3. Place on door frame B. Attach tape to the back of the DoorSense, Press the adhesive side ensuring it is aligned with to the frame.
- Page 19 Installing DoorSense® Step 4. Screw into frame Notes: Once the lock has been set up, navigate to the Lock Settings and select Calibrate Lock. Hand tighten to the frame Follow the instructions in the app. using the included screws. Open and close the door to validate the door state is You may wish to complete accurate.
- Page 20 Installing DoorSense® B. Press the cap onto the notched side of the magnet carrier. Flush Mount Installation The two shapes What you’ll need should interlock. • Flush Mount Cap (shown in illustration on page 16.) • 5/8" drill blade bit • Electric drill Notches Clips Step 1.
- Page 21 Installing DoorSense® Step 4. Tape drill bit Step 6. Insert Door Door DoorSense into It may be helpful to Frame Frame the hole attach tape to your drill bit to mark the If it is too snug to push proper depth of in by hand, protect hole to drill.
- Page 22 Using Your Lock To Unlock the Door Exterior Keypad Interior Lock 1. Press the Yale logo on the exterior keypad. Wake or Battery 2. Enter the entry code. Cover One Touch Locking 3. Press the Yale Logo Warnings Passage Button...
- Page 23 Simply press the button on the inside of the lock to turn it on. • To turn passage mode off, simply lock your door. • Yale Access products work in harmony with some of your favorite smart home brands to make Integrations life more simple and secure.
-
Page 24: Setting Definitions
Access App Yale Access App, enter this code on the keypad and press the gear symbol. Entry codes can be created,from the Yale Access App, for users to allow them to lock/unlock Entry Codes the door from the lock keypad. - Page 25 Advanced Device Settings Volume This feature can be changed in the Yale Access App. You can turn the lock volume on or off. Operating Mode: When the lock is in normal operating mode all entry codes will work and the lock can be Normal unlocked/locked from the app and voice assistants.
-
Page 26: Troubleshooting
Troubleshooting Symptom Suggested Action • Keypad becomes active when the Yale logo is pressed. • Verify contact with the logo. Lock does not respond - • If keypad numbers are visible, check they respond when pressed. door is open and accessible. - Page 27 Lock operates, but makes no sound. • Check in the Yale Access App to see if Volume is set to off. *When batteries are replaced, Smart Module locks have a real time clock that will be set through the User Interface.
-
Page 28: Hardware Troubleshooting
Hardware Troubleshooting Symptom Solution Deadbolt grinds and will not extend to Attempt re-handing using the Settings Menu. lock when using an ntry ode but You must use Programming Code to access the Settings Menu. thumbturn locks and unlocks smoothly. Deadbolt is hitting the strike plate. Reposition the strike plate to align with deadbolt. - Page 29 Resetting Lock to Factory Defaults When lock is reset*, it will remove the lock from the Yale Access App and remove all pin codes and settings that were changed. Reset Pin To Reset Lock: 1. Remove battery cover and one battery.
- Page 30 Keypad Alerts Keypad Meaning Gear flashes Amber Low Battery Level 1 Gear flashes Red Low Battery Level 2 Gear flashes Red then stays red Low Battery Level 3 until batteries are replaced Checkmark flashes Pairing Success X then gear flashes Red Jammed Lock Gear flashes White Pairing/successful pairing...
- Page 31 Interior Lock Light Alerts Inside Lock Light Meaning Blue flashing Low Battery Level 1 Blue flashing Low Battery Level 2 Blue flashing Low Battery Level 3 Pink flashing Passage Mode enabled Red flash Locked state Green flash Unlocked state Green 3 second solid Pairing Success Red 3 second solid Pairing Fail...
- Page 32 Yale® and Assure Lock® 2 are registered trademarks of Yale Home. Other products’ brand names may be trademarks or registered trademarks of their respective owners and are mentioned for reference purposes only. ©Copyright 2022. All rights reserved. Reproduction in whole or in part without the express written permission of Yale Home is prohibited. Trusted every day...
Need help?
Do you have a question about the Assure Lock YRD410 and is the answer not in the manual?
Questions and answers
why does it say blue tooth disabled