
Related Manuals for Nevir NVR-6321MEDGS


Summary of Contents for Nevir NVR-6321MEDGS
- Page 1 MICROONDAS ENCASTRE 21 LITROS y GRILL MANUAL DE INSTRUCCIONES NVR-6321MEDGS INSTRUCCIONES DE SEGURIDAD IMPORTANTES LEA DETENIDAMENTE Y GUÁRDELA PARA FUTURAS REFERENCIA...
-
Page 2: Medidas Importantes De Seguridad
ADVERTENCIA: Si las gomas de la puerta o la puerta están dañados, el microondas no debe funcionar hasta que haya sido reparado por un servicio técnico oficial de NEVIR. manipulación por personal ajeno a NEVIR supondrá la pérdida de garantía del aparato. - Page 3 8. La falta de mantenimiento del microondas en condiciones limpias podría provocar un deterioro de la superficie que podría afectar negativamente la vida útil del aparato y posiblemente dar lugar a una situación peligrosa y la perdida de garantia. 9. El aparato no debe colocarse en un armario cerrado. 10.
-
Page 4: Instalación
electromagnética para el tratamiento de materiales, y equipos de electroerosión y soldadura por arco. Los equipos de clase B son equipos adecuados para su uso en establecimientos domésticos y en establecimientos conectados directamente a una red de suministro de energía de baja tensión que abastece a los edificios utilizados para fines domésticos. .INSTALACIÓN 1. - Page 5 INSTALACIÓN: a) Coloque el microondas en el gabinete y empuje hacia adelante hasta el final. (Fig.1) Figura 1 b) Empuje el microondas hasta el final. (Fig.2) Figura 2...
- Page 6 c) Mueva el producto en paralelo en el gabinete de la cocina de acuerdo con la dirección de la flecha en la figura y manténgalo centrado. (Fig.3) Figura 3 d) Utilice los tornillos del embalaje de piezas para asegurar el horno de microondas en el gabinete. (Fig.4) Figura 4...
-
Page 7: Cuidado Del Horno Microondas
Detalles del gabinete: Tamaño del producto: (W)595x(H)385x(D)377(mm) Tamaño de apertura: (D)560±2 x (E)360±2 x (F)550±2 (mm) como se muestra en la Fig. 5 "D", "E", "F". G (El grosor del tablero): 20mm I (El grosor de la placa): 20 mm H (La profundidad de la capa ): 20 mm exhaust port G(20mm) -
Page 8: Consejos Para La Limpieza
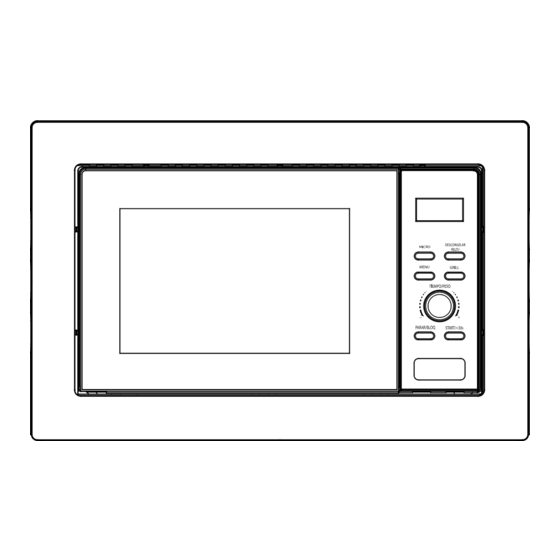
b. La falta de mantenimiento del microondas en condiciones no limpias podría provocar un deterioro de la superficie que podría afectar negativamente la vida útil del aparato y posiblemente dar lugar a una situación peligrosa y la perdida de garantia. c. - Page 9 DESCRIPCIÓN ② ⑧ ⑦ ① ③ ④ ⑤ ⑥ 1.Cerradura de la puerta La puerta del horno microondas debe estar bien cerrada para que funcione. Nunca use con la puerta abierta. 2. Ventana de visualización Permitir que el usuario vea el estado de cocción 3.
-
Page 10: Funcionamiento Del Panel De Control
- Coloque primero el anillo giratorio - Coloque la plataforma giratoria en el eje giratorio y asegúrese de que esté engranada correctamente 6.Panel de control Vea a continuación en detalles (el panel de control está sujeto a cambios sin previo aviso) 7.Rejilla Utilizar para colocar los alimentos asados. - Page 11 2. FUNCIÓN DE MICROONDAS Hay cinco niveles de potencia de fuego, 100P, 80P, 50P, 30P y 10P, respectivamente. Presione el botón "Micro." continuamente para seleccionar la potencia de microondas deseada. Gire la perilla para seleccionar el tiempo de cocción, y el rango de tiempo se puede seleccionar de 0:10 a 60:00.
-
Page 12: Cocción Automática
de peso de dEF1 es de 100g a 1500g, y el rango de tiempo opcional de dEF2 es de 0:10 a 60:00. Después de seleccionar el peso o el tiempo de descongelación, presione el botón "START / +30s" para comenzar a trabajar. Un zumbido para notificar la finalización de la operación. El modo de descongelación dEF1 por peso tendrá... - Page 13 continuamente para seleccionar el menú deseado y gire la perilla para seleccionar el peso deseado de los alimentos, luego presione el botón "START / +30s" para comenzar a trabajar. Un zumbido para notificar la finalización de la operación. Monitor Método Los pesos opcionales son 250g, 500g y Patata 750g.
- Page 14 Después de seleccionar el tiempo de cocción, presione el botón "START / +30s" para comenzar el trabajo. Un zumbido para notificar la finalización de la operación. Parrilla, el elemento de calor se energizará durante el tiempo de operación. Lo cual es aplicable para carnes delgadas o carne de cerdo, salchicha, alitas de pollo ya que se puede obtener un buen color marrón.
- Page 15 8. EXPRESS O CALENTAMIENTO En el modo de espera, después de poner la comida y cerrar la puerta, presione el botón "START / +30s" para iniciar rápidamente el microondas. El tiempo de trabajo predeterminado es de 30 segundos. En el proceso de trabajo, presione el botón "START / +30s" una vez durante 30 segundos.
-
Page 16: Consejos De Cocina
No debe usarse al cocinar carne o Película chuletas, ya que la Sí plástica sobretemperatura puede dañar la película. El bastidor de parrilla Rejilla Sí Sí solo se puede usar en modo Grill. No debe usarse en horno microondas. El Contenedor microondas no puede metálico... -
Page 17: Mantenimiento
Si "NO" es la respuesta a cualquiera de las preguntas anteriores, verifique su enchufe de pared y el fusible en la caja de su medidor. Si tanto el enchufe de pared como el fusible funcionan correctamente, PÓNGASE EN CONTACTO CON SU CENTRO DE SERVICIO TECNICO OFICIAL MÁS CERCANO APROBADO POR NEVIR. - Page 18 MANTENIMIENTO DE SALVAGUARDIAS Precaución: RADIACIÓN DE MICROONDAS 1. El condensador de alto voltaje permanece cargado después de la desconexión; cortocircuite el terminal negativo del condensador H. V al chasis del microondas (use un destornillador) para descargar antes de tocarlo. 2. Durante el mantenimiento, las piezas enumeradas a continuación pueden ser retiradas y dar acceso a potenciales superiores a 250V a tierra.
-
Page 19: Built-In Microwave Oven
21L BUILT-IN MICROWAVE OVEN USER MANUAL NVR-6321MEDGS IMPORTANT SAFETY INSTRUCTIONS READ CAREFULLY AND KEEP FOR FUTURE REFERENCE... -
Page 20: Important Safeguards
Household use only SAVE THESE INSTRUCTIONS .IMPORTANT SAFEGUARDS … WARNING: If the door or door seals are damaged, the oven must not be operated until it has been repaired by a trained person. WARNING: It is hazardous for anyone other than a trained person to carry out any service or repair operation, which involves the removal of any cover, which gives protection against exposure to microwave energy. - Page 21 10. Care should be taken not to displace the turntable when removing containers from the appliance. 11. The appliance shall not be cleaned with a steam cleaner. 12. The appliance must not be installed equal or higher than 900 mm above the floor. Minimum height of free space necessary above the top surface of the oven: 100mm.
-
Page 22: Installation
.INSTALLATION… … 1. Take out all the packing. If there is a safe film over the oven, tear it off before use. Check carefully for damage. If any, immediately notify dealer or send to the manufacturer’s service center. 2. Microwave ovens must be placed under dry and non-corrosiveness environments, kept away from heat and humidity, such as gas burner or water tank. - Page 23 b) Push the microwave oven till to the end. (Fig.2) Fig.2 c) Move the product in parallel in the kitchen cabinet according to the direction of the arrow in the figure, and keep it centered. (Fig.3) Fig.3...
- Page 24 d) Use the screws of parts packing to secure the microwave oven in the cabinet. (Fig.4) Fig.4 Cabinet details: Product size: (W)595x(H)385x(D)377(mm) Opening size: (D)560±2 x (E)360±2 x (F)550±2 (mm) as shown in Fig.5 “D”,“E”,“F”. G (The thickness of board): 20mm I (The thickness of board):20mm H (The deepness of wrong layer): 20mm exhaust port...
-
Page 25: Microwave Oven Care
.CLEANING MICROWAVE OVEN CARE The oven should be cleaned regularly and any food deposits removed. a. Remove the power cord from the wall outlet before cleaning. After cooling products. Don't immerse the appliance in water or other fluids when cleaning. b. -
Page 26: Product Instruction
.PRODUCT INSTRUCTION …………………………....② ⑧ ⑦ ① ③ ④ ⑤ ⑥ 1.Door lock Microwave oven door must be properly closed in order for it to operate 2.Viewing window Allow user to see the cooking status 3.Rotating ring The glass turntable sits on its wheels; it supports the turntable and helps it to balance when rotating 4.Rotating axis The glass turntable sits on the axis;... -
Page 27: Before Cooking
8.Waveguide cover It is inside the microwave oven, next to the wall of control panel. Never remove the waveguide cover. OPERATION OF CONTROL PANEL… 1. BEFORE COOKING The display lights up when plugged in power supply, then enter the standby state and display shows 1:00. -
Page 28: Microwave Function
2. MICROWAVE FUNCTION There are five firepower levels, 100P, 80P, 50P, 30P and 10P, respectively. Press the “Microw.” button continuously to select the desired microwave power. Turn the knob to select cooking time, and the time range can be selected from 0:10 to 60:00. After selecting the cooking time, press “START/+30s”... -
Page 29: Auto Cooking
Below is some food defrosting time advice: dEF1 For defrosting, the weight range is from 100g to 1500g. dEF2 For defrosting, the time range is from 0:10 to 60:00 a. It is necessary to turn over the food during operation to obtain uniform effect. b. -
Page 30: Grill Function
The optional weights are 1 cup, 2 cups or 3 cups, Beverage each one about 250ml. The optional weights are 200g, 400g and 600g. Meat The optional weights are 200g, 400g and 600g. Fish a. The temperature of food before cooking would be 20-25℃. Higher or lower temperature of the food before cooking would require increase or decrease of cooking time. -
Page 31: Child Lock Function
6. STOP In the process of cooking settings, can press “STOP” button to cancel the settings and return to standby state. In the process of working, can press “STOP” button to pause. In the standby state, can press “STOP” button again to cancel the function and return to standby state. 7. -
Page 32: Cooking Tips
Material of Microwave Grill Combi Notes container Never Heat-resistant ceramics which are ceramic decorated with metal rim or glazed Can not be used for Heat-resistant long time microwave plastic cooking Heat-resistant glass It should not be used when cooking meat or Plastic film chops over-temperature may... - Page 33 Cooking food evenly Food such as chicken, hamburger or steak should be turned once during cooking. Depending on the type of food, if applicable, stir it from outside to centre of dish once or twice during cooking Allow standing time After cooking times out, leave the food in the oven for an adequate length of time, this allows it to complete its cooking cycle and cooling it down in a gradual manner Whether the food is done...
- Page 34 fuse in your meter box. If both the wall socket and the fuse are functioning properly, CONTACT YOUR NEAREST SERVICE CENTER APPROVED. SERVICING SAFEGUARDS Caution: MICROWAVE RADIATION 1. The high voltage capacitor remains charge after disconnection; short the negative terminal of H.
-
Page 36: Declaración De Conformidad
DECLARACIÓN DE CONFORMIDAD NEVIR, S.A. declara bajo su responsabilidad que el aparato indicado cumple los requisitos de las siguientes directivas: DIRECTIVA EMC LOW VOLTAGE DIRECTIVA (LVD= EN55011:2016+A2:2021 EN 60335-2-25: 2012 + A1: 2015 + A2:2016 ENIEC55014- 1:2021 EN60335-2-6: 2015+A1: 2020 +A11: 2020...
Need help?
Do you have a question about the NVR-6321MEDGS and is the answer not in the manual?
Questions and answers