Table of Contents
Advertisement
Available languages
Available languages
Quick Links
Advertisement
Table of Contents

Related Manuals for Nevir NVR-6320MEGS


Summary of Contents for Nevir NVR-6320MEGS
- Page 1 MICROONDAS ENCASTRE 21 LITROS y GRILL MANUAL DE INSTRUCCIONES POWER Medio M.Alto Max. BAJO M2+G8 M3+G7 M4+G6 Grill Temporizador 0 NVR-6320MEGS INSTRUCCIONES DE SEGURIDAD IMPORTANTES LEA DETENIDAMENTE Y GUÁRDELA PARA FUTURAS REFERENCIA...
-
Page 2: Medidas Importantes De Seguridad
ADVERTENCIA: Si las gomas de la puerta o la puerta están dañados, el microondas no debe funcionar hasta que haya sido reparado por un servicio técnico oficial de NEVIR. manipulación por personal ajeno a NEVIR supondrá la perdida de garantía del aparato. - Page 3 8. La falta de mantenimiento del microondas en condiciones limpias podría provocar un deterioro de la superficie que podría afectar negativamente la vida útil del aparato y posiblemente dar lugar a una situación peligrosa y la perdida de garantia. 9. El aparato no debe colocarse en un armario cerrado. 10.
-
Page 4: Instalación
electromagnética para el tratamiento de materiales, y equipos de electroerosión y soldadura por arco. Los equipos de clase B son equipos adecuados para su uso en establecimientos domésticos y en establecimientos conectados directamente a una red de suministro de energía de baja tensión que abastece a los edificios utilizados para fines domésticos. INSTALACIÓN 1. - Page 5 INSTALACIÓN: a) Coloque el horno de microondas en el gabinete incorporado y empuje hacia adelante hasta el final. (Fig.1) Figura 1 b) Empuje el horno de microondas hasta el final. (Fig.2) Figura 2...
- Page 6 c) Mueva el producto en paralelo en el gabinete de la cocina de acuerdo con la dirección de la flecha en la figura y manténgalo centrado. (Fig.3) Figura 3 d) Utilice los tornillos del embalaje de piezas para asegurar el horno de microondas en el gabinete. (Fig.4) Figura 4...
-
Page 7: Cuidado Del Horno Microondas
Detalles del gabinete: Tamaño del producto: (W)595x(H)385x(D)377(mm) Tamaño de apertura: (D)560±2 x (E)360±2 x (F)550±2 (mm) como se muestra en la Fig. 5 "D", "E", "F". G (El grosor del tablero): 20mm I (El grosor de la placa): 20 mm H (La profundidad de la capa): 20 mm exhaust port G(20mm) -
Page 8: Consejos Para La Limpieza
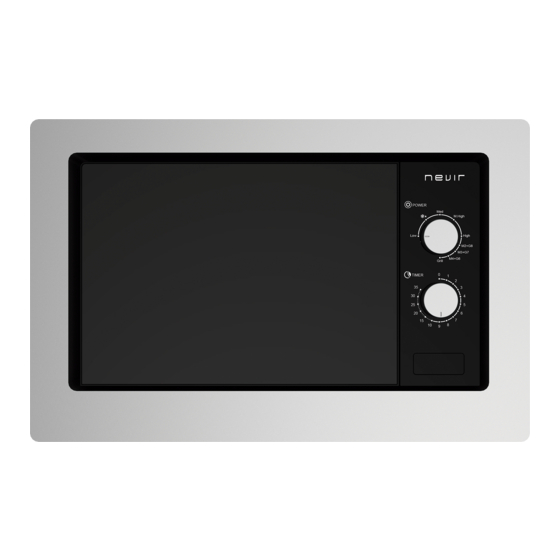
a. Retire el cable de alimentación de la toma de corriente de la pared antes de limpiar. Después de enfriar los productos. No sumerja el aparato en agua u otros líquidos al limpiar. b. La falta de mantenimiento del microondas en condiciones no limpias podría provocar un deterioro de la superficie que podría afectar negativamente la vida útil del aparato y posiblemente dar lugar a una situación peligrosa y la perdida de garantia. - Page 9 DESCRIPCIÓN ② ⑧ ⑦ ① ③ ④ ⑤ ⑥ 1.Cerradura de la puerta La puerta del horno microondas debe estar bien cerrada para que funcione. Nunca use con la puerta abierta. 2.Ventana de visualización Permitir que el usuario vea el estado de cocción 3.
-
Page 10: Funcionamiento Del Panel De Control
- Coloque primero el anillo giratorio - Coloque la plataforma giratoria en el eje giratorio y asegúrese de que esté engranada correctamente 6.Panel de control Vea a continuación en detalles (el panel de control está sujeto a cambios sin previo aviso) 7.Rejilla Utilizar para colocar los alimentos asados. - Page 11 2. FUNCIÓN DE COMBINACIÓN DE MICROONDAS Y GRILL Hay cinco niveles de potencia de fuego: Relación de salida de Relación de salida FUEGO microondas de la parrilla 17% de potencia de BAJO salida 30% de potencia de M.Bajo salida 55% de potencia de salida 80% de potencia de M.Alto...
-
Page 12: Guía De Utensilios
3) Seleccione el nivel de potencia deseado 4) Una vez que se establece el tiempo deseado, comienza la cocción. Si es necesario hacer una pausa en el medio, simplemente abra la puerta en cualquier momento y ciérrela para reanudar la operación. 5) Cuando se agota el tiempo de espera y termina la cocción, el horno de microondas produce un toque de campana, la lámpara interior también se apagará... -
Page 13: Consejos De Cocina
No debe usarse en microondas. Contenedor microondas no puede metálico penetrar a través del metal. Pobre resistencia al calor. No se puede laca utilizar para cocinar a alta temperatura Pobre resistencia al Madera y papel calor. No se puede de bambú utilizar para cocinar a alta temperatura CONSEJOS DE COCINA... -
Page 14: Mantenimiento
Si tanto el enchufe de pared como el fusible funcionan correctamente, PÓNGASE EN CONTACTO CON SU CENTRO DE SERVICIO TECNICO OFICIAL MÁS CERCANO APROBADO POR NEVIR. MANTENIMIENTO Precaución: RADIACIÓN DE MICROONDAS 1. - Page 15 ● Transformador de alta tensión ● Condensador de alto voltaje ● Diodo de alto voltaje ● Fusible de alto voltaje 3. Las siguientes condiciones pueden causar una exposición indebida a las microondas durante el mantenimiento. Ajuste inadecuado del magnetrón; ...
-
Page 16: Built-In Microwave Oven
21L BUILT-IN MICROWAVE OVEN USER MANUAL POWER Medio M.Alto Max. BAJO M2+G8 M3+G7 M4+G6 Grill Temporizador 0 NVR-6320MEGS IMPORTANT SAFETY INSTRUCTIONS READ CAREFULLY AND KEEP FOR FUTURE REFERENCE... -
Page 17: Important Safeguards
Household use only SAVE THESE INSTRUCTIONS .IMPORTANT SAFEGUARDS … WARNING: If the door or door seals are damaged, the oven must not be operated until it has been repaired by a trained person. WARNING: It is hazardous for anyone other than a trained person to carry out any service or repair operation, which involves the removal of any cover, which gives protection against exposure to microwave energy. - Page 18 10. Care should be taken not to displace the turntable when removing containers from the appliance. 11. The appliance shall not be cleaned with a steam cleaner. 12. The appliance must not be installed equal or higher than 900 mm above the floor. Minimum height of free space necessary above the top surface of the oven: 100mm.
- Page 19 20. “To be in compliance EN 61000-3-11, the product shall be connected only to a supply of the system impedance: Zsys = 0.40089 ohms or less. Before connect the product to public power network, please consult your local power supply authority to ensure the power network meet above requirement.”...
-
Page 20: Installation
INSTALLATION: a) Put the microwave oven into built-in cabinet and push it forward to the end. (Fig.1) Fig.1 b) Push the microwave oven till to the end. (Fig.2) Fig.2... - Page 21 c) Move the product in parallel in the kitchen cabinet according to the direction of the arrow in the figure, and keep it centered. (Fig.3) Fig.3 d) Use the screws of parts packing to secure the microwave oven in the cabinet. (Fig.4) Fig.4...
-
Page 22: Microwave Oven Care
Cabinet details: Product size: (W)595x(H)385x(D)377(mm) Opening size: (D)560±2 x (E)360±2 x (F)550±2 (mm) as shown in Fig.5 “D”,“E”,“F”. G (The thickness of board): 20mm I (The thickness of board):20mm H (The deepness of wrong layer): 20mm exhaust port G(20mm) intake Fig.5 .CLEANING MICROWAVE OVEN CARE... -
Page 23: Tips For Cleaning
c. Never use hard detergent, gasoline, abrasive powder or metal brush to clean any part of the appliance. d. Do not remove the waveguide cover. e. When the microwave oven has been used for a long time, there may be some strange odors exist in oven, following 3 methods can get rid of them: 1) Place several lemon slices in a cup, then heat with high Micro Power for 2-3 min. -
Page 24: Product Instruction
PRODUCT INSTRUCTION ② ⑧ ⑦ ① ③ ④ ⑤ ⑥ 1.Door lock Microwave oven door must be properly closed in order for it to operate 2.Viewing window Allow user to see the cooking status 3.Rotating ring The glass turntable sits on its wheels; it supports the turntable and helps it to balance when rotating 4.Rotating axis The glass turntable sits on the axis;... - Page 25 8.Waveguide cover It is inside the microwave oven, next to the wall of control panel. Never remove the waveguide cover. OPERATION OF CONTROL PANEL… POWER Medio M.Alto Max. BAJO M2+G8 M3+G7 M4+G6 Grill Temporizador 0 1. CLOCK SETTING The maximum setting is 35 minutes, there is a ringtone at the end, and the knob returns to the “0” position.
-
Page 26: Operation
2. MICROWAVE and GRILL COMBINATION FUNCTION There are five firepower levels: FIREPOWER Microwave output ratio Grill output ratio 17% power output M.Low 30% power output 55% power output M.High 80% power output HIGH 100% power output M2+G8 20% power output 80% power output M3+G7 30% power output... -
Page 27: Utensils Guideline
.UTENSILS GUIDELINE …。 ……………………… … It is strongly recommended to use the containers which are suitable and safe for microwave cooking. Generally speaking, the containers which are made of heat-resistant ceramic, glass or plastic are suitable for microwave cooking. Never use the metal containers for microwave cooking and combination cooking as spark is likely to occur. -
Page 28: Maintenance
Cooking food evenly Food such as chicken, hamburger or steak should be turned once during cooking. Depending on the type of food, if applicable, stir it from outside to centre of dish once or twice during cooking Allow standing time After cooking times out, leave the food in the oven for an adequate length of time, this allows it to complete its cooking cycle and cooling it down in a gradual manner Whether the food is done... - Page 29 5. Is the water inside the oven hot? If “NO” is the answer to any of the above questions, please check your wall socket and the fuse in your meter box. If both the wall socket and the fuse are functioning properly, CONTACT YOUR NEAREST SERVICE CENTER APPROVED.
-
Page 32: Declaración De Conformidad
DECLARACIÓN DE CONFORMIDAD NEVIR, S.A. declara bajo su responsabilidad que el aparato indicado cumple los requisitos de las siguientes directivas: DIRECTIVA EMC LOW VOLTAGE DIRECTIVA (LVD= EN55011:2016+A2:2021 EN 60335-2-25: 2012 + A1: 2015 + A2: 2016 ENIEC55014-1:2021 EN60335-2-6: 2015+A1: 2020 + A11: 2020...
Need help?
Do you have a question about the NVR-6320MEGS and is the answer not in the manual?
Questions and answers