Advertisement
Quick Links
Advertisement

Subscribe to Our Youtube Channel
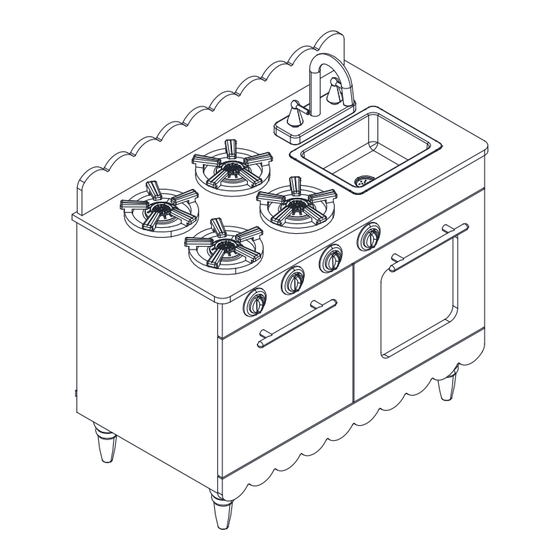
Summary of Contents for Mocka Kids Cottage Kitchen
- Page 1 Hello, I’ve arrived! Now that I’m here you are only one flat-pack away from transforming your home.
- Page 2 Thank you for supporting us. We believe design belongs to everyone. From materials and processes to safety testing, production and delivery, we are passionate and committed to bringing you the best possible product so you can create beautifully functional spaces to feel comfortably you. Here are a few assembly tips before you get started: Make Time Set The Mood...
- Page 3 Not suitable for children under 2+ years of age. WARNING: Small parts are used to assemble the Kids Cottage Kitchen. Only an adult should assemble the Kids Cottage Kitchen. Keep all assembly parts away from small children. mocka.co.nz I mocka.com.au...
- Page 4 Kids Cottage Kitchen Attach 1 x rail track (P) to panel [3] and secure with 2 x screws (H). Insert 6 x dowels (A) to panels [2] and [3] as shown. mocka.co.nz I mocka.com.au...
- Page 5 Kids Cottage Kitchen Insert 6 x dowels (A) to panel [4] as shown. Attach 2 x panels [12] to panel [4] and secure with 4 x screws (D). mocka.co.nz I mocka.com.au...
- Page 6 Kids Cottage Kitchen Attach panels [2] and [3] to panel [4] and secure with 4 x screws (D). Insert 5 x dowels (A) to panel [5] as shown. mocka.co.nz I mocka.com.au...
- Page 7 Kids Cottage Kitchen Attach 1 x rail track (P) to panel [5] and secure with 2 x screws (H). Insert 2 x nuts (F) to panel [5] as shown.Attach panel [5] to panel [4] and secure with 2 x screws (E) and allen key (M).
- Page 8 Kids Cottage Kitchen Attach panel [6] to step 8 assemble the piece and secure with 5 x cams (C). Fix 5 x cam bolts (B) to panel [6]. mocka.co.nz I mocka.com.au...
- Page 9 Kids Cottage Kitchen Attach step 11 assemble the piece to step 10 assemble the piece Attach 1 x metal plate (V) to panel [7] and secure with 1 x screw (G). and secure with 16 x screws (O). mocka.co.nz I mocka.com.au...
- Page 10 Kids Cottage Kitchen Insert 2 x panels [8] to step 12 assemble the piece as shown. Insert 2 x dowels (A) to panel [9] .Fix 3 x cam bolts (B) to panel [9] as shown. mocka.co.nz I mocka.com.au...
- Page 11 Kids Cottage Kitchen Attach 4 x switches (S) into panel [9], in order to guarantee the switches Attach panel [9] to step 13 assemble the piece and secure with 3 x cams (C). move smoothly, do not lock the rotary knob tightly.
- Page 12 Kids Cottage Kitchen Insert 4 x nuts (F) to panel [10] as shown. Attach panel [10] to panel [1] Fix 6 x cam bolts (B) to panel [1]. and secure with 4 x screws (E) and allen key (M). mocka.co.nz I mocka.com.au...
- Page 13 Kids Cottage Kitchen Attach step 19 assemble the piece to step 16 assemble Attach 1 x tap (T) to panel [1] and secure with 2 x screws (N) and 2 x the piece and secure with 6 x cams (C).
- Page 14 Kids Cottage Kitchen Kids Cottage Kitchen Attach 2 x handles (Q) to panels [13] and [14] and secure with 4 x screws (D). Insert panel [11] to step 20 assemble the piece as shown. Attach 4 x hinges (I) and 8 x washer (S) to panels [13] and [14] and secure with 8 x screws (J).
- Page 15 Kids Cottage Kitchen Kids Cottage Kitchen Attach panels [13] and [14] to step 21 assemble the piece Insert 1 x sink (U) to step 13 assemble the piece as shown. and secure with 16 x screws (J). mocka.co.nz I mocka.com.au...


Need help?
Do you have a question about the Kids Cottage Kitchen and is the answer not in the manual?
Questions and answers