Table of Contents
Advertisement
Quick Links
Advertisement
Table of Contents

Related Manuals for Yolink YS5707-UC


Summary of Contents for Yolink YS5707-UC
- Page 1 Dimmer Switch YS5707-UC Installation Manual & User Guide Rev 1.2 February 2, 2023...
-
Page 2: Table Of Contents
SECTION TOPIC PAGE Welcome! Introduction Before You Begin What's in the Box? Install the YoLink App Add Your Dimmer Switch to the App Installation Get to Know Your Dimmer Switch App Functions: Device Screen App Functions: Schedule App Functions: Timer... -
Page 3: A Welcome
Mostly unimportant (it’s ok to breeze past it!) Welcome! Thank you for purchasing YoLink products! Whether you are adding additional YoLink products or if this is your first YoLink system, we appreciate you trusting YoLink for your smart home & automation needs. -
Page 4: B Introduction
(original YoLink Hub or the SpeakerHub), not via WiFi or other wireless methods. If you do not already have a YoLink hub, and unless there is an existing YoLink wireless network in your... -
Page 5: C Before You Begin
Before You Begin The Dimmer Switch is generally compatible with the following light bulb types, at their respective maximum loads: LED – 150 Watts Fluorescent/CFL – 150 Watts Halogen – 450 Watts Incandescent – 450 Watts Refer to the Device Settings section to calibrate your Dimmer Switch if the lights flicker. - Page 6 Before You Begin, Continued Do NOT overload or use your dimmer switch to control receptacles, motor-driven appliances, or transformer-supplied appliances. Do review the environmental limitations of the Dimmer Switch prior to installation. The Dimmer Switch is intended for indoor locations, only! Do familiarize yourself with this user guide prior to beginning installation.
-
Page 7: D What's In The Box
What’s in the Box? Dimmer Switch, with Faceplate Wire Connectors (4) Faceplate Screws (2) Electrical Box Screws (2) Quick Start Guide... -
Page 8: E Install The Yolink App
Install the YoLink App If you are new to YoLink, please install the app on your phone or tablet, if you have not already. Otherwise, please proceed to part Scan the appropriate QR code below or find the “YoLink app” on the appropriate app store. - Page 9 Install the YoLink App, Continued You will immediately receive an email from no-reply@yosmart.com with some helpful information. Please mark the yosmart.com domain as safe, to ensure you receive important messages in the future. Log in to the app using your new username and password. The app opens to the Favorite screen, as shown.
-
Page 10: F Add Your Dimmer Switch To The App
Add Your Dimmer Switch to the App Approve access to the camera, if requested. A viewfinder will be shown on the app. Hold the phone over the QR code (on the Dimmer Switch “Remove After Registering” decal, as well as on the rear of the Dimmer Switch) so that the code appears in the viewfinder. - Page 11 Figure 2. Figure 1 Figure 2 If this is your first YoLink system, please visit our product support area at yosmart.com for an introduction to the app, and for tutorials, videos, and other support resources. Ensure your YoLink Hub or SpeakerHub is setup and online...
-
Page 12: G Installation
Installation Turn off the circuit that serves the switch at the circuit breaker panel (or other means of disconnecting the AC power to the circuit). Do NOT work on “hot” electrical wiring! Verify that power has been removed to the light switch, by testing the switch, and by using a multimeter or other type of voltage tester before removing any wires from the switch. - Page 13 Installation, Continued Line or Hot Wire: this wire is typically black, but can be red or another color, but if not it may be marked as the hot wire with black or red tape. One of the wires on the existing light switch should be the hot wire.
- Page 14 Installation, Continued Identify each wire with a marker, tape or other labeling method, as desired, so they are not confused with each other during the wire termination step. Connect the Dimmer Switch’s “pigtail” wires (pre-installed colored wires, connected to the switch) to your identified wires.
- Page 15 Installation, Continued Check each wiring connection by gently tugging on each conductor, ensuring it does not pull out of the wire-nut or appear loose. Re-do any that do not pass this test. Gently push the wiring and the switch into the electrical box, then secure the switch to the box using the included or existing screws (if more suitable for the box).
-
Page 16: H Get To Know Your Dimmer Switch
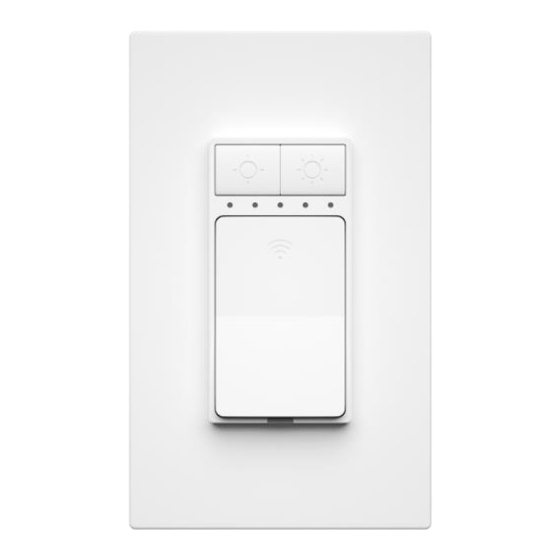
Get to Know Your Dimmer Switch Please take a moment to familiarize yourself with your Dimmer Switch, in particular the LED behaviors. Brightness Decrease Button Short press to decrease the brightness in order 100%->80%- >60%->40%->20% Long Press to decrease by 1% Brightness Increase Button Short press to increase the brightness in order 20%->40%-... -
Page 17: I App Functions: Device Screen
App Functions: Device Screen Product Support Device Settings -Tap to go to Details screen Connection Status Real-time Status -Turned on or turned off Power Button -Tap to turn on/off the dimmer Brightness Control -Slide to set the desired brightness Brightness Status -Shows the current brightness level Schedule -Set schedules to automatically turn... -
Page 18: J App Functions: Schedule
App Functions: Schedule Tap to add a schedule Tap to enable or disable a schedule Tap to edit the schedule Swipe left to edit or delete a schedule Tap to save the settings Set the preferred state “on”, ”off”, or “on and off”. Set the schedule time Apply special brightness Set repeating frequency... -
Page 19: K App Functions: Timer
App Functions: Timer Tap to save the settings Tap to choose action “on”, “off”, or “on and off” Set the timer duration Apply special brightness The timer will run only once. You can set a new timer after the timer has already run once or after you cancel it. The timer runs on the device without an internet connection. -
Page 20: L App Functions: Device Details Screen
Power on status after power outage -Switch to Last State or On or Off *Default is set to Off State Model -Dimmer Switch (YS5707-UC) Device EUI -Device’s unique ID number -Device’s unique serial number, tap to save the device’s QR code, if... -
Page 21: M App Functions: Smart - Scene
App Functions: Smart - Scene Tap to save the settings Edit the name of the scene Select an icon Tap the heart icon, the scene will be displayed on the Favorite tab Assign the scene to a scene group Delete the behavior Edit behavior You must have at least one behavior... -
Page 22: N App Functions: Smart - Automation
App Functions: Smart - Automation The Dimmer Switch can be set up as a condition or action in automation. The Automation settings are saved in the cloud. You can edit the Advanced Settings, including save the log, retry if action fails, notify if action fails, etc. -
Page 23: O Third-Party Assistants & Integrations
Third-party Assistants & Integrations The YoLink Dimmer Switch is compatible with Alexa and Google voice assistants, as well as IFTTT.com. Home Assistant (coming soon). From the Favorites, Rooms, or Smart screen, tap the menu icon. Settings EricYoLink service@yosmart.com... - Page 24 Third-party Assistants & Integr., Cont. Third-Party Services. Tap the appropriate service, then Started, and follow the instructions. Additional information and videos are available in the Support areas on our website.
-
Page 25: P About Control-D2D (Device Pairing)
About Control-D2D (Device Pairing) YoLink Control-D2D (device-to-device) pairing is a feature unique to YoLink products. One device can be paired to one (or more) devices. When two or more devices are paired, a link is created, “locking-in” the behavior, so that the device(s) will... - Page 26 About Control-D2D, Continued How to Pair Two Devices: In this example, two Dimmer Switches will be paired to each other, to provide 3-way functionality. Start with both switches off. Choose one switch to act as a Controller. Turn on the Controller, then press the power button for 5 to 10 seconds until the green LED flashes.
- Page 27 About Control-D2D, Continued If replacing existing 3-way switches with Dimmer Switches, the wiring may not immediately be compatible with the Dimmer Switch. The “traveler” wire will not be connected to either Dimmer Switch, but it may need to be changed to another function (such as to a neutral wire), so that each switch has a hot, neutral, ground, and at least one switch leg wire going to the controlled light(s).
-
Page 28: Q Firmware Updates
Firmware Updates Your YoLink products are constantly being improved, with new features added. It is periodically necessary to make changes to your device's firmware. For optimal performance of your system, and to give you access to all available features for your devices, these firmware updates should be installed when they become available. -
Page 29: S Specifications
Specifications Controller: Semtech® LoRa® RF Module YL09 microcontroller with 32-Bit RISC processor Listings: ETL-Listing Pending Color: White AC Input Power: 100 - 120VAC, 60Hz Maximum Load (Watts): Incandescent: 450 Fluorescent: 150 LED: 150 Dimensions, Imperial (L x W x D): 4.71 x 1.79 x 1.73 inches Dimensions, Metric (L x W x D): 106 x 45.5 x 44 mm Operating Temperature Range:... -
Page 30: T Warnings
Warnings • Please install, operate and maintain the Dimmer Switch only as outlined in this manual. Improper use may damage the unit and/or void the warranty. • Always adhere to local, regional and national electrical codes, including any local ordinances regarding electrical installation or service work. -
Page 31: U 1-Year Limited Electrical Warranty
God (such as floods, lightning, earthquakes, etc.). This warranty is limited to repair or replacement of the YoLink device only at YoSmart's sole discretion. YoSmart will NOT be liable for the cost of installing, removing, nor reinstalling this product, nor direct, indirect, or consequential damages to persons or property resulting from the use of this product. -
Page 32: Fcc Statement
-Consult the dealer or an experienced radio/TV technician for help. The device has been evaluated to meet general RF exposure requirement. The device can be used in portable exposure condition without restriction. PRODUCT NAME: RESPONSIBLE PARTY: TELEPHONE: YOLINK DIMMER YOSMART, INC. (949) 825-5958 SWITCH MODEL NUMBER: ADDRESS:... -
Page 33: W Contact Us & Customer Support
Contact Us / Customer Support We are here for you, if you ever need any assistance installing, setting up or using a YoLink app or product! Please email us 24/7 at service@yosmart.com You can use our online chat service by visiting our website, www.yosmart.com or by scanning the QR code...
Need help?
Do you have a question about the YS5707-UC and is the answer not in the manual?
Questions and answers