Advertisement
Quick Links
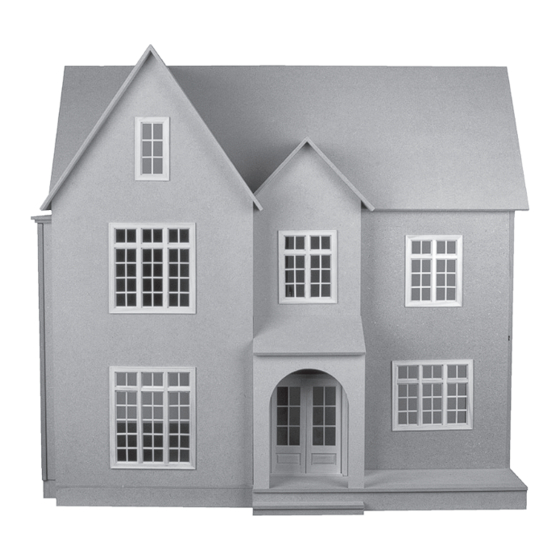
#41045 The Brentwood
from Paper Doll Miniatures
Available exclusively at miniatures.com
Step-by-step assembly instructions
Copyright miniatures.com 2022
SUPPLIES NEEDED:
Masking tape
Glue (such as #1249 Weldbond)
Door hardware
Finishes
See miniatures.com for finishing ideas
and materials
Assembly Instructions
Foundation
Parts you will need in this section:
Foundation Long (2)
1st Floor
Foundation Middle Brace (4)
Exterior Shell
Parts you will need in this section:
Exterior Right Side Wall
Right Front Wall
Filler Strip Access Panel
Exterior Left Side Wall A & B
Large Gable Front Wall
1st Level Entrance Wall
Filler Strip Arch (2)
1st Level Interior Wall Arches
Entrance Front Wall
2nd Floor
GENERAL INSTRUCTIONS
• Identify and inspect all parts using the Parts List and Parts Diagram.
• Read the directions completely before beginning the project.
• If possible, it is most ideal to have a dedicated work area so that you are
not unpacking, repacking, and moving the project from place to place.
• Choose a work surface that is level, flat, clean, dry, and protected
from spills.
• Do a dry fit, using masking tape to hold parts in place, to make sure
everything fits together correctly before permanent assembly.
Tip: Plan the finishes for the interior and exterior at the dry-fit stage,
before final/permanent assembly. It is easier to finish the panels as flat
surfaces. Disassemble and finish as desired, then reassemble using glue.
1. Glue and tape house foundation
perimeter. The ends of the Foundation
Middle Braces / A02 insert into the grooves
in the Foundation Long / A01 pieces.
1. Glue and insert the Exterior Right
Side Wall / A33 and the Right Front
Wall / A37 into the 1st Floor / A16
grooves. Tape together and allow to
dry. An extra pair of hands would be
helpful at this step.
2. Glue, tape, and weight the 1st Floor
/ A16 to the foundation. Allow to dry
before moving on to the next step.
2. Glue and tape the 1st Level
Entrance Wall / A32 to the
Right Front Wall / A37 and
into the shortest groove on
the 1st Floor / A16.
©2022 miniatures.com | 1-800-926-6464 | support@miniatures.com | 1
3. Glue and tape in the
Entrance Front Wall / A36
in groove on 1st Floor / A16.
Advertisement

Related Manuals for Miniatures The Brentwood 41045


Summary of Contents for Miniatures The Brentwood 41045
- Page 1 1st Floor / A16. grooves. Tape together and allow to into the shortest groove on the 1st Floor / A16. dry. An extra pair of hands would be helpful at this step. ©2022 miniatures.com | 1-800-926-6464 | support@miniatures.com | 1...
- Page 2 Note: If you install this wall permanently then be sure to make Access Panel Front / A40 openable so you can maintain access to the room at the front left of the house. 2 | ©2022 miniatures.com | 1-800-926-6464 | support@miniatures.com...
- Page 3 / A20 into the holes on each exterior It will fit either way, but the roof upwards. side wall. Overlap the indented ends with the Back Roof / A18. Allow to dry. looks cleaner with the angle slanted downwards. ©2022 miniatures.com | 1-800-926-6464 | support@miniatures.com | 3...
-
Page 4: Front View
Foundation Floor Extension Front Step Tread line up with the right side of Foundation Porch Extension the house foundation and Front Step Base where the entrance meets the Large Right Gable / A08. 4 | ©2022 miniatures.com | 1-800-926-6464 | support@miniatures.com... -
Page 5: Access Panel
A42 in place. Both line up with the A14. The smaller goes on first Hinges that are on the Access Panel Side / A41. main house floors, extending out. and the larger goes on top. ©2022 miniatures.com | 1-800-926-6464 | support@miniatures.com | 5... - Page 6 6. The treads without holes go on all the other steps. Treads overhang slightly over the left side (same side as railing). Place the treads with holes so that the holes are closest to the step edge. 6 | ©2022 miniatures.com | 1-800-926-6464 | support@miniatures.com...
- Page 7 2. Glue the doors into the wall openings. Use the Double Interior Door included trim to mirror the frame on the back side of the wall. 3. Finish doors with hardware of your choice (not included). Assembly is now complete. ©2022 miniatures.com | 1-800-926-6464 | support@miniatures.com | 7...
-
Page 8: Part List
Front - 8 x 10 x 3rd Level Closet Roof - 8 x 4 x 9 x Right Wall with Archway 3rd Level Interior Long x 11 Left Wall - 3 x 11 8 | ©2022 miniatures.com | 1-800-926-6464 | support@miniatures.com... -
Page 9: Parts Diagram
Exterior Left Side Large Gable Front Wall A / A34 Wall / A35 3rd Floor / A39 Dormer Roof / A43 Access Panel Front Entance Front Right Front Wall Wall / A36 ©2022 miniatures.com | 1-800-926-6464 | support@miniatures.com | 9... - Page 10 Foundation Spacer / A05 Front Step Base / A06 Foundation Porch Extension / A03 Foundation Floor Extension / A11 Front Step Foundation Access Panel / A04 Tread / A12 Foundation Long / A01 10 | ©2022 miniatures.com | 1-800-926-6464 | support@miniatures.com...
- Page 11 Wall / A51 Stair Railing 3rd Level Short / A55 Steps / A53 Stair Railing Stair Railing 3rd Level Long / A54 Stair Interior Left Wall / A50 Stair Railing 2nd Level / A90 ©2022 miniatures.com | 1-800-926-6464 | support@miniatures.com | 11...
- Page 12 We hope you enjoy your Brentwood Dollhouse kit! For finishing tips and more information, visit miniatures.com and Paper Doll Miniatures. We would love to see how yours turns out; please send pictures to support@miniatures.com. Questions? Contact us at support@minatures.com or call 1-800-926-6464 (Mon-Fri 10:00 AM-5:00 PM ET).
Need help?
Do you have a question about the The Brentwood 41045 and is the answer not in the manual?
Questions and answers
Where can I buy A05 foundation spacer for the Brentwood house #41045?