Advertisement
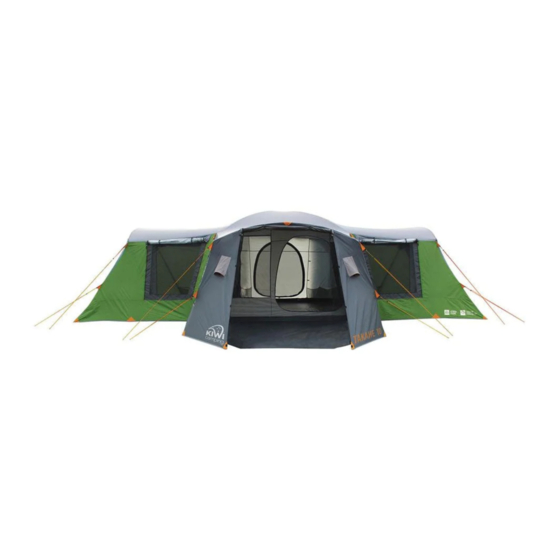
Takahe 10 Family Tent
Model No. KC072-118
PITCHING INSTRUCTIONS
Your tent includes:
60 x pegs
23 x ropes
2 x BLACK fibreglass poles (3355mm x 11mm)
7 x GREY fibreglass poles (2230mm x 11mm)
10 x black STEEL frame poles (1770mm x 19mm)
4 x black PORCH poles (1900mm x 16mm)
1. Select a dry, level site and clear
the ground of any sharp objects.
Remove the tent from its carry
bag, untie fabric ties and unroll the
tent.
2. Spread out the floor of the inner
tent and peg out the four main
corners first, then peg out the
four corners of the middle room.
Ensure that the tent is pulled taut
and square. Unzip and open the
doors to make erecting the tent
easier. Pitch the inner so it is in
line with the wind, never side on.
3. One at a time, feed the two BLACK
fibreglass poles through the pole
sleeves with black trim to create an
'X' over the main room and fit ends
into the centre opening of the star
shaped knuckles.
Filename: 3733_KC072-118_Takahe-10_Instr.pdf
Dimensions: 400mm W x 200mm H
Colour: Black
4. Assemble the seven short GREY fibreglass poles by
interlocking the sections together. Take two GREY poles, one
at a time, slide the poles through the pole sleeves, with GREY
trim, that run across the roof of the inner (over the bedrooms).
The remaining four grey poles form the square of the main
room, attach them to the outside openings of the star shaped
corner knuckles. Attach the speed-clips to the corresponding
poles.
5. Assemble the ten STEEL poles.
Take eight poles and beginning
at the middle room, insert them
into the remaining openings of the
star shaped knuckles at the top of
the inner. Fit the bottom of each
pole on to the corresponding pin
at the base of the inner so that the
middle room now stands. This will
take 2 people to assemble.
6. Attach the speed-clips onto the corresponding poles. Peg out
the remaining peg points on the inner tent. The inner tent is
now pitched. You should have 1 GREY pole and 2 steel poles
left for the sunroom.
Steel Poles
To make sure the tent
stays in place, insert the
pegs into the ground at
a 45° angle.
7. Carefully pull the fly over the inner making sure the windows
and doors line up. Clip the fly to the inner at the base of the
Grey
middle room with the 4 side release buckles. Align all rubbing
Poles
strips over the knuckles and attach the ties, then wrap the
remaining Velcro ties on the underside of the fly around the
corresponding fibreglass poles, this will centralize the fly and
help the tent to perform better in the wind. Peg out the rear
corners of the fly to keep it in place.
Black
8. Going to the front room, slide the remaining GREY pole through
Poles
the GREY sleeve and insert it into the knuckles.
Fit the remaining 2 black STEEL poles into the knuckles, pins
and rings. Go to the front of the tent and peg out the front corners
keeping the floor square.
9. Proceed to peg out the remaining pegging points on the fly
ensuring there is an adequate gap between the inner and the fly.
10. Finally, rope out the guy ropes and fine tune the fly so it remains
taut and positioned correctly over the tent.
The end of the steel pole with
11. When pegging out the black PORCH poles, make sure the ropes
the small hole should be at the
are at a 45° angle to pull the flap evenly. In light rain you can
bottom.
remove the middle section to allow any water build up to run off. In
heavy rain you may have to pull the flap down to stop water build
up.
REVERSE THE PROCEDURE TO LOWER THE TENT
PACKING INSTRUCTIONS
Pack the poles and pegs into their bags, place into their separate
frame bag. Evenly layout the fly inside the tent inner (this is best
done when the inner is still pitched) leaving all doors and windows
open. Fold the inner tent floor from each end to the centre and fold
the front room over the inner from front to back. Fold again to the
width of the tent bag. Roll from front to back, forcing all of the air
out the back door. Roll into the tent bag provided.
Advertisement
Table of Contents

Summary of Contents for Kiwi Camping Takane 10
- Page 1 4. Assemble the seven short GREY fibreglass poles by Takahe 10 Family Tent interlocking the sections together. Take two GREY poles, one at a time, slide the poles through the pole sleeves, with GREY Model No. KC072-118 trim, that run across the roof of the inner (over the bedrooms). PITCHING INSTRUCTIONS The remaining four grey poles form the square of the main room, attach them to the outside openings of the star shaped...
- Page 2 5. Keep all flame and heat sources away from this tent fabric. Do not use open flame or gas appliances in or near your tent. details are on the Kiwi Camping website - www.kiwicamping.co.nz. Key points: 6. Do not use aerosol sprays or any solvent based products in or...


Need help?
Do you have a question about the Takane 10 and is the answer not in the manual?
Questions and answers