Table of Contents
Advertisement
Quick Links
Advertisement
Chapters
Table of Contents

Related Manuals for German pool PAC-CH416-SC


Summary of Contents for German pool PAC-CH416-SC
- Page 1 WiFi Smart Portable Air Conditioner 360° Multi-Oscillation Fan PAC-CH416-SC RHS-126 Online Warranty Registration Please read these instructions and warranty information carefully before use and keep them handy for future reference. U S E R M A N U A L...
- Page 2 請即進行保用登記! 有關保用條款細則,請看說明書最後一頁。 Please register your warranty information now ! For Warranty Terms & Conditions, please refer to the last page of this user manual.
-
Page 3: Table Of Contents
Table of Contents Warnings & Safety Precautions Product Structure Installation Instructions Operation Instructions Cleaning & Maintenance Troubleshooting Technical Specification Warranty Terms & Conditions... -
Page 4: Warnings & Safety Precautions
Unplug this product from the power source before cleaning and maintenance. • Contact German Pool authorized service technician for repair or maintenance of this product. WARNING! This product uses a flammable refrigerant. If refrigerant leaks and comes in contact with fire or heating part, it will create harmful gas and there is risk of fire. - Page 5 Warnings & Safety Precautions If propane gas is present or even suspected, do not allow untrained personnel to attempt to find the cause. The propane gas used in this product has no odor. The lack of smell does not indicate a lack of escaped gas.
- Page 6 Warnings & Safety Precautions 21. This product shall be stored in a room without continuously operation sources (for example: open flames, an operating gas appliance or an operating electric heater). 22. This product shall be stored so as to prevent mechanical damage from occurring. 23.
- Page 7 Warnings & Safety Precautions including cigarette smoking, should be kept sufficiently far away from the site of installation, repairing, removing and disposal, during which flammable refrigerant can possibly be released to the surrounding space. Prior to work taking place, the area around the equipment is to be surveyed to make sure that there are no flammable hazards or ignition risks.
-
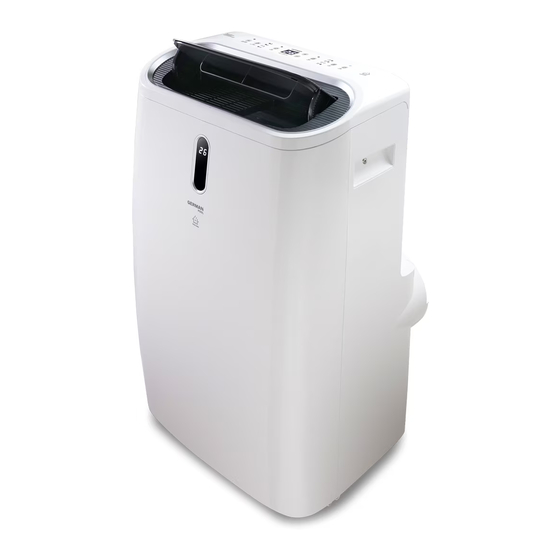
Page 8: Product Structure
Product Structure Control Panel 10. Condensation Drain Port Air Outlet & Louvre 11. Drainage Hose LED Display 12. Remote Control Casters 13. Exhaust Hose Connector Handle 14. Exhaust Hose Air Inlet & Filter 15. Exhaust Hose Adaptor Exhaust Hose Fastener 16. -
Page 9: Installation Instructions
Installation Instructions WARNING! • DO NOT install this product in a room smaller than 13m • DO NOT install this product in a place where inflammable gas may leak. • Excessive Weight Hazard: It is recommended to have 2 or more persons to move and install this product. - Page 10 Installation Instructions A. Remove Packing Materials Remove all packing materials before using product for the first time. It is recommended to save the carton box and styrofoam packing for storing the product when not in use. Note: • The are NO packing materials inside the product to remove. DO NOT disassemble the product body.
- Page 11 Installation Instructions D. Install Window Adaptor Kit Note: • Window adaptor kit is designed to accommodate either a vertical slide or horizontal slide window. • If the window opening is shorter than the minimum length of the window adaptor kit, cut the end without the hole until it is short enough to fit in the window opening.
- Page 12 Installation Instructions Slide the extension panel between the main panel and the screw’s 2.5mm gap and adjust the length needed to cover the window opening. Screw the butterfly nut tight to secure the adaptor kit. E. Connect Exhaust Hose To Window Adaptor Kit Close the window till it fits snugly against the window adaptor kit.
- Page 13 Installation Instructions To Use The Air Vent Flap Aside from the Window Adaptor Kit, exhaust air from the product can be vented outdoors by means of the Air Vent Flap. Separate the Air Vent Adaptor from the Air Vent Flap. Air Vent Flap Air Vent Adaptor Bore a hole on the window/wall according to the size of the round end of the Air Vent Flap.
-
Page 14: Operation Instructions
Operation Instructions Control Panel Icon Description Icon Description Icon Description On/Off Key Mode Key Sleep Key Increase Key Decrease Key Swing Key High Fan Speed Fan Speed Key Timer / WiFi Key Indicator Light Medium Fan Speed Low Fan Speed Cool Mode Indicator Indicator Light Indicator Light... - Page 15 Operation Instructions Mode Selection When product is turned on, tap Mode Key to cycle among Cool Mode, Dry Mode, Fan Mode and Heat Mode, the corresponding indicator light will light up constant. After selecting your desired mode, tap Increase Key /Decrease Key to adjust temperature, and tap Fan Speed Key...
- Page 16 Operation Instructions Off-Timer To Set Off-Timer (time for product to automatically turn off): Turn on the product, tap Timer / WiFi Key to enter Timer Settings. Timer Indicator Light lights up constant. Tap Increase Key /Decrease Key to set on-timer from 1-24 hr. LED Display blinks timer duration.
- Page 17 Operation Instructions Remote Control Note: • Before using the remote control, place in 2 AAA batteries. DO NOT use rechargeable batteries. • When changing batteries, both batteries must be replaced together. DO NOT mix new and old batteries. • If product will not be used for an extended period of time, remove batteries from the remote control and store batteries in a safe place.
- Page 18 Operation Instructions WARNING! • If the remote control’s battery fluid leaks onto skin or clothes, immediately rinse with large amount of water; DO NOT use remote control if battery is leaking. • If battery fluid is swallowed, gargle and seek medical attention immediately. The chemicals in battery fluid can cause burning or other bodily harm.
- Page 19 Operation Instructions Manual Drainage Turn off the product and unplug product from the socket. Place a tray or container (not included with product) under the Condensation Drain Port located at the bottom of the product’s backside. Unplug the Condensation Drain Port plug to let the water run out. User may tilt the product slightly to speed up drainage.
- Page 20 5.0 GHz. A. How To Set Up The APP 1. Connect your phone to 2.4 GHz WiFi then scan the QR Code below, or search “German Pool Smart Control”in App Store or Google Play to download and install the APP.
- Page 21 Operation Instructions C. Register Your Account 1. Open the APP,click “Agree” 2. Click “Sign Up” to register 3. Enter your email address, tick on “User Agreement and your account. “I agree Privacy Policy and Privacy Policy”. User Agreement”, then click “Get Verification Code”.
- Page 22 Operation Instructions D. Pairing Sequence Method 1: Auto Pairing 1. Long-press the product’s 2. Click “+” on the upper right 3. Before pairing, user must Timer/WiFi Button for 5 corner of the APP homepage, allow the App to access your seconds until buzzer beeps then click “Add Device”.
- Page 23 Operation Instructions WiFi Smart Portable Air Conditioner 10. Tap “Allow While Using App” 11. Select WiFi name and enter 12. APP will show ”Being (if Location is already on, ignore your WiFi password, then Added”, the product and APP this step). click “Next”.
- Page 24 Operation Instructions Method 2: Bluetooth Pairing 1. Click “+” on the upper right 2. In the “Add Manually “ 3. Follow the instructions on the corner of the APP homepage, column, find the product APP to pair. then click “Add Device”. model that needs to be paired, and click the product to pair.
- Page 25 Operation Instructions E. Sharing Control WiFi Smart Portable Air Conditioner 1. On the product’s homepage, 2. Click “Share Device” under 3. Click “Add Sharing”. click “ ” on the upper “Others”. right corner. WiFi Smart Portable Air Conditioner WiFi Smart Portable Air Conditioner has been shared with 4.
- Page 26 Operation Instructions Controlling The Product With The APP Settings Key WiFi Smart Portable Air Conditioner Target Temperature Target Temperature Decrease Key Increase Key Target Temperature Current Temperature Display Display On/Off Fan Speed Key Mode Key Menu Key Description On/Off • Tap this key to turn on the product.
- Page 27 Operation Instructions Timer Function Select Timer Function to enter into Timer Function page. Tap “Add” to enter Timer Setting page (Pic 1). In Timer Setting page, user can set the following parameters (Pic 2): a. Select time. b. “Repeat” section: Select whether you wish to repeat this timer (select day/s of the week; when Timer is turned on, the Portable Air Conditioner will run according to the setting for that specific day of the week).
- Page 28 Operation Instructions Sleep Mode Tap Menu Key, then tap the switch on the right of "Sleep Mode" to turn Sleep Mode on and off. Green indicates Sleep Mode is on, grey indicates Sleep Mode is off (Pic 4). Sleep Mode cannot be activated when product is running in Dry Mode or Fan Mode. In Sleep Mode, product runs in Low Fan Speed, fan speed is not adjustable;...
-
Page 29: Cleaning & Maintenance
Cleaning & Maintenance WARNING! Turn off the product and unplug from the power socket before cleaning and maintenance. Surface Cleaning • Unplug the product from the power source before cleaning. • Wipe product surface with a soft moist cloth. DO NOT use alcohol, gasoline or other chemical solvents to avoid damaging this product. -
Page 30: Troubleshooting
DO NOT disassemble or repair this product on your own. Improper repair will cause the warranty to become voided, and may lead to personal injury and property damage. • If problem persists or for problems not listed in the table above, please contact German Pool Customer Service & Repair Centre for assistance. P.30... -
Page 31: Technical Specification
Technical Specification Model PAC-CH416-SC Voltage / Frequency 220-240V ~ 50 Hz Power 1,712 W Cooling Capacity (BTU) 16,000 BTU Heating Capacity (BTU) 11,200 BTU Maximum Allowable Pressure (Low Pressure) 0.7 MPa Maximum Allowable Pressure (High Pressure) 3.2 MPa Dehumidification Capacity... - Page 32 請即進行保用登記! 有關保用條款細則,請看說明書最後一頁。 Please register your warranty information now ! For Warranty Terms & Conditions, please refer to the last page of this user manual. P.32...
- Page 33 目錄 警告及注意事項 產品結構 安裝說明 使用說明 清潔及保養 故障檢修 技術規格 保用條款 P.33...
-
Page 34: 警告及注意事項
警告及注意事項 警告! 使用本產品前,請仔細閱讀所有說明。 • 本產品只限家居室內日常使用,如產品作任何商業、工業、出租或其他用途,保用證即告失 效。 • 請勿讓兒童或身體有殘障、精神不健全及對本產品缺乏經驗或知識的人士單獨使用本產品;如 需使用,必須要在負責任的成年人監管下方可使用。 • 應照顧好兒童,確保他們不會玩耍本產品。 • 無成年人監管下,勿讓兒童清潔及維護本產品。 • 使用前,請先檢查所有電壓是否與本產品標籤上的電壓相符。 • 如果電源線損壞,為免發生意外,電源線必須由廠方、廠方指定的維修中心或同等合格的技術 人員進行更換。 • 清潔或檢查本產品前,必須先關機及拔掉插頭。 • 請聯繫德國寶授權的技術人員進行維修或保養本產品。 警告! 本產品使用易燃製冷劑。如果製冷劑洩漏並接觸到火源或加熱部分,就會產生有害氣體,並有發生 火災的危險。 本產品充滿易燃氣體R290。 在使用本產品之前,必須先閱讀說明書。 警告!火災危險 安裝本產品之前,必須先閱讀說明書安裝部份。 R290 如需維修,請聯繫德國寶客戶服務及維修中心,並嚴 格按照製造商的說明進行操作。 為確保安全,必須嚴格遵守以下規定: 1. 本產品適用於8歲以上的兒童,以及身體、感官或智力能力下降或缺乏經驗和知識的人,如果 他們得到了有關安全使用本產品的監督或指導,並了解所涉及的危險。兒童不得接觸本產品。 未經監督,兒童不得進行清潔和用戶維護。 2. 本產品僅用於使用R-290(丙烷)氣體作為指定製冷劑。 3. 製冷劑迴路已密封。只有合格的專業技術人員方可進行維修。 4. 嚴禁將製冷劑排放到大氣中。... - Page 35 警告及注意事項 1. R290(丙烷)會首先於低處積聚,但可能經由風扇散播。 2. 如懷疑R290(丙烷)洩漏,嚴禁非專業人員試圖查找原因。 3. 本產品使用的R290(丙烷)無氣味,然而沒有氣味並不代表無漏氣。 4. 如檢測到洩漏,必須立即疏散所有人,使房間通風,並聯絡所在地的消防部門,告知他們發生 R290(丙烷)洩漏。 5. 在合格的專業技術人員到達,並且由專業技術人員告知可安全返回房間之前,嚴禁讓任何人返 回房間。 6. 嚴禁在本產品內部或附近使用明火、香煙或其他可能的火源。 7. 本產品的零部件專為丙烷設計,無刺激性、無火花。所有零部件只能用相同的維修零件更換。 8. 本產品的遙控器包含電池。如果電池被吞下,可能在2小時內造成嚴重的內部燒傷,並可能導 致死亡。新電池和舊電池應遠離兒童。如果電池蓋不能安全關閉,請停止使用遙控器,並將其 遠離兒童。如果您認為電池可能被吞食或放置在身體任何部位,請立即就醫。電池含有對環境 有害的材料;在報廢前,必須將其從設備中取出,並進行安全處理。 9. 不遵守以上警告可能會導致爆炸、死亡、受傷和財產損失。 為降低火災、觸電、人身傷害或財產傷害的風險,必須嚴格遵守以下規定: 1. 如電源線損壞,必須由製造商、其服務代理或具有類似資格的人員更換,以避免發生危險。 2. 維修期間必須斷開本產品與電源的連接。 3. 必須使用產品銘牌上指示的相同電壓、頻率和額定值的電源來操作本產品。 4. 必須使用接地的電源插座。 5. 清潔或不使用本產品時必須拔除電源線。 6. 嚴禁濕手操作本產品,必須防止水濺到本產品上。 7. 嚴禁將本產品浸入或暴露在雨水、濕氣或任何其他液體中。 8. 嚴禁讓本產品在無人看管的情況下運行,嚴禁傾斜或翻轉本產品。 9. 嚴禁在本產品運行期間拔出插頭。...
- Page 36 警告及注意事項 1. 本產品必須存放在沒有連續運行熱源(例如明火、運行中的燃氣器具或運行中的電加熱器)的 房間內。 2. 儲存本產品時,必須防止發生機械損壞。 3. 即使廢棄,嚴禁刺穿或燃燒本產品。 4. 必須注意,製冷劑可能沒有氣味。 5. 必須保護管道免受損壞,嚴禁將本產品安裝在面積小於13m 且不通風的房間內。 6. 必須遵守所在地區的燃氣法規。 7. 必須保持所有必要的通風口暢通無阻。 8. 本產品必須放置在通風良好的地方,房間大小應與本產品適用的房間面積相符。 警告! • 任何涉及製冷劑迴路工作的人員,都必須持有行業認可的評估機構頒發的有效證書,該證書授 權他們有能力根據行業認可的評估規範安全處理製冷劑。 • 必須按照本產品製造商的建議進行維修。維護和修理必須在有能力使用易燃製冷劑的人員的監 督下進行。 在維修帶有R290的設備時,必須嚴格遵守以下規定: 1. 操作及維修前檢查 在操作含易燃製冷劑的系統之前,必須進行安全檢查以確保將點燃的風險降至最低。如需維修 製冷系統,必須遵守下列預防措施。 2. 工作程序 工作必須在受控程序下進行,以最大限度地降低工作進行時存在易燃氣體或蒸汽的風險。 3. 工作區域 所有維修人員和其他工作人員必須了解所開展工作的性質,必須避免在密閉空間內工作,工作 空間周圍的區域應被分隔開。通過控制易燃材料確保該區域安全。 4. 檢查是否存在製冷劑 在工作前和工作期間,必須使用適當的製冷劑檢測器檢查該工作區域,以確保技術人員了解潛...
- Page 37 警告及注意事項 7. 通風區 在拆開系統或進行任何熱加工之前,必須確保工作範圍處於露天狀態或通風良好。在進行工作 期間,必須保持一定程度的通風。通風環境必須足夠安全地驅散任何釋放的製冷劑,最好能將 製冷劑直接在室外排放到大氣中。 8. 對製冷設備的檢查 當更換電氣元件時,元件必須適合用途並符合正確的規格。必須時刻遵守製造商的維護和維修 指引。如有疑問,請諮詢製造商的技術部門尋求幫助。 安裝使用易燃製冷劑的裝置時,必須進行以下檢查: • 充注量根據安裝含製冷劑部件的房間大小而定; • 通風機械和出風口運行正常,沒有阻塞; • 如果使用間接製冷迴路,則應檢查二次迴路是否存在製冷劑; • 設備上的標記仍然清晰可見。難以辨認的標記和符號應予以更正; • 製冷管或部件安裝在不太可能暴露於任何可能腐蝕含有製冷劑的部件的物質的位置,除非 部件由本身俱有抗腐蝕能力或適當保護以防被腐蝕的材料製成。 9. 電氣設備檢查 進行電氣元件的維修和保養前必須先做好事前安全檢查和元件檢查程序。如果存在可能危及安 全的故障,則必須先圓滿排除故障後,才可以將電源連接到電路。如果故障不能立即排除,但 又需要繼續運行,則必須採用適當的臨時解決方案。而此情況必須報告給設備的所有者,以便 通知所有有關人士。 事前安全檢查須包括: • 有關的電容器已放電:必須以安全的方式進行,以避免產生火花的可能性; • 在對系統進行充電、恢復或淨化時,沒有帶電的電氣元件和接線暴露在外; • 有關系統需持續接地。 正確處置本產品 此標誌表明該產品不應與其他生活垃圾一起處理。為防止不受控制的廢物處理對環 境或人類健康可能造成的危害,請負責任地回收本產品以促進材料資源的可持續再 利用。要退回您用過的設備,請聯繫購買本產品的零售商,他們可將本產品用於對 環境安全的回收。 P.37...
-
Page 38: 產品結構
產品結構 1. 控制面板 10. 排水口 2. 出風口及導風板 11. 排水管 3. LED顯示屏 12. 搖控器 4. 滾輪 13. 排氣管接頭 5. 提手 14. 排氣管 6. 進風口及過濾網 15. 排氣管外接頭 7. 排氣管接頭固定糟 16. 窗戶密封板組件 8. 連續排水孔 17. 窗戶密封板組件螺絲 9. 進風口 18. 窗隔裝置/密封蓋組件 P.38... -
Page 39: 安裝說明
安裝說明 警告! • 嚴禁將產品安裝在少於13m 的房間內。 • 嚴禁將本產品安裝在可能有易燃氣體洩漏的地方。 • 超重危險:建議由兩個或以上的人協助移動和安裝本產品。否則有機會導致背部或其他傷害。 • 搬運或移動本產品時必須握住機身的手柄,並確保本產品時刻處於直立位置。 • 嚴禁握住本產品出風口導風板進行移動。 • 在搬運或移動本產品前,必須將本產品中的水徹底排乾,以防止漏水弄濕地板或地毯。 安裝前注意事項 1. 本產品必須放置在堅固的平面上,以儘量減少噪音和振動。為了安全和牢固放置,請將本產品 放置在足夠堅固的平穩水平地板上以支撐本機。 2. 本產品配備滾輪用以方便移動,但只能在平滑的平面上滾動。在地毯上滾動時要小心,在木地 板上滾動時要小心並保護地板;嚴禁讓本產品滾過任何物體。 3. 本產品必須放置在能夠連接到適當的額定接地插座的地方。 警告! 觸電危險:必須使用接地的三孔插座;嚴禁透過拉扯電源線從插座上拔下插頭;嚴禁使用萬能蘇; 嚴禁使用拖板;否則可能導致死亡、火災或觸電。 4. 嚴禁在本產品的進風口和出風口周圍放置任何物品。嚴禁靠近牆壁、窗簾或其他可能阻擋進出 風口的物體,使用本產品時必須保持進風口和出風口暢通無阻。建議周圍至少留有50cm的自由 空間,以確保足夠空氣流通。 5. 排氣管可以拉長,但長度建議保持在所需的最短長度。必須確保排氣管沒有任何急轉彎或凹 陷。 6. 跟機附送的窗戶密封板組件適用於大多數標準垂直滑動或水平滑動的窗戶,但是,對於其他窗 戶類型,可能需要修改安裝程序。 7. 如產品運送時傾斜超過45° ,在安裝及啟動前必須將本產品直立擺放至少24小時。 8. 嚴禁將本產品安裝在下列地方或附近使用:... - Page 40 安裝說明 注意: • 本產品主機內沒有包裝材料可以拆除,嚴禁拆開機身。 • 妥善處理及回收所有包裝材料。 • 必須輕拿輕放,並保持本產品直立和水平。嚴禁將本產品側放或倒置。 B. 組裝排氣管 1. 握住排氣管的兩端,輕輕拉長排氣管。 2. 將排氣管開口端對準排氣管接頭,順時針旋轉至扣緊。 3. 將排氣管另一開口端對準排氣管外接頭,順時針旋轉至扣緊。 注意: 嚴禁連接額外的軟管來延長排氣管長度,避免降低本產品製冷效率,並有可能損壞本產品。 C. 連接排氣管至機身 1. 將排氣管接頭對準機身背面的排氣管接頭固定槽。 2. 將排氣管接頭向下插入至扣緊,即成。 D. 安裝窗戶密封板組件 注意: • 窗戶密封板組件適用於垂直滑動或水平滑動的窗戶。 • 如窗戶開口小於窗戶密封板元件的最小長度,請切掉窗戶密封板組件無孔側的末端,使其足夠 短以適合窗戶開口。嚴禁切掉窗戶密封板組件中的孔。 1. 按窗戶開口的大小,使用主面板及擴展面板。 2. 打開窗戶,將主面板放入窗戶開口中。 水平滑動窗戶 垂直滑動窗戶 P.40...
- Page 41 安裝說明 3. 使用跟機附送的螺絲,按下圖方法拆開螺絲。 4. 將螺絲扣在主面板上,擰緊螺絲並預留約2.5mm間距的空隙。 5. 將擴展面板卡入主面板與螺絲之間的空隙,將面板調整成窗口的寬度或高度。 6. 擰緊螺絲以固定窗戶密封板組件。 E. 連接排氣管至窗戶 1. 將窗戶關閉到與窗戶密封板組件緊貼,完全覆蓋窗戶開口。如有需要,可用膠帶將窗戶密封板 組件固定。 2. 將排氣管外接頭對準窗戶密封板組件上的卡槽,扣緊完成安裝。 注意: • 連接排氣管時,本產品必須離窗戶足夠近;連接完成後,將本產品移離牆壁20英寸(約50厘 米),並與周圍的物件保持至少20英寸(約50厘米)距離。 • 嚴禁將排氣管彎曲至超過45° ,以保持排氣管良好通風。 • 使用前必須確保排氣管已安裝在正確位置及安裝穩妥。 P.41...
- Page 42 安裝說明 使用窗隔裝置/密封蓋組件 除窗戶密封板組件之外,亦可使用窗隔裝置/密封蓋組件開孔安裝,以進行排氣。 1. 握住窗隔裝置/密封蓋組件兩端,向外拉拆開成兩個部件。 密封蓋組件 窗隔裝置 2. 按照密封蓋組件圓形一端的尺寸在窗戶或牆壁開孔。 3. 將密封蓋組件從窗戶或牆壁內向室外安裝(安裝後密封蓋組件圓形一端在室外,密封蓋在室 內),注意檢查是否安裝穩固。 4. 將排氣管安裝在窗隔裝置帶螺紋的一端,排氣管的另一端安裝至機身。 5. 使用時,打開密封蓋,然後將窗隔裝置插入密封蓋組件即可。 牆壁/窗戶 密封蓋組件 窗隔裝置 排氣管 室內 室外 警告! 安裝窗隔裝置/密封蓋組件時,必須確保安裝穩固而不會鬆脫,以免造成危險。 P.42...
-
Page 43: 使用說明
使用說明 控制面板 圖標 說明 圖標 說明 圖標 說明 開關鍵 模式鍵 睡眠鍵 加鍵 減鍵 搖擺鍵 風速鍵 定時/網絡鍵 高風速指示燈 中風速指示燈 低風速指示燈 冷氣模式指示燈 除濕模式指示燈 吹風模式指示燈 暖風模式指示燈 WiFi指示燈 接通電源 1. 連接電源後,蜂鳴器發出提示聲一聲,控制面板全亮1秒後熄滅,電源鍵指示燈常亮,進入待 機模式。 2. 按「開關鍵 」開機,首次開機預設以吹風模式運行。 3. 使用完畢後,按「開關鍵 」關機(返回待機狀態,不會斷開本產品與電源的連接)。 注意: 本產品設有記憶功能,按「開關鍵 」關機後再重新開機,或斷開電源(拔除電源插頭)後再重 新開機,將以上一次關機前的設置繼續運行。 選擇模式 1. 開機後按「模式鍵 」循環選擇冷風模式、除濕模式、吹風模式、暖風模式,相應指示燈常... - Page 44 使用說明 模式 溫度 風速 顯示屏 冷風模式 可調高、中、低風速 顯示設定溫度 可調16ºC-32ºC不 除濕模式 預設低風速,不可調 顯示當前室溫 不可調 吹風模式 可調高、中、低風速 顯示當前室溫 不可調 暖風模式 可調高、中、低風速 顯示設定溫度 可調16ºC-32ºC 注意: • 使用冷風模式時如設置溫度高於當前室溫,或使用暖風模式時如設置溫度低於當前室溫,產品 將不運作。 • 切換不同模式時,壓縮機將有大約15-30秒延遲啟動或關閉。 睡眠模式 1. 在冷風模式或暖風模式下,按「睡眠鍵 」進入睡眠模式,所有指示燈變暗。 2. 在睡眠模式下,預設以低風速運行,風速不可調;溫度可調16ºC-32ºC,顯示屏顯示設定溫度。 注意: • 在冷風模式下開啟睡眠模式,預設溫度將每小時提高1ºC(總共只提升2ºC),然後自動恆溫; 在暖風模式下開啟睡眠模式,預設溫度將每小時降低1ºC(總共只降低2ºC),然後自動恆溫, 以達至節能省電效果。 • 在除濕模式及吹風模式下,無法使用睡眠模式。 • 如在睡眠模式下,按「模式鍵...
- Page 45 使用說明 遙控器 注意: • 使用前請先插入兩節AAA電池;嚴禁使用充電電池。 • 更換電池時,必須同時更換2節電池,嚴禁混用新舊電池。 • 如長時間不使用本產品,必須取出遙控器的電池並妥善存放。 開關鍵 冷風模式鍵 暖風模式鍵 除濕模式鍵 風速鍵 吹風模式鍵 搖擺鍵 加鍵/減鍵 睡眠模式鍵 溫度單位轉換鍵 定時鍵 警告! • 如遙控器電池液漏到皮膚或衣服上,必須盡快用大量清水沖洗;發現洩漏,嚴禁使用遙控器。 • 如吞下電池液,必須盡快漱口並就醫。電池中的化學物質可能會燃燒或造成其他健康危害。 按鍵 說明 開關鍵 接通電源後按鍵開機或關機(返回待機狀態) 暖風模式鍵 按鍵選擇暖風模式 風速鍵 按鍵選擇高、中、低風速 搖擺鍵 按鍵啟動或關閉搖擺功能 睡眠模式鍵 按鍵進入睡眠模式(只適用於冷風模式及暖風模式) 溫度單位轉換鍵 按鍵切換攝氏或華氏溫度顯示 冷風模式鍵 按鍵選擇冷風模式...
- Page 46 使用說明 手動排水 1. 將本產品關機並拔除電源插頭。 2. 將托盤或容器(自備)放在機身背面冷凝器排水口下。 3. 打開排水孔的膠塞,將冷凝水完全排出,可輕輕傾斜本產品以加速排水。 4. 將冷凝水排清後,塞上膠塞。 注意: • 移動本產品時必須小心以免漏水。 • 如果容器無法容納所有的水,請在裝滿前盡快堵住冷凝器排水口,以防止漏水弄濕地板或地 毯。 • 膠塞必須安裝牢固,以免產品重新開始工作時,新的冷凝水弄濕地板或地毯。 連續排水 1. 打開連續排水孔的膠塞,用附送的16mm內徑的排水管連接排水孔。 2. 用水桶盛著排水管流出的水。切勿將水管末端浸於水內,以免形成氣塞。 注意: • 建議避免在冷風模式時使用連續排水,以確保機內有足夠的水循環以增強系統冷卻效果。 • 建議在暖風模式及除濕模式下使用連續排水,避免頻繁手動排水。 • 避免讓排水管高於排水孔,並保持排水管筆直,無任何彎曲。 壓縮機延時保護功能 除第一次接通電源後,壓縮機可能立即啟動外,每次關機壓縮機停止運行後,產品進入3分鐘延時 再啟動保護,3分鐘內無法再啟動壓縮機。 P.46...
- Page 47 使用說明 使用WiFi連接本產品 本產品可透過德國寶智能控制應用程式「German Pool Smart Control」APP以智能手機操控。 注意: 必須使用頻率為2.4 GHz的WiFi進行連接,不適用於頻率為5.0 GHz的WiFi。 A.下載應用程式 連接頻率為2.4 GHz的WiFi後,掃描下方二維碼,或於蘋果IOS系統上的App Store或安卓Android系統 上的 Google Play搜尋「German Pool Smart Control」,下載並安裝APP。 蘋果IOS系統 安卓Android系統 App Store Google Play B.設置APP語言 蘋果IOS系統 1. 在手機的設定中搜尋 2. 點擊「偏好的語言」。 3. 在「建議的語言」一欄中選 「Smart Control」。 擇繁體中文或英文(注意 : 選擇「繁體中文(香港)」 APP將會顯示英文)。 安卓Android系統 預設為系統所使用的語言,如需更改APP語言,需在設置中更改系統語言。 P.47...
- Page 48 使用說明 C.註冊用戶資料 2. 點擊「註冊」註冊用戶資 3. 輸入電郵地址,剔選「我同 1. 打開APP,點擊「用戶協議 料。 意隱私致策與用戶協議」後 與隱私政策」上的「同意」 。 點擊「獲取驗證碼」。 4. 輸入電郵裡的驗證碼。 5. 設定您的登入密碼後點擊 「完成」,完成註冊。 P.48...
- Page 49 使用說明 D.配對本產品 方法1:自動配對 1. 長按移動空調上的「定時/ 3. 配對前必須先打開藍牙權 2. 點擊APP主頁右上角 「+」 , 網絡鍵」3秒,直至蜂鳴 限,點擊「打開藍牙」(如已 再點擊「添加設備」。 器發出提示聲1聲,WiFi指 打開,可忽略此步驟)。 示燈閃爍。 4. 點擊「去設定」(如已打 5. 點擊藍牙一欄以打開藍牙 6. APP顯示「正在搜索附近的 開,可忽略此步驟)。 權限(如已打開,可忽略此 設備…」。 步驟)。 WiFi Smart Portable Air Conditioner 8. 點擊產品名稱右方的 「+」 。 9. 配對時建議開啟位置權限, 7. 數秒後APP顯示「發現設 點擊「立即設置」(如已開 備…」,點擊「添加」。 啟,可忽略此步驟)。 P.49...
- Page 50 使用說明 WiFi Smart Portable Air Conditioner 10. 點擊「使用App時允許」 11. 輸入手機所連接的WiFi 12. APP顯示「正在添加」,產 (如已開啟,可忽略此步 名稱及密碼,點擊「下一 品與APP自動配對中。 驟)。 步」。 WiFi Smart Portable Air Conditioner 13. 配對完成後APP顯示「添加 成功」,按右上角「完成」 進入產品主界面。 警告! 如沒有開啟藍牙或沒有打開藍牙權限,將無法配對產品;注意,即使電話已開啟藍牙功能,並不代 表已打開「藍牙權限」。 注意: • 每次只可以一個帳戶進行配對,如由另一帳戶再次進行配對,先前已配對的帳號將失去本產品 的操作權。 • 已配對的帳戶可以分享本產品的操作權予其他帳戶,詳見「E.操作權分享」部份。 注意: 如無法搜索到本產品,或在配對期間APP顯示感嘆號符號,代表配對失敗,請使用下列的方法2進行 配對。 P.50...
- Page 51 使用說明 方法2:藍牙配對 2. 在「手動添加」一欄找到需 1. 點擊APP主頁右上角 「+」 , 3. 按照APP上的指示進行配 要配對的產品型號,點擊該 再點擊「添加設備」。 對。 產品進行配對。 WiFi Smart Portable Air Conditioner WiFi Smart Portable Air Conditioner 4. 點擊產品名稱右方的 「+」 。 5. 輸入手機所連接的WiFi名稱 6. 配對完成後APP顯示「添 及密碼,點擊 「下一步」 。 加成功…」,按右上角「完 成」進入產品主界面。 警告! 如沒有開啟藍牙或沒有打開藍牙權限,將無法配對產品;注意,即使電話已開啟藍牙功能,並不代 表已打開「藍牙權限」。 P.51...
- Page 52 使用說明 E.操作權分享 WiFi Smart Portable Air Conditioner 1. 在本產品操作主界面點擊右 2. 在「其他」一欄中點擊「共 3. 點擊下方「添加共用」。 上角「 」。 用設備」。 WiFi Smart Portable Air Conditioner WiFi Smart Portable Air Conditioner 已共享給 4. 在「分享給其他人」一欄 5. 輸入該帳戶的註冊電郵地 6. 重複步驟3-5添加更多其他 中可設定所需分享的人數, 址,再點擊右上角「完成」 帳戶。 再點擊「分享給 即可。 SmartControl賬號」。 注意: 在「共用設備」頁面裡,你可隨時添加或移除帳戶的操作權。 P.52...
- Page 53 使用說明 使用APP操作 設置鍵 WiFi Smart Portable Air Conditioner 目標溫度 目標溫度 減鍵 加鍵 目標溫度顯示 當前溫度顯示 模式鍵 風速鍵 選單鍵 開關鍵 按鍵 說明 • 按此鍵開機 開關鍵 • 再按1次關機 加/減鍵 • 按加鍵增加目標溫度1° C;按減鍵減少目標溫度1° C • 冷風模式及暖風模式可調節範圍為16-32° C • 在除濕模式及吹風模式下無法調校溫度 模式鍵 • 按此鍵後,可選擇「冷風模式」 、「除濕模式」 、「吹風模式」、 「暖風模式」...
- Page 54 使用說明 定時功能 1. 選擇「定時功能」後,進入定時功能介面,按「Add」進入定時設置界面(圖1)。 2. 在定時設置界面裡可設置以下內容(圖2): a.選擇所需時間。 b.「重複Repeat」欄位:選擇是否需要重複此定時(可選星期一至日,開啟此功能後,移動 空調將在所選日子按此設置運行)。 c.「備註Note」欄位:可輸入筆記提示。 d.「電源Power」欄位:將本定時設置定時開機或定時關機。 e.設置完成後,按右上方的「保存Save」確認設置。 3. 完成後返回定時功能介面。如需設置更多定時功能,可按底部的「添加定時Add Schedule」 (圖3)。 Power:On 圖1 圖2 圖3 P.54...
- Page 55 使用說明 睡眠模式 1. 按選單鍵後,再按「睡眠模式」右側的按鈕,綠色代表開啟睡眠模式,灰色代表關閉睡眠模式 (圖4)。 2. 在除濕模式及吹風模式下,無法使用睡眠模式。 3. 在睡眠模式下,預設以低風速運行,風速不可調;溫度可調16ºC-32ºC(圖5)。 調校溫度單位 按選單鍵後,再按「溫度單位」右側的按鈕,可選擇「攝氏ºC」或「華氏ºF」顯示溫度(圖6)。 WiFi Smart Portable Air Conditioner 圖4 圖5 圖6 P.55...
-
Page 56: 清潔及保養
清潔及保養 警告! 在維修或保養前,必須先關機並拔除電源插頭。 清潔產品表面 • 清潔前必須拔除電源插頭。 • 用濕軟布清潔本產品表面,嚴禁使用酒精和汽油等化學溶劑,以免損壞本產品。清潔本產品時 嚴禁使用任何稀釋劑、酒精或其他類似溶劑。 • 用濕軟布和中性清潔劑清潔出風口。嚴禁使用任何化學溶劑清洗機身組件或在本產品附近長期 放置此類物品。 清潔過濾網 • 建議每兩星期清潔一次過濾網,否則過濾網被灰塵堵塞會影響本產品性能。 • 拆出過濾網,將過濾網浸入混有中性清潔劑的溫水(約40℃)中輕輕清洗,然後置於 陰 涼處晾 乾。 注意: • 拉出過濾網時必須小心,避免扭曲或損壞過濾網。 • 嚴禁用尖銳的物體或刷子擠壓或撞擊過濾網。 • 嚴禁在未安裝過濾網的情況下使用本產品。 警告! 嚴禁接觸蒸發器表面,以免造成受傷。 收納本產品 長時間不使用本產品時,請妥善存放。 1. 打開機身背面排水孔的膠塞,將冷凝水完全排出,可輕輕傾斜本產品以加速排水。 2. 使用本產品的「吹風模式」運行約12小時,使機內部件完全乾燥,防止發霉。 3. 關閉本產品並拔除插頭,將電源線收好,裝好排水孔及連續排水孔的膠塞。 4. 拆下排氣管清洗乾淨後置於陰涼處風乾。 5. 從遙控器中取出電池並妥善保管。 注意:... -
Page 57: 故障檢修
故障檢修 故障情況 可能原因 解決方法 產品不運行 電源連接不牢固 將電源線牢固地插入到電源插座中 室溫過高或過低 本產品工作溫度範圍為5-35℃ 產品運行效率降低 過濾網積存污垢 清潔過濾網 風道堵塞 清除堵塞物 房間的門窗打開 保持門窗關閉 選擇錯誤模式或溫度設置過高或 設置合適的模式和溫度 過低 排氣管分離 確保排氣管連接牢固 產品漏水 移動本產品時水溢出 移動前應清空水箱 排水管扭結或彎曲 拉直排水管 運行噪音過大 產品放在不平坦的地面上 將本產品放置在水平和牢固的地 面上 零件鬆動或震動 聯絡德國寶客戶服務及維修中心 噪音聽起來像是水在流動 噪音來自於流動的製冷劑,屬正常 現象 錯誤代碼「E0」 主PCB與顯示PCB通信故障 聯絡德國寶客戶服務及維修中心 錯誤代碼「E1」 環境溫度感測器故障 聯絡德國寶客戶服務及維修中心... -
Page 58: 技術規格
技術規格 PAC-CH416-SC 型號 220-240V ~ 50 Hz 電壓/頻率 1,712 W 功率 16,000 BTU 製冷能力(BTU) 11,200 BTU 製暖能力(BTU) 0.7 MPa 最高可使用壓力(低壓) 3.2 MPa 最高可使用壓力(高壓) 31 L/Day 除濕量 R290 / 265 g 製冷劑 (H) 785 (W) 355 (D) 455 mm 產品尺寸 33.4 kg 淨重... -
Page 59: Warranty Terms & Conditions
- the serial number is modified, damaged or removed from the product. - 機身編號被擅自塗改、破壞或刪除。 4. German Pool will, at its discretion, repair or replace any 4. 總代理有權選擇維修或更換配件或其損壞部份。 defective part. 5. This warranty will be void if there is any transfer of 5. - Page 60 Fax:+853 2875 2661 HONG KONG TOP BRAND TEN YEAR ACHIEVEMENT AWARD © All rights reserved. Copying, reproducing or using the contents of this manual is not allowed without prior authorization from German Pool, violators will be prosecuted. www.germanpool.com PAC-CH416-SC-M-23(1) P.60...
Need help?
Do you have a question about the PAC-CH416-SC and is the answer not in the manual?
Questions and answers