Chapters
Table of Contents

Related Manuals for German pool PAC-C209


Summary of Contents for German pool PAC-C209
- Page 1 Portable Air Conditioner PAC-C209 360° Multi-Oscillation Fan RHS-126 Online Warranty Registration Please read these instructions and warranty information carefully before use and keep them handy for future reference. U S E R M A N U A L...
-
Page 2: Table Of Contents
Table of Contents Warnings & Safety Precautions Product Structure Installation Instructions Operation Instructions Cleaning & Maintenance Troubleshooting Technical Specification Warranty Terms & Conditions... -
Page 3: Warnings & Safety Precautions
Unplug this product from the power source before cleaning and maintenance. • Contact German Pool authorized service technician for repair or maintenance of this product. DO NOT use means to accelerate the defrosting process or to clean, other than those recommended by the manufacturer. - Page 4 Warnings & Safety Precautions 18. While adjusting the upper and lower wind-guide strips of the air outlet, pluck it with hands gently to avoid damaging wind-guide strips. 19. When moving this product, make sure that it is in an upright position. 20.
-
Page 5: Product Structure
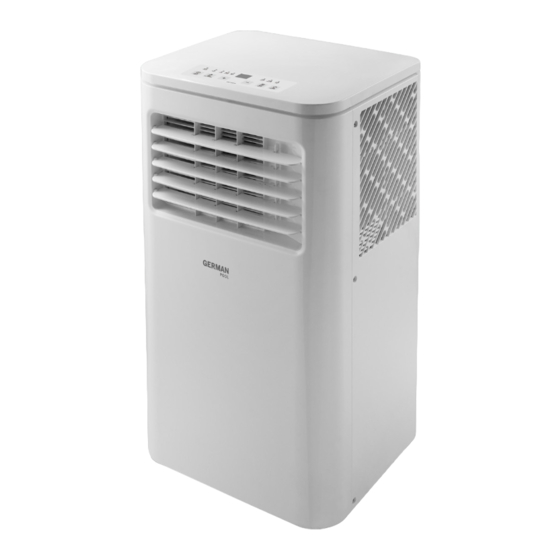
Product Structure 1. Control Panel 11. Power Cord 2. Air Outlet & Louvre 12. Condensation Drain Port 3. Casters 13. Remote Control 4. Air Inlet 14. Exhaust Hose Connector 5. Filter 15. Exhaust Hose 6. Exhaust Hose Fastener 16. Exhaust Hose Adaptor 7. -
Page 6: Installation Instructions
Installation Instructions WARNING! • Excessive Weight Hazard: It is recommended to have 2 or more persons to move and install this product. Failure to do so can result in back or other injury. • During handling and transportation, always hold the product by the handle on the back panel, and maintain the unit in its upright position at all times. - Page 7 Installation Instructions B. Install Exhaust Hose Grasp both ends of the exhaust hose and gently pull to expand the hose. Screw one end of the hose to the exhaust hose connector using a counterclockwise motion, until it is firmly attached. Screw the other end of the hose to the exhaust hose adaptor using a counterclockwise motion, until it is firmly attached.
- Page 8 Installation Instructions D. Install Window Adaptor Kit Note: • Window adaptor kit is designed to accommodate either a vertical slide or horizontal slide window. • If the window opening is shorter than the minimum length of the window adaptor kit, cut the end without the hole until it is short enough to fit in the window opening.
- Page 9 Installation Instructions Slide the extension panel between the main panel and the screw’s 2.5mm gap and adjust the length needed to cover the window opening. Screw the butterfly nut tight to secure the adaptor kit. E. Connect Exhaust Hose To Window Adaptor Kit Close the window till it fits snugly against the window adaptor kit.
-
Page 10: Operation Instructions
Operation Instructions Control Panel Icon Description Icon Description Icon Description On/Off Button Mode Button Increase Button Timer Button Fan Speed Button Decrease Button Timer Indicator High Fan Speed Low Fan Speed Light Indicator Light Indicator Light Fan Mode Indicator Sleep Mode Water Full Indicator Light Indicator Light... - Page 11 Operation Instructions Mode Selection When product is turned on, press Mode Button to cycle among Cool Mode, Dehumidify Mode and Fan Mode, the corresponding indicator light will light up constant. After selecting your desired mode, press Increase Button /Decrease Button to adjust temperature, and press Fan Speed Button to adjust fan speed (temperature only adjustable...
- Page 12 Operation Instructions Press Increase Button /Decrease Button to set on-timer from 1-24 hr. LED Display blinks timer duration. If product does not receive any commands in 5 seconds, it will automatically confirm timer, and LED Display will switch back to show current room temperature. After countdown is completed, the product will automatically start to run in the setting before it was last turned off (memorized setting).
- Page 13 Operation Instructions WARNING! • If the remote control’s battery fluid leaks onto skin or clothes, immediately rinse with large amount of water; DO NOT use remote control if battery is leaking. • If battery fluid is swallowed, gargle and seek medical attention immediately. The chemicals in battery fluid can cause burning or other bodily harm.
- Page 14 Operation Instructions Water Full Alert When the water tank inside the main unit is full, buzzer will beep, Water Full Indicator Light on the Control Panel will light up constant. User must drain off the water inside the main unit before restarting the product.
-
Page 15: Cleaning & Maintenance
Cleaning & Maintenance WARNING! Turn off the product and unplug from the power socket before cleaning and maintenance. Surface Cleaning • Unplug the product from the power source before cleaning. • Wipe product surface with a soft moist cloth. DO NOT use alcohol, gasoline or other chemical solvents to avoid damaging this product. -
Page 16: Troubleshooting
DO NOT disassemble or repair this product on your own. Improper repair will cause the warranty to become voided, and may lead to personal injury and property damage. • If problem persists or for problems not listed in the table above, please contact German Pool Customer Service & Repair Centre for assistance. P.16... -
Page 17: Technical Specification
Technical Specification Model PAC-C209 Voltage / Frequency 220-240V ~ 50 Hz Power 960 W Cooling Capacity (BTU) 9,000 BTU/hr Maximum Allowable Pressure (Low Pressure) 2.0 MPa Maximum Allowable Pressure (High Pressure) 2.6 MPa Dehumidification Capacity (30°C, RH80%) 1.25 L/hr Refrigerant / Charge... - Page 18 目錄 警告及注意事項 產品結構 安裝說明 使用說明 清潔及保養 故障檢修 技術規格 保用條款 P.18...
-
Page 19: 警告及注意事項
警告及注意事項 警告! 使用本產品前,請仔細閱讀所有說明。 • 本產品只限家居室內日常使用,如產品作任何商業、工業、出租或其他用途,保用證即告失 效。 • 請勿讓兒童或身體有殘障、精神不健全及對本產品缺乏經驗或知識的人士單獨使用本產品;如 需使用,必須要在負責任的成年人監管下方可使用。 • 應照顧好兒童,確保他們不會玩耍本產品。 • 無成年人監管下,勿讓兒童清潔及維護本產品。 • 使用前,請先檢查所有電壓是否與本產品標籤上的電壓相符。 • 如果電源線損壞,為免發生意外,電源線必須由廠方、廠方指定的維修中心或同等合格的技術 人員進行更換。 • 清潔或檢查本產品前,必須先關機及拔掉插頭。 • 請聯繫德國寶授權的技術人員進行維修或保養本產品。 1. 除製造商推薦的方法外,嚴禁用任何其他方法加速除霜過程及進行清潔。 2. 本產品必須存放在沒有持續點燃的火源(例如:明火、運行中的燃氣器具或運行中的電暖爐) 的房間內。 3. 嚴禁刺穿或燃燒本產品。 4. 必須注意製冷劑可能沒有氣味。 5. 必須保持所有必要的通風口暢通無阻。 6. 本產品必須按照製造商的建議進行維修。 7. 本產品必須放置在通風良好的地方,房間大小應與本產品適用的房間面積相符。 8. 任何涉及製冷劑迴路工作的人員,都必須持有行業認可的評估機構頒發的有效證書,該證書授 權他們有能力根據行業認可的評估規範安全處理製冷劑。 9. 必須按照本產品製造商的建議進行維修。維護和修理必須在有能力使用易燃製冷劑的人員的監... - Page 20 警告及注意事項 21. 嚴禁隨意拆卸、檢修和改裝本產品,否則會引起機器故障,甚至導至人身和財產危害。為避免 發生危險,如本產品出現故障,必須由製造商或專業人員進行維修。 22. 嚴禁在浴室等潮濕環境中安裝和使用本產品。 23. 嚴禁以拔除插頭的方法關閉本產品。 24. 嚴禁在機身上放置杯子等物品,以免水或其他液體濺入本產品內。 25. 嚴禁在本產品附近使用殺蟲噴霧劑或其他易燃物質。 26. 嚴禁使用汽油、酒精等化學溶劑擦拭、清洗本產品。當您需要清潔本產品時,必須斷開電源, 並用半濕的軟布清潔。如本產品太髒,建議用溫和的清潔劑擦洗。 27. 如8歲及以上的兒童以及身體、感官或精神上有缺陷的人在接受有關安全使用該設備的監督或 指導並了解所涉及的危險的情況下,可以使用本產品。兒童嚴禁玩耍本產品。兒童嚴禁在沒有 監督的情況下為本產品進行清潔和維護。 28. 如電源線損壞,必須由製造商、其服務代理或具有類似資格的人員更換,以免發生危險。 29. 本產品的安裝應符合所在地區的佈線規定。 30. 警告!本產品的遙控器包含電池。如果電池被吞下,可能在2小時內造成嚴重的內部燒傷, 並可能導致死亡。新電池和舊電池應遠離兒童。如果電池蓋不能安全關閉,請停止使用遙控 器,並將其遠離兒童。如果您認為電池可能被吞食或放置在身體任何部位,請立即就醫。電池 含有對環境有害的材料;在報廢前,必須將其從設備中取出,並進行安全處理。 31. 警告!本產品必須在佔地面積大於7m 的房間內安裝、使用和存放。 正確處置本產品 此標誌表明該產品不應與其他生活垃圾一起處理。為防止不受控制的廢物處理對環 境或人類健康可能造成的危害,請負責任地回收本產品以促進材料資源的可持續再 利用。要退回您用過的設備,請聯繫購買本產品的零售商,他們可將本產品用於對 環境安全的回收。 P.20...
-
Page 21: 產品結構
產品結構 1. 控制面板 11. 電源線 2. 出風口及導風板 12. 冷凝器排水口 3. 滾輪 13. 遙控器 4. 進風口 14. 排氣管接頭 5. 過濾網 15. 排氣管 6. 排氣管接頭固定槽 16. 排氣管外接頭 7. 進風口及過濾網 17. 窗戶密封板組件 8. 提手 18. 窗戶密封板組件螺絲 9. 電源插頭收納槽 19. 排水管 10. 連續排水孔 P.21... -
Page 22: 安裝說明
安裝說明 警告! • 超重危險:建議由兩個或以上的人協助移動和安裝本產品。否則有機會導致背部或其他傷害。 • 搬運或移動本產品時必須握住機身的手柄,並確保本產品時刻處於直立位置。 • 嚴禁握住本產品出風口導風板進行移動。 • 在搬運或移動本產品前,必須將本產品中的水徹底排乾,以防止漏水弄濕地板或地毯。 安裝前注意事項 1. 本產品必須放置在堅固的平面上,以儘量減少噪音和振動。為了安全和牢固放置,請將本產品 放置在足夠堅固的平穩水平地板上以支撐本機。 2. 本產品配備滾輪用以方便移動,但只能在平滑的平面上滾動。在地毯上滾動時要小心,在木地 板上滾動時要小心並保護地板;嚴禁讓本產品滾過任何物體。 3. 本產品必須放置在能夠連接到適當的額定接地插座的地方。 警告! 觸電危險:必須使用接地的三孔插座;嚴禁透過拉扯電源線從插座上拔下插頭;嚴禁使用萬能蘇; 嚴禁使用拖板;否則可能導致死亡、火災或觸電。 4. 嚴禁在本產品的進風口和出風口周圍放置任何物品。 5. 排氣管可以拉長,但長度建議保持在所需的最短長度。必須確保排氣管沒有任何急轉彎或凹 陷。 6. 跟機附送的窗戶密封板組件適用於大多數標準垂直滑動或水平滑動的窗戶,但是,對於其他窗 戶類型,可能需要修改安裝程序。 A. 拆除包裝材料 1. 首次使用前必須先拆除包裝材料。 2. 建議保留紙箱和發泡膠包裝,以便在不使用時存放本產品。 注意: • 本產品主機內沒有包裝材料可以拆除,嚴禁拆開機身。 • 妥善處理及回收所有包裝材料。 • 必須輕拿輕放,並保持本產品直立和水平。嚴禁將本產品側放或倒置。... - Page 23 安裝說明 B. 組裝排氣管 1. 握住排氣管的兩端,輕輕拉長排氣管。 2. 將排氣管開口端對準排氣管接頭,逆時針旋轉至扣緊。 3. 將排氣管另一開口端對準排氣管外接頭,逆時針旋轉至扣緊。 注意: 嚴禁連接額外的軟管來延長排氣管長度,避免降低本產品製冷效率,並有可能損壞本產品。 C. 連接排氣管至機身 1. 將排氣管接頭對準機身背面的排氣管接頭固定槽。 2. 將排氣管接頭從左向右滑動至扣緊,即成。 D. 安裝窗戶密封板組件 注意: • 窗戶密封板組件適用於垂直滑動或水平滑動的窗戶。 • 如窗戶開口小於窗戶密封板元件的最小長度,請切掉窗戶密封板組件無孔側的末端,使其足夠 短以適合窗戶開口。嚴禁切掉窗戶密封板組件中的孔。 1. 按窗戶開口的大小,使用主面板及擴展面板。 2. 打開窗戶,將主面板放入窗戶開口中。 水平滑動窗戶 垂直滑動窗戶 P.23...
- Page 24 安裝說明 3. 使用跟機附送的螺絲,按下圖方法拆開螺絲。 4. 將螺絲扣在主面板上,擰緊螺絲並預留約2.5mm間距的空隙。 5. 將擴展面板卡入主面板與螺絲之間的空隙,將面板調整成窗口的寬度或高度。 6. 擰緊螺絲以固定窗戶密封板組件。 E. 連接排氣管至窗戶 1. 將窗戶關閉到與窗戶密封板組件緊貼,完全覆蓋窗戶開口。 2. 將排氣管外接頭對準窗戶密封板組件上的卡槽,扣緊完成安裝。 注意: • 連接排氣管時,本產品必須離窗戶足夠近;連接完成後,將本產品移離牆壁20英寸(約50厘 米),並與周圍的物件保持至少20英寸(約50厘米)距離。 • 嚴禁將排氣管彎曲至超過45° ,以保持排氣管良好通風。 • 使用前必須確保排氣管已安裝在正確位置及安裝穩妥。 • 當窗戶密封板組件水平安裝時,確保排氣管外接頭上帶「A」標記的一面朝上。 P.24...
-
Page 25: 使用說明
使用說明 控制面板 圖標 說明 圖標 說明 圖標 說明 開關鍵 模式鍵 加鍵 定時鍵 風速鍵 減鍵 定時指示燈 高風速指示燈 低風速指示燈 睡眠模式指示燈 滿水指示燈 吹風模式指示燈 冷風模式指示燈 除濕模式指示燈 接通電源 1. 連接電源後,蜂鳴器發出提示聲一聲,控制面板全亮1秒後熄滅,顯示屏顯示當前室溫,進入 待機模式。 2. 按「開關鍵 」開機,首次開機預設以冷風模式及高風速運行。 3. 使用完畢後,按「開關鍵 」關機(返回待機狀態,不會斷開本產品與電源的連接)。 注意: 本產品設有記憶功能,按「開關鍵 」關機後再重新開機,將以上一次關機前的設置繼續運行; 直至斷開電源(拔除電源插頭)後再重新開機,以首次開機的預設模式運行。 選擇模式 1. 開機後按「模式鍵 」循環選擇冷風模式、除濕模式及吹風模式,相應指示燈常亮。 2. 選擇對應模式後,可按「加鍵... - Page 26 使用說明 模式 溫度 風速 顯示屏 冷風模式 可調高風速或低風速 顯示設定溫度 可調17ºC-30ºC 除濕模式 不可調 預設低風速,不可調 顯示當前室溫 吹風模式 可調高風速或低風速 顯示當前室溫 不可調 睡眠模式 1. 在冷風模式下,同時按「定時鍵 」及「減鍵 」進入睡眠模式。 2. 在睡眠模式下,預設以低風速運行,風速不可調;溫度可調17ºC-30ºC,顯示屏顯示設定溫度。 注意: • 在除濕模式及吹風模式下,無法使用睡眠模式。 • 如在睡眠模式下,按「模式鍵 」切換至除濕模式或吹風模式,將自動退出睡眠模式。 定時關機 1. 開機後按「定時鍵 」進入定時設置,定時指示燈常亮。 2. 按「加鍵 / 減鍵 」調整1-24小時定時,顯示屏閃爍顯示所選擇的時間。 3. 如5秒內無任何操作,將自動確認所選時間,顯示屏轉回顯示設定溫度(冷風模式)或當前室 溫(除濕模式或吹風模式)。...
- Page 27 使用說明 遙控器 注意: • 使用前請先插入兩節AAA電池;嚴禁使用充電電池。 • 更換電池時,必須同時更換2節電池,嚴禁混用新舊電池。 • 如長時間不使用本產品,必須取出遙控器的電池並妥善存放。 加鍵 高風速鍵 冷風模式鍵 低風速鍵 除濕模式鍵 睡眠模式鍵 吹風模式鍵 減鍵 定時鍵 開關鍵 警告! • 如遙控器電池液漏到皮膚或衣服上,必須盡快用大量清水沖洗;發現洩漏,嚴禁使用遙控器。 • 如吞下電池液,必須盡快漱口並就醫。電池中的化學物質可能會燃燒或造成其他健康危害。 按鍵 說明 開關鍵 接通電源後按鍵開機或關機(返回待機狀態) 高風速鍵 按鍵設定風速為高風速(不適用於除濕模式) 低風速鍵 按鍵設定風速為低風速(不適用於除濕模式) 定時鍵 按鍵進入定時設置 冷風模式鍵 按鍵選擇冷風模式 除濕模式鍵 按鍵選擇除濕模式 吹風模式鍵 按鍵選擇吹風模式 睡眠模式鍵...
- Page 28 使用說明 滿水提示 當機內水滿,產品將發出蜂鳴器提示聲,控制面板上的滿水指示燈常亮,需要排掉冷凝水並重新啟 動本產品。 手動排水 1. 將本產品關機並拔除電源插頭。 2. 將托盤或容器(自備)放在機身背面冷凝器排水口下。 3. 打開冷凝器排水口的膠塞,將冷凝水完全排出,可輕輕傾斜本產品以加速排水。 4. 將冷凝水排清後,塞上膠塞。 注意: • 移動本產品時必須小心以免漏水。 • 如果容器無法容納所有的水,請在裝滿前盡快堵住冷凝器排水口,以防止漏水弄濕地板或地 毯。 • 膠塞必須安裝牢固,以免產品重新開始工作時,新的冷凝水弄濕地板或地毯。 連續排水 1. 打開連續排水孔的膠塞,用φ13mm的排水管連接排水孔 2. 將排水管拉到浴室或室外進行排水。 注意: • 建議避免在冷風模式時使用連續排水,以確保機內有足夠的水循環以增強系統冷卻效果。 • 建議在暖風模式及除濕模式下使用連續排水,避免頻繁手動排水。 • 將排水管放在不易接近的地方,避免高於排水孔,並保持排水管筆直,無任何彎曲。 壓縮機延時保護功能 除第一次接通電源後,壓縮機可能立即啟動外,每次關機壓縮機停止運行後,產品進入3分鐘延時 再啟動保護,3分鐘內無法再啟動壓縮機。 P.28...
-
Page 29: 清潔及保養
清潔及保養 警告! 在維修或保養前,必須先關機並拔除電源插頭。 清潔產品表面 • 清潔前必須拔除電源插頭。 • 用濕軟布清潔本產品表面,嚴禁使用酒精和汽油等化學溶劑,以免損壞本產品。清潔本產品時 嚴禁使用任何稀釋劑、酒精或其他類似溶劑。 • 用濕軟布和中性清潔劑清潔出風口。嚴禁使用任何化學溶劑清洗機身組件或在本產品附近長期 放置此類物品。 清潔過濾網 • 建議每兩星期清潔一次過濾網,否則過濾網被灰塵堵塞會影響本產品性能。 • 握住過濾網提手輕輕拉出,將過濾網浸入混有中性清潔劑的溫水(約40℃)中輕輕清洗,然後 置於 陰 涼處晾乾。 注意: • 拉出過濾網時必須小心,避免扭曲或損壞過濾網。 • 嚴禁用尖銳的物體或刷子擠壓或撞擊過濾網。 • 嚴禁在未安裝過濾網的情況下使用本產品。 收納本產品 不使用本產品時,請妥善存放。 1. 打開機身背面冷凝器排水口的膠塞,將冷凝水完全排出,可輕輕傾斜本產品以加速排水。 2. 使用本產品的「吹風模式」運行約12小時,使機內部件完全乾燥,防止發霉。 3. 關閉本產品並拔除插頭,將電源線收好並將插頭插入機身背面的電源插頭收納槽,裝好冷凝器 排水口及連續排水孔的膠塞。 4. 拆下排氣管清洗乾淨後置於陰涼處風乾。 5. 從遙控器中取出電池並妥善保管。 注意:... -
Page 30: 故障檢修
儲水箱滿水 排乾本產品的積水後重新開機 顯示屏溫度顯示為華 錯誤地同時按下控制面板上的加 同時按控制面板上的加鍵及減鍵將 氏° F 而非攝氏° C 鍵及減鍵 ° F 轉回° C 警告! • 嚴禁擅自拆卸或維修本產品,維修不當將使保養失效,並可能對您和您的財產造成傷害。 • 如果產品的問題未在上表中列出,請聯絡德國寶客戶服務及維修中心。 技術規格 PAC-C209 型號 220-240V ~ 50 Hz 電壓/頻率 960 W 功率 9,000 BTU/hr 製冷能力(BTU) 2.0 MPa 最高可使用壓力(低壓) 2.6 MPa 最高可使用壓力(高壓) 1.25 L/hr 除濕量(30°... -
Page 31: Warranty Terms & Conditions
- the serial number is modified, damaged or removed from the product. - 機身編號被擅自塗改、破壞或刪除。 4. German Pool will, at its discretion, repair or replace any defective part. 4. 總代理有權選擇維修或更換配件或其損壞部份。 5. This warranty will be void if there is any transfer of 5. - Page 32 Fax:+853 2875 2661 HONG KONG TOP BRAND TEN YEAR ACHIEVEMENT AWARD © All rights reserved. Copying, reproducing or using the contents of this manual is not allowed without prior authorization from German Pool, violators will be prosecuted. www.germanpool.com PAC-209-M-23(1) P.32...
Need help?
Do you have a question about the PAC-C209 and is the answer not in the manual?
Questions and answers