Table of Contents
Advertisement
Quick Links
Advertisement
Table of Contents

Related Manuals for Electrolux EOE8P39V


Summary of Contents for Electrolux EOE8P39V
- Page 1 EN User Manual | Oven EOE8P39V EOE8P39X...
-
Page 2: Table Of Contents
Welcome to Electrolux! Thank you for choosing our appliance. Get usage advice, brochures, trouble shooter, service and repair information: www.electrolux.com/support Subject to change without notice. CONTENTS 1. SAFETY INFORMATION................2 2. SAFETY INSTRUCTIONS................4 3. INSTALLATION....................7 4. PRODUCT DESCRIPTION................9 5. - Page 3 be kept away from the appliance unless continuously supervised. • Children should be supervised to ensure that they do not play with the appliance. • Keep all packaging away from children and dispose of it appropriately. • WARNING: The appliance and its accessible parts become hot during use.
-
Page 4: Safety Instructions
• Always use oven gloves to remove or insert accessories or ovenware. • Use only the food sensor (core temperature sensor) recommended for this appliance. • To remove the shelf supports first pull the front of the shelf support and then the rear end away from the side walls. Install the shelf supports in the opposite sequence. - Page 5 2.2 Electrical connection Cable types applicable for installation or re‐ placement for Europe: WARNING! Risk of fire and electric shock. H07 RN-F, H05 RN-F, H05 RRF, H05 VV-F, H05 V2V2-F (T90), H05 BB-F • All electrical connections should be made For the section of the cable refer to the total by a qualified electrician.
- Page 6 • Clean the appliance with a moist soft WARNING! cloth. Use only neutral detergents. Do not use abrasive products, abrasive cleaning Risk of damage to the appliance. pads, solvents or metal objects. • To prevent damage or discoloration to the •...
-
Page 7: Installation
• This product contains a light source of appliance. energy efficiency class G. • Use only lamps with the same specifications. 3. INSTALLATION 3.1 Building in WARNING! Refer to Safety chapters. www.youtube.com/electrolux www.youtube.com/aeg How to install your AEG/Electrolux Oven - Column installation ENGLISH... - Page 8 (*mm) min. 550 min. 560 (*mm) min. 550 min. 560 3.2 Securing the oven to the cabinet ENGLISH...
-
Page 9: Product Description
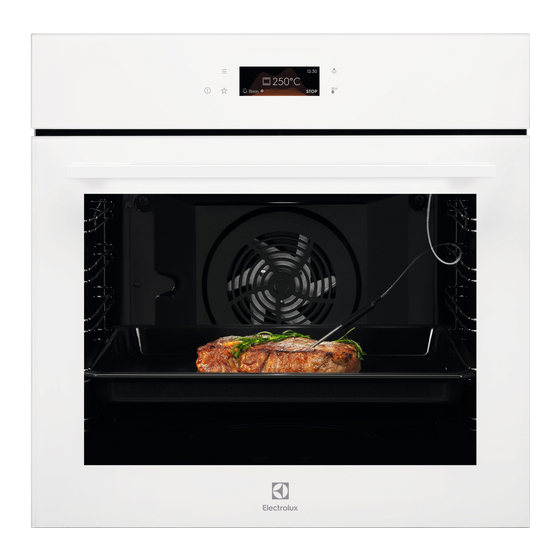
4. PRODUCT DESCRIPTION 4.1 General overview Control panel Electronic programmer Socket for the food sensor Heating element Lamp Shelf support, removable Shelf positions 4.2 Accessories • Food sensor To measure how far the food is cooked. • Wire shelf • Telescopic runners For cookware, cake tins, roasts. - Page 10 Favourites Lists the favourite settings. Display Shows the current settings of the appliance. Lamp switch To turn the lamp on and off. Fast Heat Up To turn on and off the function: Fast Heat Up. Press Move Press and hold Touch the surface with fingertip.
-
Page 11: Before First Use
6. BEFORE FIRST USE WARNING! Refer to Safety chapters. 6.1 Initial Cleaning Step 1 Step 2 Step 3 Remove all accessories and remov‐ Clean the appliance and the acces‐ Place the accessories and the re‐ able shelf supports from the appli‐ sories only with a microfibre cloth, movable shelf supports in the appli‐... - Page 12 Step 5 Press: Food Sensor - you can plug the sensor at any time before or during cooking. - press to turn off the heating function. Step 6 Turn off the oven. 7.2 How to set: Assisted Cooking Every dish in this submenu has a recommended function and temperature. You can adjust the time and the temperature.
- Page 13 Heating function Application To bake and roast food on one shelf position. Conventional Cooking To bake pizza. To make intensive browning and a crispy bottom. Pizza Function To bake cakes with crispy bottom and to preserve food. Bottom Heat Use this function to prepare bread and bread rolls with a very good professional-like result in terms of crispiness, colour and crust gloss.
-
Page 14: Clock Functions
Heating function Application To keep food warm. Please note that some dishes may continue to cook and dry out while being kept warm. Cover the dishes if necessary Keep Warm This function is designed to save energy during cooking. When you use this function, the temperature inside the appliance may differ from the set temperature. - Page 15 How to set cooking time Step 1 Choose the heating function and set the temperature. Step 2 Press: Step 3 Set the time. Press: How to choose end option Step 1 Choose the heating function and set the temperature. Step 2 Press: Step 3 Set the cooking time.
-
Page 16: Using The Accessories
9. USING THE ACCESSORIES devices. The high rim around the shelf WARNING! prevents cookware from slipping of the shelf. Refer to Safety chapters. 9.1 Inserting accessories A small indentation at the top increases safety. The indentations are also anti-tip Wire shelf: Push the shelf between the guide bars of the shelf support and make sure that the feet point down. - Page 17 9.3 How to use: Food Sensor Step 1 Turn on the oven. Step 2 Set a heating function and, if necessary, the oven temperature. Step 3 Insert: Food Sensor. Meat, poultry and fish Casserole Insert the tip of Food Sensor into the centre of meat, Insert the tip of Food Sensor exactly in the centre of the fish, in the thickest part if possible.
-
Page 18: Additional Functions
10. ADDITIONAL FUNCTIONS 10.1 How to save: Favourites You can save your favourite settings, such as the heating function, the cooking time, the temperature or the cleaning function. You can save 3 favourite settings. Step 1 Turn on the appliance. Step 2 Select the preferred setting. -
Page 19: Hints And Tips
11. HINTS AND TIPS 11.1 Cooking recommendations The temperature and cooking times in the tables are guidelines only. They depend on the recipes and the quality and quantity of the ingredients used. Your appliance may bake or roast differently to the appliance you had before. The hints below show recommen‐ ded settings for temperature, cooking time and shelf position for specific types of the food. - Page 20 (°C) (min) Short crust biscuits, baking tray or dripping pan 25 - 35 20 pieces Tartlets, 8 pieces baking tray or dripping pan 20 - 30 Vegetables, poached, baking tray or dripping pan 35 - 45 0.4 kg Vegetarian omelette pizza pan on wire shelf 25 - 30 Mediterranean vege‐...
-
Page 21: Care And Cleaning
( °C) (min) Apple pie, 2 Conventional Wire shelf 70 - 90 tins Ø20 Cooking Apple pie, 2 True Fan Wire shelf 70 - 90 tins Ø20 Cooking Fatless Conventional Wire shelf 40 - 50 Preheat the oven for sponge Cooking 10 min. - Page 22 12.1 Notes on cleaning Clean the front of the appliance only with a microfibre cloth with warm water and a mild de‐ tergent. Use a cleaning solution to clean metal surfaces. Clean stains with a mild detergent. Cleaning Agents Clean the cavity after each use. Fat accumulation or other residue may cause fire. Moisture can condense in the appliance or on the door glass panels.
- Page 23 Before the Pyrolytic Cleaning: Turn off the oven and wait until Remove all accessories. Clean the oven floor and the inner door it is cold. glass with warm water, a soft cloth and a mild detergent. Step 1 Step 2 Step 3 Turn on the oven.
- Page 24 Step 2 Lift and pull the latches until they click. Step 3 Close the oven door halfway to the first opening position. Then lift and pull to remove the door from its seat. Step 4 Put the door on a soft cloth on a stable sur‐ face.
-
Page 25: Troubleshooting
Make sure that you put the glass panels (A and B) back in the correct sequence. Check for the symbol / printing on the side of the glass panel, each of the glass panels looks different to make the disassembly and assembly easier. - Page 26 13.1 What to do if... The appliance does not turn on or does not heat up Possible cause Remedy The appliance is not connected to an electrical supply Check if the appliance is correctly connected to the or it is connected incorrectly. electrical supply.
-
Page 27: Energy Efficiency
14. ENERGY EFFICIENCY 14.1 Product Information and Product Information Sheet according to EU Ecodesign and Energy Labelling Regulations Supplier's name Electrolux EOE8P39V 949498474 Model identification EOE8P39X 949498473 Energy Efficiency Index 81.2 Energy efficiency class Energy consumption with a standard load, conventional mode 0.93 kWh/cycle... -
Page 28: Menu Structure
Residual heat Keep food warm If a programme with Duration is activated and Choose the lowest possible temperature the cooking time is longer than 30 min, the setting to use residual heat and keep a meal heating elements automatically turn off earlier warm. -
Page 29: S Easy
Submenu Application Child Lock Prevents accidental activation of the appliance. When the option is on, the text Child Lock appears in the display when you turn on the appliance. To enable the appliance use, choose the code letters in the alphabetical order. When the option is on, and the appliance is turned off the appliance door is locked. -
Page 30: Environmental Concerns
Start using the appliance Quick start Turn on the appli‐ Step 1 Step 2 Step 3 ance and start cook‐ ing with the default Press and hold: - select the Press: temperature and preferred function. time of the function. Quick Off Turn off the appli‐... - Page 32 867369557-C-322023...
Need help?
Do you have a question about the EOE8P39V and is the answer not in the manual?
Questions and answers