Table of Contents
Advertisement
Advertisement
Table of Contents

Related Manuals for Electrolux COE7P31X


Summary of Contents for Electrolux COE7P31X
- Page 1 User Manual Oven COE7P31X EOE7P31Z electrolux.com/register...
-
Page 2: Table Of Contents
WE’RE THINKING OF YOU Thank you for purchasing an Electrolux appliance. You’ve chosen a product that brings with it decades of professional experience and innovation. Ingenious and stylish, it has been designed with you in mind. So whenever you use it, you can be safe in the knowledge that you’ll get great results every time. -
Page 3: Safety Information
SAFETY INFORMATION Before the installation and use of the appliance, carefully read the supplied instructions. The manufacturer is not responsible for any injuries or damage that are the result of incorrect installation or usage. Always keep the instructions in a safe and accessible location for future reference. -
Page 4: Safety Instructions
similar accommodation where such use does not exceed (average) domestic usage levels. • Only a qualified person must install this appliance and replace the cable. • Do not use the appliance before installing it in the built-in structure. • Disconnect the appliance from the power supply before carrying out any maintenance. - Page 5 • Do not pull the appliance by the handle. electrical ratings of the mains power • Install the appliance in a safe and suitable supply. place that meets installation requirements. • Always use a correctly installed • Keep the minimum distance from other shockproof socket.
- Page 6 2.4 Care and cleaning • Deactivate the appliance after each use. • Be careful when you open the appliance door while the appliance is in operation. WARNING! Hot air can release. Risk of injury, fire, or damage to the • Do not operate the appliance with wet appliance.
- Page 7 – provide good ventilation during and signal information about the operational after the initial preheating. status of the appliance. They are not • Do not spill or apply water on the oven intended to be used in other applications door during and after the pyrolytic cleaning and are not suitable for household room to avoid damaging the glass panels.
-
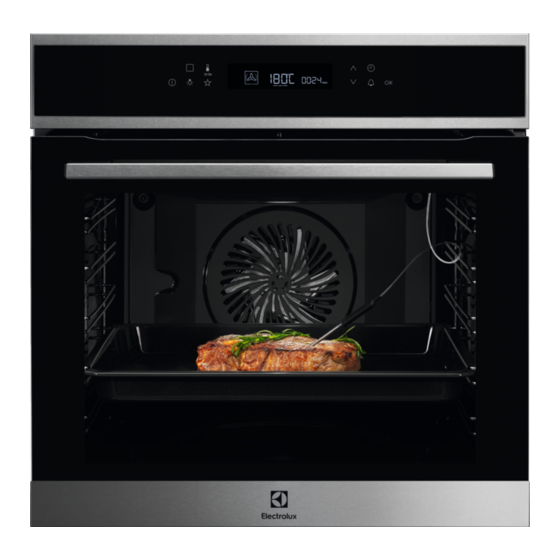
Page 8: Product Description
3. PRODUCT DESCRIPTION 3.1 General overview Control panel Electronic programmer Socket for the food sensor Heating element Lamp Shelf support, removable Shelf positions 3.2 Accessories Grill- / Roasting pan Wire shelf To bake and roast or as a pan to collect fat. For cookware, cake tins, roasts. -
Page 9: Control Panel
To insert and remove trays and wireshelf more easily. 4. CONTROL PANEL 4.1 Electronic programmer 7 8 9 10 Use the sensor fields to operate the oven. Sensor Function Description Field ON / OFF To turn the oven on and off. Options To set a heating function, a cleaning function or an automatic programme. -
Page 10: Before First Use
4.2 Display A. Heating function symbol B. Number of the heating function / programme C. Indicators for the clock functions (refer to "Clock functions" table) D. Clock / residual heat display E. Temperature / time of day display Other indicators of the display: Symbol Name Description... -
Page 11: Daily Use
5.1 Initial Cleaning Step 1 Step 2 Step 3 Remove all accessories and remov‐ Clean the appliance and the acces‐ Place the accessories and the re‐ able shelf supports from the appli‐ sories only with a microfibre cloth, movable shelf supports in the appli‐ ance. - Page 12 When you use this function the lamp automatically turns off after 30 sec. Oven function Application For the cooking instructions refer to "Hints This function is designed to save and tips" chapter, Moist Fan Baking. For energy during cooking. When general energy saving recommendations you use this function, the tem‐...
-
Page 13: Clock Functions
To turn on the Fast Heat Up press and hold If the Fast Heat Up is turned on the display shows flashing bars. for more than 3 seconds. 7. CLOCK FUNCTIONS 7.1 Clock functions table Clock function Application Time of Day To show or change the time of day. -
Page 14: Automatic Programmes
7.5 How to set: Time Delay 7.6 How to set: Minute Minder 1. Set a heating function and temperature. 1. Press 2. Press again and again until starts The display shows flashing and "00". to flash. 2. Press to switch between options. First 3. -
Page 15: Using The Accessories
8.2 Recipes online 4. Touch or the settings save automatically after five seconds. You can find the recipes for the automatic The appliance activates. programmes on our website. To find the 5. You can change the default weight value Recipe Book check the PNC number on the rating plate on the front frame of the oven with . - Page 16 The oven calculates the approximate cooking The display shows the current core time, it may change during cooking. temperature and the heat up symbol When you put the accessory into the socket, you cancel the settings for the clock functions. When you cook with the core temperature sensor, you can change the temperature shown in the display.
- Page 17 bottom of a baking dish. You can set the core temperature only when flashes. If is in the display but does not flash before you set the core temperature, touch to set a new value. 8. Set the oven function and the oven temperature.
-
Page 18: Additional Functions
Wire shelf: Push the shelf between the guide bars of the shelf support. Baking tray / Deep pan: Push the tray between the guide bars of the shelf support. 10. ADDITIONAL FUNCTIONS 10.1 Using My Favourite 10.2 Using Child Lock Programme function The Child Lock prevents an accidental operation of the oven. - Page 19 The Function Lock prevents an accidental change of the oven function. You can turn off the oven when the 1. To turn on the function turn on the oven. Function Lock is on. When you turn off 2. Turn on an oven function or setting. the oven, the Function Lock turns off.
-
Page 20: Hints And Tips
10.7 Cooling fan – when the appliance is activated. – if you touch a sensor field during the When the appliance operates, the cooling fan night brightness (apart from ON / turns on automatically to keep the surfaces of OFF), the display goes back to the day the appliance cool. - Page 21 Baking results Possible cause Remedy The cake is too dry. The oven temperature is too low. Next time set higher oven temperature. The baking time is too long. Next time set shorter baking time. The cake bakes unevenly. The oven temperature is too high Next time set a longer baking time and and the baking time is too short.
- Page 22 CAKES / PASTRIES / BREADS (°C) (min) Swiss roll 180 - 200 10 - 20 Rye bread: first: 230 then: 160 - 180 30 - 60 Buttered almond cake / 190 - 210 20 - 30 Sugar cakes Cream puffs / Eclairs 190 - 210 20 - 35 Plaited bread / Bread...
- Page 23 (°C) (min) Baguettes topped with mel‐ True Fan Cooking 160 - 170 15 - 30 ted cheese Vegetables au gratin, pre‐ Turbo Grilling 160 - 170 15 - 30 heat the empty oven Lasagne Conventional Cooking 180 - 200 25 - 40 Fish bakes Conventional Cooking 180 - 200...
- Page 24 11.7 Tips on Roasting Roast meat and fish in large pieces (1 kg or more). Use heat-resistant ovenware. If level one is suggested put the food directly Roast lean meat covered (you can use on the baking tray aluminium foil). Baste meat joints with their own juice several Roast large meat joints directly in the tray.
- Page 25 VEAL Use the function: Turbo Grilling. (kg) (°C) (min) Roast veal 160 - 180 90 - 120 Veal knuckle 1.5 - 2 160 - 180 120 - 150 LAMB Use the function: Turbo Grilling. (kg) (°C) (min) Lamb leg / Roast lamb 1 - 1.5 150 - 170 100 - 120...
- Page 26 POULTRY Use the function: Turbo Grilling. (kg) (°C) (min) Poultry, portions 0.2 - 0.25 each 200 - 220 30 - 50 Chicken, half 0.4 - 0.5 each 190 - 210 35 - 50 Chicken, poulard 1 - 1.5 190 - 210 50 - 70 Duck 1.5 - 2...
- Page 27 PIZZA PIZZA Preheat the empty oven before cook‐ Preheat the empty oven before cook‐ ing. ing. Use the second shelf position. Use the second shelf position. (°C) (min) (°C) (min) Pizza, thin crust, 200 - 230 15 - 20 Flammkuchen 230 - 250 12 - 20 use a deep pan...
- Page 28 poultry, fatty roast pork, pot roast. Food Sensor temperature should not be higher than 65 °C. FAST GRILLING 1. Sear the meat for 1 - 2 minutes on each side in a pan over high heat. 2. If third shelf position is recommended put Use the fourth shelf position unless the food directly on the wire shelf.
- Page 29 11.12 Frozen Foods - True Fan Cooking DEFROSTING (°C) (min) Pizza, frozen 200 - 220 15 - 25 Pizza American, frozen 190 - 210 20 - 25 Pizza, chilled 210 - 230 13 - 25 Pizza snacks, frozen 180 - 200 15 - 30 French fries, thin 200 - 220...
- Page 30 (kg) (min) (min) Defrosting time Further defrost‐ ing time Cream 2 x 0.2 80 - 100 10 - 15 Whip the cream when still slightly frozen in pla‐ ces. Gateau 11.14 Preserving Use the function Bottom Heat. STONE Use only preserve jars of the same FRUIT (min) (min)
- Page 31 Set the temperature to 60 - 70 °C. VEGETA‐ BLES (°C) FRUIT Beans 60 - 70 6 - 8 Plums 8 - 10 Peppers 60 - 70 5 - 6 Apricots 8 - 10 Vegetables for soup 60 - 70 5 - 6 Apple slices 6 - 8...
- Page 32 MUTTON / LAMB Food core temperature (°C) Less Medium More Mutton leg Mutton saddle Roast lamb / Lamb leg GAME Food core temperature (°C) Less Medium More Hare saddle / Venison saddle Hare leg / Hare, whole / Venison leg POULTRY Food core temperature (°C) Less...
- Page 33 CASSEROLES - SWEET Food core temperature (°C) Less Medium More White bread casserole with / without fruit / Rice porridge casserole with / without fruit / Sweet noodle casserole 11.17 Moist Fan Baking - recommended accessories Use the dark and non-reflective tins and containers. They have better heat absorption than the light colour and reflective dishes.
- Page 34 Baking on one level - baking in tins °C Fatless sponge cake True Fan Cooking 45 - 60 Fatless sponge cake Conventional Cooking 45 - 60 Apple pie, 2 tins Ø20 cm True Fan Cooking 55 - 65 Apple pie, 2 tins Ø20 cm Conventional Cooking 55 - 65 Short bread...
-
Page 35: Care And Cleaning
Beef steak, turn halfway through Grill 24 - 30 Fast Grilling Preheat the empty oven for 3 minutes. Grill with the maximum temperature setting. Use the fourth shelf position. 1st side 2nd side Burgers 8 - 10 6 - 8 Toast 1 - 3 1 - 3... - Page 36 12.2 How to remove: Shelf supports Remove the shelf supports to clean the oven. Step 1 Turn off the oven and wait until it is cold. Step 2 Pull the front of the shelf support away from the side wall. Step 3 Pull the rear end of the shelf support away from the side wall and remove...
- Page 37 When the cleaning ends: Turn off the oven and wait until it Clean the cavity with a soft cloth. Remove the residue from the bottom of is cold. the cavity. 12.4 Cleaning reminder WARNING! The oven reminds you when to clean the The door is heavy.
- Page 38 Step 7 Clean the glass panel with water and soap. Dry the glass panel care‐ fully. Do not clean the glass panels in the dishwasher. Step 8 After cleaning, do the above steps in the opposite sequence. Step 9 Install the smaller panel first, then the larger and the door. 12.6 How to replace: Lamp WARNING! Risk of electric shock.
-
Page 39: Troubleshooting
Side lamp Step 1 Remove the left shelf support to get ac‐ cess to the lamp. Step 2 Use a narrow, blunt object (e.g. a tea‐ spoon) to remove the glass cover. Step 3 Clean the glass cover. Step 4 Replace the lamp with a suitable 300 °C heat-resistant lamp. - Page 40 Problem Possible cause Remedy The display does not show the time The display is deactivated. Touch at the same time during the off status. to activate the display again. The food sensor does not operate. The plug of the food sensor is not Put the plug of the food sensor as correctly installed into the socket.
-
Page 41: Energy Efficiency
......... Serial number (S.N.) ......... 14. ENERGY EFFICIENCY 14.1 Product Information and Product Information Sheet Supplier's name Electrolux COE7P31X 944184841 Model identification EOE7P31Z 944184893 Energy Efficiency Index 81.2 Energy efficiency class Energy consumption with a standard load, conventional mode 1.09 kWh/cycle Energy consumption with a standard load, fan-forced mode 0.69 kWh/cycle... -
Page 42: Environmental Concerns
When the cooking duration is longer than 30 Moist Fan Baking min, reduce the appliance temperature to Function designed to save energy during minimum 3 - 10 min before the end of cooking. cooking. The residual heat inside the When you use this function the lamp appliance will continue to cook. - Page 44 electrolux.com...
Need help?
Do you have a question about the COE7P31X and is the answer not in the manual?
Questions and answers