Table of Contents
Advertisement
Quick Links
Advertisement
Table of Contents

Related Manuals for Electrolux EOE8P31V


Summary of Contents for Electrolux EOE8P31V
- Page 1 User Manual Oven EOE8P31V EOE8P31X electrolux.com/register...
-
Page 2: Table Of Contents
WE’RE THINKING OF YOU Thank you for purchasing an Electrolux appliance. You’ve chosen a product that brings with it decades of professional experience and innovation. Ingenious and stylish, it has been designed with you in mind. So whenever you use it, you can be safe in the knowledge that you’ll get great results every time. -
Page 3: Safety Information
SAFETY INFORMATION Before the installation and use of the appliance, carefully read the supplied instructions. The manufacturer is not responsible for any injuries or damage that are the result of incorrect installation or usage. Always keep the instructions in a safe and accessible location for future reference. -
Page 4: Safety Instructions
similar accommodation where such use does not exceed (average) domestic usage levels. Only a qualified person must install this appliance and • replace the cable. Do not use the appliance before installing it in the built-in • structure. Disconnect the appliance from the power supply before •... - Page 5 • Do not pull the appliance by the handle. • Always use a correctly installed • Install the appliance in a safe and suitable shockproof socket. place that meets installation requirements. • Do not use multi-plug adapters and • Keep the minimum distance from other extension cables.
- Page 6 – do not keep moist dishes and food in the appliance after you finish the Total power (W) Section of the cable cooking. (mm²) – be careful when you remove or install maximum 2300 the accessories. • Discoloration of the enamel or stainless maximum 3680 3x1.5 steel has no effect on the performance of...
- Page 7 2.5 Pyrolytic cleaning temperature Pyrolytic cleaning operation of all Pyrolytic Ovens and can be also a source for low level harmful fumes. WARNING! • Fumes released from all Pyrolytic Ovens / Risk of Injury / Fires / Chemical Cooking Residues as described are not Emissions (Fumes) in Pyrolytic harmful to humans, including children, or Mode.
-
Page 8: Installation
3. INSTALLATION 3.1 Building in WARNING! Refer to Safety chapters. www.youtube.com/electrolux www.youtube.com/aeg How to install your AEG/Electrolux Oven - Column installation (*mm) min. 550 min. 560 (*mm) min. 550 min. 560 ENGLISH... -
Page 9: Product Description
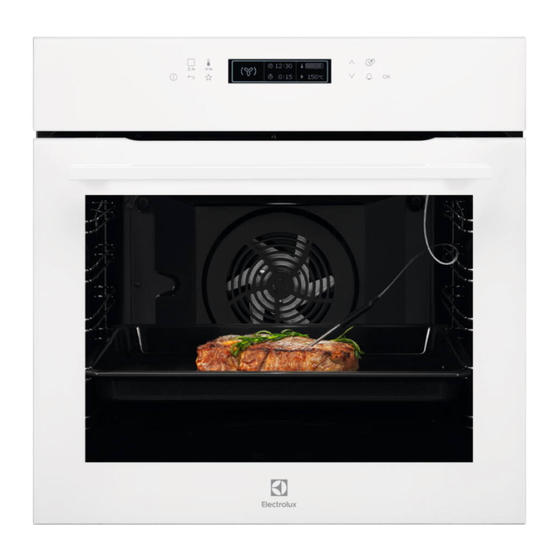
3.2 Securing the oven to the cabinet 4. PRODUCT DESCRIPTION 4.1 General overview Control panel Electronic programmer Socket for the food sensor Heating element Lamp Shelf support, removable Shelf positions 4.2 Accessories • Food sensor To measure how far the food is cooked. •... -
Page 10: Control Panel
5. CONTROL PANEL 5.1 Electronic programmer 9 10 Use the sensor fields to operate the oven. Sensor Function Comment field ON / OFF To turn on and off the oven. Heating Functions or Press the sensor field once to choose a heating function or the Assisted Cooking menu: Assisted Cooking. -
Page 11: Before First Use
5.2 Display A. Heating function B. Time of day C. Heat-up indicator D. Temperature E. Duration time or end time of a function Other indicators of the display: Symbol Function Minute Minder The function works. Time of day The display shows the current time. Duration The display shows the necessary time for cook‐... -
Page 12: Daily Use
6.2 First Connection Before the first use you have to set: Language Display contrast Display Brightness Time of day 6.3 Initial preheating Preheat the empty oven before the first use. Step 1 Remove all accessories and removable shelf supports from the oven. Step 2 Set the maximum temperature for the function: Let the oven operate for 1 h. - Page 13 7.6 The menus in overview Symbol / Menu Description Main menu item Symbol / Menu Application Activates and deactivates item the time extension function. Time Extension Contains a list of heating Adjusts the display contrast functions. Heating Functions by degrees. Display Contrast Contains a list of automatic Adjusts the display bright‐...
- Page 14 Heating function Application Heating function Application To bake food on one shelf po‐ To preserve vegetables sition for a more intensive (e.g., pickles). browning and a crispy bottom. Pizza Function Preserving Set the temperature 20 - 40 °C lower than for the func‐ To dry sliced fruit, vegeta‐...
- Page 15 7.10 Assisted Cooking Dish Food Category: Fish / Seafood Spare ribs Dish Pork knuckle, pre-cooked Fish Fish, baked Pork joint Fish fingers Pork Loin of pork Fish fillet, frozen Pork neck Whole small fish, grilled Pork shoulder Whole fish, grilled Veal knuckle Whole fish, grilled Loin of veal...
- Page 16 Food Category: Pizza / Quiche Dish Dish Apple strudel, frozen Pizza, thin Sponge dough Pizza, extra topping Cake on tray Yeast dough Pizza, frozen Pizza Cheese cake, tray Pizza American, frozen Brownies Pizza, chilled Swiss roll Pizza snacks, frozen Yeast cake Baguettes au gratin Crumble cake Tarte flambée...
-
Page 17: Clock Functions
8. CLOCK FUNCTIONS 8.1 Clock functions table 8.3 Heat + Hold Conditions for the function: Clock function Application • The set temperature is more than 80 °C. • The function: Duration is set. To set a countdown (max. 2 h 30 min). -
Page 18: Using The Accessories
1. Turn on the oven. 1. Turn on the oven. 2. Select the menu: Assisted Cooking. 2. Select the menu: Recipes. Press confirm. Press 3. Select the dish with the function: Weight 3. Select the category and dish. Press to confirm. Automatic. - Page 19 devices. The high rim around the shelf WARNING! prevents cookware from slipping of the shelf. The food sensor is hot. There is a risk of burns. 10.2 Inserting accessories A small indentation at the top increases safety. The indentations are also anti-tip Wireshelf: Push the shelf between the guide bars of the shelf support and make sure that the feet point down.
-
Page 20: Additional Functions
Step 1 Pull out the right and left hand telescopic Step 2 Put the wire shelf on the telescopic runners. runners and carefully push them into the oven. 11. ADDITIONAL FUNCTIONS 11.1 Favourites Activating the programme You can save your favourite settings, such as 1. - Page 21 2. Set a heating function or setting. 3. Press again and again until the display shows: Function Lock. (°C) 4. Press to confirm. 30 - 115 12.5 If the Pyrolysis function works, 120 - 195 the door is locked and the symbol of a key comes on in the 200 - 245 display.
-
Page 22: Hints And Tips
12. HINTS AND TIPS Leave the meat for approximately 15 minutes Refer to Safety chapters. before carving so that the juice does not seep out. To prevent too much smoke in the oven 12.1 Cooking recommendations during roasting, add some water into the The oven has five shelf positions. - Page 23 (°C) (min) Rolls, 9 pieces baking tray or dripping pan 30 - 40 Pizza, frozen, 0.35 kg wire shelf 10 - 15 Swiss roll baking tray or dripping pan 25 - 35 Brownie baking tray or dripping pan 25 - 30 Soufflè, 6 pieces ceramic ramekins on wire 25 - 30...
- Page 24 (°C) (min) Small Conventional Baking tray 20 - 30 cakes, 20 Cooking per tray Small True Fan Baking tray 150 - 160 20 - 35 cakes, 20 Cooking per tray Small True Fan Baking tray 2 and 4 150 - 160 20 - 35 cakes, 20 Cooking...
-
Page 25: Care And Cleaning
13. CARE AND CLEANING WARNING! Refer to Safety chapters. 13.1 Notes on cleaning Clean the front of the appliance with a microfibre cloth with warm water and a mild detergent. Use a cleaning solution to clean metal surfaces. Clean stains with a mild detergent. Cleaning Agents Clean the cavity after each use. - Page 26 13.3 How to use: Pyrolytic Cleaning CAUTION! If there are other appliances Clean the oven with Pyrolytic Cleaning. installed in the same cabinet, do WARNING! not use them at the same time There is a risk of burns. as this function. It can cause damage to the oven.
- Page 27 Step 2 Lift and pull the latches until they click. Step 3 Close the oven door halfway to the first opening position. Then lift and pull to remove the door from its seat. Step 4 Put the door on a soft cloth on a stable sur‐ face.
-
Page 28: Troubleshooting
Make sure that you put the glass panels (A and B) back in the correct sequence. Check for the symbol / printing on the side of the glass panel, each of the glass panels looks different to make the disassembly and assembly easier. - Page 29 14.1 What to do if... Problem Possible cause Remedy You cannot activate or operate the The oven is not connected to an Check if the oven is correctly con‐ oven. electrical supply or it is connected nected to the electrical supply (refer incorrectly.
-
Page 30: Energy Efficiency
......... Serial number (S.N.) ......... 15. ENERGY EFFICIENCY 15.1 Product Information and Product Information Sheet* Supplier's name Electrolux EOE8P31V 949498425 Model identification EOE8P31X 949498421 Energy Efficiency Index 81.2 Energy efficiency class Energy consumption with a standard load, conventional mode 0.93 kWh/cycle Energy consumption with a standard load, fan-forced mode 0.69 kWh/cycle... -
Page 31: Environmental Concerns
elements automatically turn off earlier in warm. The residual heat indicator or some appliance functions. temperature appears on the display. The fan and lamp continue to operate. When Cooking with the lamp off you turn off the appliance, the display shows Turn off the lamp during cooking. - Page 32 electrolux.com...
Need help?
Do you have a question about the EOE8P31V and is the answer not in the manual?
Questions and answers