Table of Contents
Advertisement
8/18/2021
LMU-2600 Hardware & Installation Guide
IMPORTANT: DO NOT INSTALL OR USE THE SOFTWARE OR DOCUMENTATION UNTIL YOU
HAVE READ AND AGREED TO THE LICENSE AGREEMENT AND REVIEWED THE LIMITED
WARRANTY AND REGULATORY INFORMATION.
1 Introduction
Welcome to the LMU-2600™ Hardware and Installation Guide. This manual is intended to give you information on
the basic setup and installation of the CalAmp LMU-2600™ product(s) including hardware descriptions,
environmental specifications, wireless network overviews and device installation.
1.1 About This Manual
The LMU-2600™ is one of the most flexible economy mobile tracking hardware products available. In order
to accurately describe the functionality of these units we have broken this manual into the following sections:
System Overview – A basic description of a CalAmp LMU-2600™ based tracking system. This
includes a description of roles and responsibilities of each of the CalAmp components as well as a
brief overview of the wireless data technologies used by the LMU-2600™.
Hardware Overview – Describes the physical characteristics and interfaces of the LMU-2600™.
Installation and Verification – Provides guidance for the installation of the LMU-2600™ in a
vehicle and instructions on how to verify the installation is performing adequately.
1.2 About The Reader
In order to limit the size and scope of this manual, the following assumptions have been made about the
reader.
You are familiar with GPS concepts and terminology
https://puls.calamp.com/wiki/LMU-2600_Hardware_%26_Installation_Guide
LMU-2600 Hardware & Installation Guide - PULS Wiki
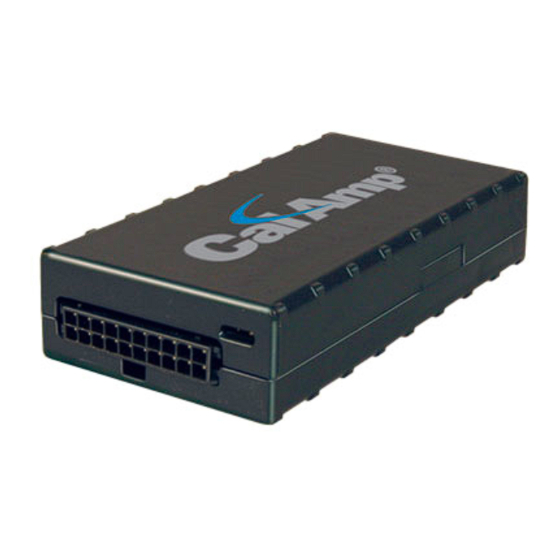
LMU-2600™
Hardware and Installation Guide
1/44
Advertisement
Table of Contents

Related Manuals for CalAmp LMU-2600


Summary of Contents for CalAmp LMU-2600
- Page 1 WARRANTY AND REGULATORY INFORMATION. 1 Introduction Welcome to the LMU-2600™ Hardware and Installation Guide. This manual is intended to give you information on the basic setup and installation of the CalAmp LMU-2600™ product(s) including hardware descriptions, environmental specifications, wireless network overviews and device installation.
-
Page 2: About Calamp
ETA, monitoring vehicle and driver status or dispatching the vehicle to its next pick up. These functions, of course, are completely dependent on the capabilities of the vehicle management application. The role of the CalAmp LMU-2600™ is to deliver the location information when and where it is https://puls.calamp.com/wiki/LMU-2600_Hardware_%26_Installation_Guide... -
Page 3: Lmu Manager
The Wireless Data Network provides the information bridge between the LM Direct™ server and the LMU- 2600™. Wireless data networks can take a variety of forms, such as cellular networks, satellite systems or local area networks. Contact the CalAmp sales team for the networks available to the LMU-2600™. https://puls.calamp.com/wiki/LMU-2600_Hardware_%26_Installation_Guide... -
Page 4: Lm Direct™ Server
LMU-2600 Hardware & Installation Guide - PULS Wiki 2.2.2 LMU-2600™ The LMU-2600™ is responsible for delivering the location and status information when and where it is needed. Data requests mainly come from the following sources: PEG™ script within the LMU-2600™... -
Page 5: Hardware Overview
LMU Manager is the primary configuration tool in the CalAmp system. It allows access to almost every feature available to the LMU-2600™. Unlike the backend software, it has the option of talking directly to an LMU-2600™ or making a request forwarded by the LM Direct™ server. -
Page 6: Operating Temperature
3.1.2 Battery Back-up devices Please properly dispose of the battery in any of the CalAmp products that utilize one, do not just throw used batteries, replaced batteries, or units containing a back-up battery into the trash. Consult your local waste management facility for proper disposal instructions. -
Page 7: Primary Connector
8/18/2021 LMU-2600 Hardware & Installation Guide - PULS Wiki Storage Temperature C to 85 Humidity 0% to 95% relative humidity, non-condensing Shock and Vibration SAE Test: SAE J1455 Compliant Mil Standard 202G and 810F Compliant Ground vehicle environment with associated shock and vibration... - Page 8 8/18/2021 LMU-2600 Hardware & Installation Guide - PULS Wiki The LMU-2600™ uses a Male (pin) Molex Micro-Fit 3.0 Dual Row, 20 circuit header to receive power, ground and supply input and output signals. The pin out is as follows: Signal...
- Page 9 8/18/2021 LMU-2600 Hardware & Installation Guide - PULS Wiki LMU-2600™ Header The mating connector for the LMU-2600™ is the 3.00mm (.118") Pitch Micro-Fit 3.0™ Receptacle Housing, Dual Row, 20 Circuits connector. Part Number 430252000 (www.molex.com (http://www.molex.com/pdm_docs/ps/PS-43045.pdf) ) 3.2.1 LMU-2600™ - 3 Wire Power Cable The standard power harness for the LMU-2600™...
- Page 10 Full I/O Wiring Harness 3.2.3 LMU-2600™ - Serial Adapter To add a host serial adapter to the LMU-2600™ there are 2 additional parts: Part Number 133360: Serial Pigtail Adapter. This is connected to 5C867 to provide a connection for the Serial Adapter itself Part Number 133337: Serial Adapter.
- Page 11 LMU-2600 Hardware & Installation Guide - PULS Wiki Attaching the Pig-Tail Serial Adapter These instructions describe how to connect the Serial Pig-Tail Adapter to the LMU-2600™’s 20 Pin wiring harness. It is recommended that the LMU be powered-off and the cable detached when installing the lead kit.
- Page 12 8/18/2021 LMU-2600 Hardware & Installation Guide - PULS Wiki Switch LED Cable Assumbly Buzzer and Cable Assembly 3.2.5 GPS Receiver The LMU-2600™’s GPS receiver has the following specifications: 50 channel GPS receiver Accuracy: 2 meter CEP (with SA off) -160dBm Tracking Sensitivity For external models, the antenna connector is SMA female.
-
Page 13: External Rf Connector
3.4.1 3-Axis Accelerometer Input The LMU-2600™ supports an internal 3 Axis Precision Accelerometer as one of its discreet inputs. When the LMU is moved in any direction, the associated input will be in the High state. If the LMU’s accelerometer does not detect motion, then the input will be in the Low state. - Page 14 8/18/2021 LMU-2600 Hardware & Installation Guide - PULS Wiki the vehicle power input level (typically 12 VDC). Their input impedance is approximately 10k . One of these inputs is dedicated to sensing the vehicle’s ignition status to provide for flexible power management. The other two inputs may be used to sense vehicle inputs such as cooling unit operation, a hidden driver “Panic”...
- Page 15 8/18/2021 LMU-2600 Hardware & Installation Guide - PULS Wiki Sample Input Wiring 3.4.3 Outputs https://puls.calamp.com/wiki/LMU-2600_Hardware_%26_Installation_Guide 15/44...
- Page 16 Sample Relay Wiring 3.4.4 Status LEDs The LMU-2600™ is equipped with two Status LEDs, one for GPS and one for COMM (wireless network status). The LEDs use the following blink patterns to indicate service: LED #1 (Comm LED - Orange) Definitions...
-
Page 17: Configuration And Activation
4 Configuration and Activation This section details how to quickly get an LMU-2600™ provisioned and configured to point at a specific server. It is assumed that a PEG script has already been created and is being managed through LMU Manager or PULS™, the CalAmp Maintenance System. - Page 18 5. Enter ATIC to verify the correct settings are displayed for your Inbound Server. This configuration process is accomplished via a series of SMS Commands: 1. Power up the LMU-2600™ and your handset 2. From the handset, send an SMS message to the LMU-2600™ phone number: !RP,2319,0,ddd.ddd.ddd.ddd !RP,768,0,ddd.ddd.ddd.ddd...
- Page 19 8/18/2021 LMU-2600 Hardware & Installation Guide - PULS Wiki o APN 0: PROXY o APN 1: PUBLIC AT&T – formerly Cingular Wireless (MCC 310, MNC 17, 18, 41) o APN 0 & 1: ISP.CINGULAR o Username: ISP@CINGULARGPRS.COM o Password: CINGULAR1 Manxpronto (MCC 234, MCN 058) o APN web.manxpronto.net...
- Page 20 4.3 Activating GSM or HSPA LMU using AT Commands Check with the CalAmp Sales team for availability of the LMU-2600™ with GSM or HSPA modems. For a GSM/GPRS operator you will get the LMU in one of two varieties, one with a SIM and one without.
- Page 21 8/18/2021 LMU-2600 Hardware & Installation Guide - PULS Wiki The IMEI, IMSI and ICC-ID are all available through the ATI1 command. The IMEI should also be printed on the bottom of the LMU. You should also get an APN (Access Point Name) value. The APN is the device on the network that allows a GPRS device (i.e.
-
Page 22: Accessing The Sim
The following instructions should be used when attempting to access the SIM in a GSM LMU-2600™. 1. Remove the top plate of the LMU-2600™. The LMU-2600™’s enclosure is held together by 4 plastic clips. To remove the cover, squeeze the top plate of the LMU near the 20 pin header and pull up then repeat this action near the SIM cover. - Page 23 ESN. Obviously the first two items are answered by “CalAmp LMU”. The last one is a little misleading. The ESN on the LMU is the CalAmp serial number. The one the operator is interested in is the MSN-D (which they call the decimal ESN). DO NOT give them the CalAmp ESN (i.e. the top one on the label).
- Page 24 2600™ will automatically use this system to attempt to self provision. This procedure assumes that the LMU- 2600™ has never been provisioned or activated before. 1. Power on the LMU-2600™, making sure you can observe the behavior of the Comm LED. 2. Wait until the Comm LED turns solid. This could take up to 5 minutes.
-
Page 25: Installing The Lmu
LMU-2600 Hardware & Installation Guide - PULS Wiki Activating an LMU-2600™ on the Sprint CDMA network is identical to activating on the Verizon network. 1. Power on the LMU-2600™, making sure you can observe the behavior of the Comm LED. -
Page 26: Plan The Installation
8/18/2021 LMU-2600 Hardware & Installation Guide - PULS Wiki LMU peripherals (i.e. Serial adapter, jPOD, TetheredLocator) Host serial devices (e.g. PDAs, laptops, other serial devices) 5.2 Plan The Installation Verify Power, Ground and Ignition. Be sure to check each source (power, ground and ignition) to ensure that the proper signaling exists. - Page 27 If possible, it should be located at least 3 feet from the GPS antenna. Ensure that the cable does not get crushed during installation. Please note that the antennas provided by CalAmp combine both the GPS and Comm portions. GPS Antenna Placement Guidelines In order to maximize the performance of the LMU the GPS antenna should have a clear view of the sky.
- Page 28 8/18/2021 LMU-2600 Hardware & Installation Guide - PULS Wiki Examples of Good (Green), OK(Yellow) and Poor(Red) combo antenna placements Examples OK(Yellow) and Poor(Red) internal antenna placements 5.2.3 Access to the SIM (Subscriber Identity Module) Card When used in a GSM or iDEN network, each LMU uses a Subscriber Identity Module (SIM) card, which should be inserted before you install the LMU for the first time.
-
Page 29: Installing The Lmu In A Vehicle
8/18/2021 LMU-2600 Hardware & Installation Guide - PULS Wiki Status LED lights on the front of the LMU unit can provide valuable information about the operation of the LMU. When feasible, attempt to install the LMU in such a way that these lights can be seen with reasonable ease. - Page 30 8/18/2021 LMU-2600 Hardware & Installation Guide - PULS Wiki Attach the LMU to the solid body of the vehicle, not to plastic panels. The LMU can be placed out of sight by removing interior trim and molding to expose available space, then replacing the trim once the LMU is in place.
- Page 31 8/18/2021 LMU-2600 Hardware & Installation Guide - PULS Wiki GPS Antenna Location 5.3.4 Mount the Comm. Antenna. When using separate Comm and GPS antennas, it is best to locate the Comm. Antenna at least 3 feet from the GPS antenna. Ensure that the cable is not crushed during installation or normal vehicle operation.
-
Page 32: Installation Verification
Completed Install - Internal antennas 5.4 Installation Verification In many cases it is desirable to verify that an installed LMU-2600™ is working properly. That is, installers should verify that the GPS and communications functions of the LMU-2600™ are working properly before departing the installation site. - Page 33 If any of the responses return Not-Acquired or Not-Registered (and the APN is correct), the wireless network operator should be contacted for further troubleshooting. Please note that it may take several seconds (or longer) for the LMU-2600™ to communicate with the modem and acquire the wireless network.
- Page 34 5.4.3 Inbound Verification The last item to verify is that the LMU-2600™ is sending data to the correct server. In general, this is a two- step process that will need the aid of an observer on the back end. That is, a technician will have to be logged in so they can monitor data coming into the backend mapping/vehicle management application.
- Page 35 8/18/2021 LMU-2600 Hardware & Installation Guide - PULS Wiki The current Comm, GPS and Inbound status of a GSM LMU can be obtained via SMS provided you have access to an SMS capable phone or PDA. Using your handset, send the following SMS Message to the LMU: Within a few minutes, the LMU should return a response in the following format: APP: <App ID>...
- Page 36 8/18/2021 LMU-2600 Hardware & Installation Guide - PULS Wiki This field indicates if the LMU’s log is currently active. An ‘L’ indicates that the log is currently in use (i.e. one or more records have been stored) where a ‘.’ indicates the log is inactive.
- Page 37 Example GSM Response APP:081 8.3d COM:0 GPS:No Time Sync INP:11100111 13.7V MID:4141000100 ESN INB:207.7.101.227:20500 LMD 6 CalAmp Locations CalAmp's Corporate headquarters is located in Irvine, CA, with many divisional and satellite locations across the United States as well as internationally. https://puls.calamp.com/wiki/LMU-2600_Hardware_%26_Installation_Guide 37/44...
-
Page 38: License Agreement
License Agreement, DO NOT INSTALL OR USE THE SOFTWARE, APIs OR DOCUMENTATION. For a full refund, return the unused media package and all accompanying materials within seven (7) days to CalAmp. Where there is no packaging or media, use of the software and/or documentation constitutes acceptance. - Page 39 CalAmp, or which you have received or downloaded electronically. “Application” means a compiled or executable software program created by Developer that uses some or all of the functionality of the Software.
- Page 40 Software or Documentation except as permitted above; (2) Make copies of the Related Materials; (3) Use any CalAmp product to translate the product of another licensor unless you have the legal right to do so; (4) Allow a greater number of Developers to access the Software at any one time than the total number of Developer licenses for which you have paid;...
-
Page 41: Limited Warranty
Application or make copies of the Application, except one backup copy may be made for each legally obtained copy of the Application, provided that all CalAmp and third party licensor information — including copyright notices — are maintained and possession of the copy is retained in a secure location;... -
Page 42: Regulatory Information
You also agree that: (1) No oral or written information or advice given by CalAmp, its dealers, distributors, agents or employees shall in any way increase the scope of this Limited Warranty and you may not rely on any such information or advice; (2) Unless a written governing... - Page 43 20 cm is normally maintained between the transmitter’s antenna and the body of the user or nearby persons. The LMU-2600™ is not designed for or intended to be used in mobile applications (within 20 cm of the body of the user) and such uses are strictly prohibited.
- Page 44 8/18/2021 LMU-2600 Hardware & Installation Guide - PULS Wiki This device complies with Industry Canada license-exempt RSS standard(s). Operation is subject to the following two conditions: (1) this device may not cause interference, and (2) this device must accept any interference, including interference that may cause undesired operation of the device.
Need help?
Do you have a question about the LMU-2600 and is the answer not in the manual?
Questions and answers