
Related Manuals for CalAmp LMU-3 Series


Summary of Contents for CalAmp LMU-3 Series
-
Page 1: Table Of Contents
LMU-3xx Hardware & Installation Guide Contents 1 Introduction 1.1 About This Manual 1.2 About The Reader 1.3 About CalAmp 1.4 About the CalAmp Location Messaging Unit-LMU-3xx™ 2 System Overview 2.1 Overview 2.2 Component Descriptions 2.2.1 Wireless Data Network 2.2.2 LMU-3xx™... -
Page 2: Introduction
System Overview – A basic description of a CalAmp LMU-3xx™ based tracking system. This includes a description of roles and responsibilities of each of the CalAmp components as well as a brief overview of the wireless data technologies used by the LMU-3xx™. -
Page 3: About The Reader
CalAmp delivers cost-effective high quality solutions to a broad array of customers and end markets. CalAmp is the leading supplier of Direct Broadcast Satellite (DBS) outdoor customer premise equipment to the U.S. satellite television market. The Company also provides wireless data communication solutions for the telemetry and asset tracking markets, private wireless networks, public safety communications and critical infrastructure and process control applications. -
Page 4: System Overview
ETA, monitoring vehicle and driver status or dispatching the vehicle to its next pick up. These functions, of course, are completely dependent on the capabilities of the vehicle management application. The role of the CalAmp LMU-3xx™ is to deliver the location information when and where it is needed. -
Page 5: Component Descriptions
The Wireless Data Network provides the information bridge between the LM Direct™ server and the LMU- 3xx™. Wireless data networks can take a variety of forms, such as cellular networks, satellite systems or local area networks. Contact the CalAmp sales team for the networks available to the LMU-3xx™. 2.2.2 LMU-3xx™... -
Page 6: Lm Direct™ Server
2.2.6 LMU Manager™ LMU Manager is the primary configuration tool in the CalAmp system. It allows access to almost every feature available to the LMU-3xx™. Unlike the backend software, it has the option of talking directly to an LMU-3xx™... -
Page 7: Lmu-3Xx™ Handling Precautions
The GPS receiver can be damaged if exposed to an RF level that exceeds its maximum input rating. Such exposure can happen if a nearby source transmits an RF signal at sufficiently high level to cause damage. Storage and Shipping One potential source of EOS is proximity of one LMU-3xx™ GPS Antenna to another LMU-3xx™ GSM https://puls.calamp.com/wiki/LMU-3xx_Hardware_%26_Installation_Guide 7/37... -
Page 8: Battery Back-Up Devices
3.1.2 Battery Back-up devices Please properly dispose of the battery in any of the CalAmp products that utilize one, do not just throw used batteries, replaced batteries, or units containing a back-up battery into the trash. Consult your local waste management facility for proper disposal instructions. -
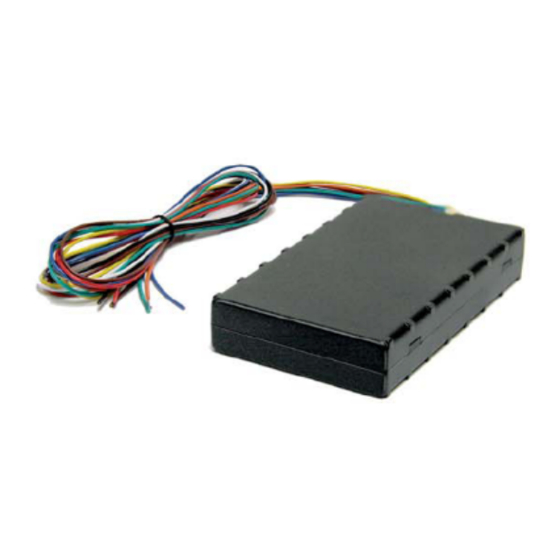
Page 9: Location Messaging Unit - 3Xx
Quad Band Class 12 GPRS Modem 850 MHz (Class 4) – 2W 900 MHz (Class 4) – 2W 1800 MHz (Class 1) – 1W 1900 MHz (Class 1) - 1W GPRS Packet Data (UDP) RoHS Compliant 3.2 Location Messaging Unit - 3xx™ https://puls.calamp.com/wiki/LMU-3xx_Hardware_%26_Installation_Guide 9/37... -
Page 10: Lmu-3Xx™ Connectors
Input Out-0 Output 0 Green Output IN-1 Input 1 Blue Input 1BB Data 1-Bit Bus Data White/Blue Output 3.3.2 Serial Adapter LMU Serial Cable (Part Number 133337) This is the standard serial cable used with most LMU products. https://puls.calamp.com/wiki/LMU-3xx_Hardware_%26_Installation_Guide 10/37... -
Page 11: Configuration And Activation
You have created, installed and configured an LM Direct™ Server to receive messages from the LMU-3xx™. (See LM Direct™ Reference Guide for details) You are using the standard wiring harness from CalAmp and the serial port expansion harness. You have created a HyperTerminal or Putty session. -
Page 12: Quick Start - General Config
3. Alternatively if a URL has been set up for your LM Direct™ server, the LMU may be programmed with: ! R P , 2 3 1 9 , 0 , m y U R L . M y C o m p a n y . C o m https://puls.calamp.com/wiki/LMU-3xx_Hardware_%26_Installation_Guide 12/37... -
Page 13: Auto Provisioning Of Gsm Or Hspa Lmus
Password: gprs Orange UK (MCC 234, MNC 33, 34) o APN 0 & 1: orangeinternet o Username: user o Password: pass T-Mobile (MCC 310, MNC 16, 20, 21, 22, 23, 24, 25, 26, 27, 31, 58, 66, 80) https://puls.calamp.com/wiki/LMU-3xx_Hardware_%26_Installation_Guide 13/37... - Page 14 Auto-provisioning occurs when the LMU detects a SIM with a new operator ID (i.e. the first 6 digits of the IMSI) or when Bit 0 of S155 is cleared and the GPRS context is blank (i.e. Parameter 2306,0). https://puls.calamp.com/wiki/LMU-3xx_Hardware_%26_Installation_Guide 14/37...
-
Page 15: Activating Gsm Or Hspa Lmu Using At Commands
4.3 Activating GSM or HSPA LMU using AT Commands Check with the CalAmp Sales team for availability of the LMU-3xx™ with GSM or HSPA modems. For a GSM/GPRS operator you will get the LMU in one of two varieties, one with a SIM and one without. -
Page 16: Accessing The Sim
ESN. Obviously the first two items are answered by “CalAmp LMU”. The last one is a little misleading. The ESN on the LMU is the CalAmp serial number. The one the operator is interested in is the MSN-D (which they call the decimal ESN). DO NOT give them the CalAmp ESN (i.e. the top one on the label). -
Page 17: Activating A Cdma Lmu-3Xx™ - Verizon
MSID can be the same value. 4.5.1 Activating a CDMA LMU-3xx™ – Verizon Verizon supports a system that allows CDMA devices to be provisioned Over-The-Air. A CalAmp LMU- 3xx™ will automatically use this system to attempt to self provision. This procedure assumes that the LMU- 3xx™... -
Page 18: Activating A Cdma Lmu-3Xx™ - Sprint
Unfortunately, this is something the LMU-3xx™ does not support, so the activation must be performed manually. Bell Mobility will provide you with a password to gain access to the network (ex: 8889). The activation procedure will be as follows: 1. Power on the LMU-3xx™. https://puls.calamp.com/wiki/LMU-3xx_Hardware_%26_Installation_Guide 18/37... - Page 19 C o n n e c t i o n : Y e s R S S I - 8 0 d B m C h a n n e l : B a n d : S i d e : 8 0 0 : B https://puls.calamp.com/wiki/LMU-3xx_Hardware_%26_Installation_Guide 19/37...
-
Page 20: Installing The Lmu
The best way to ensure a trouble-free installation is to consider your options and make some decisions before you start. Take a look at the vehicle and determine how to best install the LMU for the following purposes: https://puls.calamp.com/wiki/LMU-3xx_Hardware_%26_Installation_Guide 20/37... -
Page 21: Size And Placement Of Lmu Unit
If possible, it should be located at least 3 feet from the GPS antenna. Ensure that the cable does not get crushed during installation. Please note that the antennas provided by CalAmp combine both the GPS and Comm portions. GPS Antenna Placement Guidelines In order to maximize the performance of the LMU the GPS antenna should have a clear view of the sky. - Page 22 5° above the horizon with the best location being near the center of the roof. For more covert installs, directly under the front or rear-windshields are also acceptable. Examples of Good (Green), OK(Yellow) and Poor(Red) combo antenna placements https://puls.calamp.com/wiki/LMU-3xx_Hardware_%26_Installation_Guide 22/37...
-
Page 23: Access To The Sim (Subscriber Identity Module) Card
If at any time you should encounter a problem with the LMU, you may need to read the LEDs in order to troubleshoot the problem. If you cannot fix the LMU yourself, you will need to provide the LED information to CalAmp customer support. For information about how to interpret the LEDs, see the Status LED Behavior section. -
Page 24: Moisture And Weather Protection
The ignition input (white wire) must be connected to the vehicle ignition or another appropriate key operated line, such as ACCESSORY, ensuring that power to the ignition wire is available only when the vehicle ignition is on. The ground line (black wire) must be connected to chassis ground. https://puls.calamp.com/wiki/LMU-3xx_Hardware_%26_Installation_Guide 24/37... -
Page 25: Place The Gps Antenna
GPS antenna. Ensure that the cable is not crushed during installation or normal vehicle operation. Again, the Comm. Antenna must be located at least 20cm away from vehicle passengers, other personnel, or bystanders in order to comply with FCC radio frequency exposure limits. https://puls.calamp.com/wiki/LMU-3xx_Hardware_%26_Installation_Guide 25/37... -
Page 26: Typical Connection Sequence
Connect the cable from the Comm.. antenna Connect any peripherals to the LMU Plug in the power harness. The physical installation of the LMU hardware is now complete. Completed Install – separate antennas Completed Install - Internal antennas https://puls.calamp.com/wiki/LMU-3xx_Hardware_%26_Installation_Guide 26/37... -
Page 27: Installation Verification
: r o u t i n g i d = 0 , l o g c i d = 0 , m o d e m t y p e = 2 1 , i n b n d i n d e x = 0 If any of the responses return Not-Acquired or Not-Registered (and the APN is correct), the wireless https://puls.calamp.com/wiki/LMU-3xx_Hardware_%26_Installation_Guide 27/37... -
Page 28: Gps Verification
If the GPS receiver does not have a valid lock within 2-3 minutes, installers should check antenna placement (see the Installation Notes section for placement suggestions), the antenna connector and that the antenna has a clear view of the sky. For further troubleshooting, installers should contact CalAmp Support (M2MSupport@CalAmp.com) 5.4.3 Inbound Verification... -
Page 29: Verification Via Sms
I N B : < i n b o u n d I P a d d r e s s > : < i n b o u n d p o r t > < I n b o u n d P r o t o c o l ( L M D / L M X ) > APP: o <App ID>: The Application ID value of the LMU indicating the host platform and the wireless networking technology of the LMU. https://puls.calamp.com/wiki/LMU-3xx_Hardware_%26_Installation_Guide 29/37... - Page 30 A value of Open indicates that the antenna cable is either cut or disconnected. A value of Off indicates that the LMU’ GPS receiver is off. o [No Time Sync]: https://puls.calamp.com/wiki/LMU-3xx_Hardware_%26_Installation_Guide 30/37...
- Page 31 UDP port you are using on your LM Direct™ server. It is typically 20500. o <Inbound Protocol (LMD/LMX)>: This is the current UDP/IP messaging protocol in use by the LMU. In general it should be LMD. Example GSM Response https://puls.calamp.com/wiki/LMU-3xx_Hardware_%26_Installation_Guide 31/37...
-
Page 32: License Agreement
License Agreement, DO NOT INSTALL OR USE THE SOFTWARE, APIs OR DOCUMENTATION. For a full refund, return the unused media package and all accompanying materials within seven (7) days to CalAmp. Where there is no packaging or media, use of the software and/or documentation constitutes acceptance. - Page 33 License Certificate. The Software is licensed on a per Developer, and on a per User, per Application basis. In order to preserve and protect its rights under applicable law, CalAmp is not selling you ownership rights to Software or Documentation (owned by or licensed to CalAmp). CalAmp specifically retains title to all CalAmp Software, Documentation and Related Materials and CalAmp licensors retain title to items owned by them.
- Page 34 Application or make copies of the Application, except one backup copy may be made for each legally obtained copy of the Application, provided that all CalAmp and third party licensor information — including copyright notices — are maintained and possession of the copy is retained in a secure location;...
-
Page 35: Limited Warranty
Documentation or Related Material(s) shall be replacement of the media, Documentation or Related Material(s) by CalAmp. Each defective item, along with proof of license purchase and date, must be sent in a traceable manner to: CalAmp DataCom Inc., 1401 North Rice Ave. Oxnard, CA 93030. -
Page 36: Regulatory Information
You also agree that: (1) No oral or written information or advice given by CalAmp, its dealers, distributors, agents or employees shall in any way increase the scope of this Limited Warranty and you may not rely on any such information or advice; (2) Unless a written governing... - Page 37 20 cm must be maintained between the unit’s antenna and the body of the user and any nearby persons at all times and in all applications and uses. Additionally, in mobile applications, maximum antenna gain must not exceed 3 dBi. https://puls.calamp.com/wiki/LMU-3xx_Hardware_%26_Installation_Guide 37/37...
Need help?
Do you have a question about the LMU-3 Series and is the answer not in the manual?
Questions and answers