
Subscribe to Our Youtube Channel
Related Manuals for Cole Parmer CB-200 Series


Summary of Contents for Cole Parmer CB-200 Series
- Page 1 Cole-Parmer ® CB-200 Series Block Cooling Unit Instruction Manual 6106334 Version 4.2...
-
Page 2: Table Of Contents
CONTENTS PAGE INTRODUCTION BEFORE USE Unpacking SAFETY AND INSTALLATION SÉCURITÉ ET CONSIGNES D'INSTALLATION SICHERHEITS- UND INSTALLATIONSINFORMATIONEN INFORMAZIONI SULLA SICUREZZA E INFORMACIÓN DE SEGURIDAD E INSTALACIÓN INSTALACIÓNl CONTACT INFORMATION SPECIFICATION OPERATION Installation Power up Screen Front Panel Controls Setting the Operating Temperature Changing the Timer Mode Setting the Count Down Time Starting the Timer... -
Page 3: Introduction
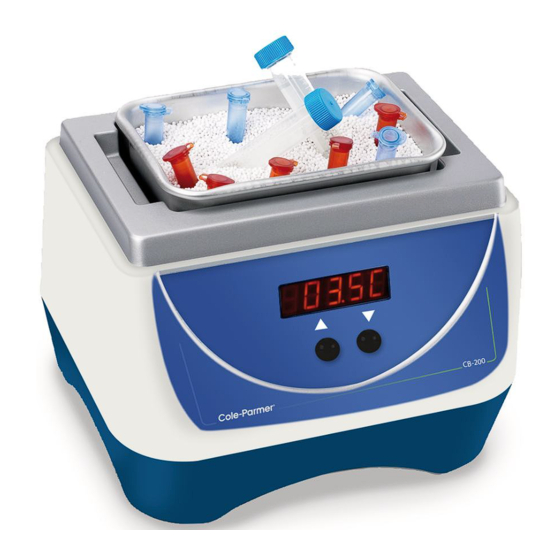
INTRODUCTION The CB-200D is a Peltier controlled cooling/warming device which is ideal for incubating sample tubes at temperatures in the range of 0 to 40ºC. The unit has an integral count down/count up timer with audible alarm to set and monitor reaction times. The CB-200D can hold two interchangeable aluminium insert blocks or one 96-well plate block for cooling a variety of tube formats. -
Page 4: Before Use
BEFORE USE Before using the CB-200D please make sure you have read this manual carefully. If there is any doubt relating to the proper use of this equipment, the staff at Antylia Scientific or your supplier will be happy to assist you. UNPACKING When unpacking the unit please ensure that the following have been removed from the packaging: •... -
Page 5: Safety And Installation
SAFETY AND INSTALLATION Please read all the information in this manual before using the CB-200D. WARNING Contact with low-temperature objects may cause cold burns. Users should be aware of the following potential hazards: • USE CARE AND WEAR PROTECTIVE GLOVES TO PROTECT HANDS •... - Page 6 6. Plug the mains cable into the socket on the back of the instrument. 7. Switch on the instrument. Symbols on or near the power switch of the unit have the following meanings: Mains Switch On O Mains Switch Off REPLACEMENT CABLE Should the mains lead need replacement, a cable of 1mm of harmonized code H05VV-F connected to...
-
Page 7: Sécurité Et Consignes D'installation
SÉCURITÉ ET CONSIGNES D’INSTALLATION Veuillez lire attentivement toutes les instructions de ce document avant d’utiliser le CB-200D. AVERTISSEMENT Le contact avec les objets à basse température peut causer les brûlures froides. Les utilisateurs devraient se rendre compte des risques suivants: •... - Page 8 5. Placez l’unité sur un banc plat approprié ou dans un compartiment de vapeur s’il y a lieu, en s’assurant que les évents sur l’arrière et le dessous sont exempts de l’obstruction. 6. Raccorder le câble d’alimentation à la prise située à l’arrière de l’appareil. 7.
-
Page 9: Sicherheits- Und Installationsinformationen
SICHERHEITS- UND INSTALLATIONSINFORMATIONEN Lesen Sie diese Anleitung vor Verwendung des CB-200D bitte sorgfältig durch. ACHTUNG Kontakt mit niedrigtemperaturgegenständen kann kalte Brände verursachen. Benutzer sollten die folgenden möglichen Gefahren berücksichtigen: • UMSICHTIG VORGEHEN UND SCHUTZHANDSCHUHE TRAGEN • Flüssigkeiten NICHT direkt auf das Gerät auftragen. SICHERHEIT DES BEDIENPERSONALS Alle Benutzer von Cole-Parmer Geräten müssen Zugang zu der entsprechenden Literatur haben, um ihre Sicherheit zu gewähren. - Page 10 5. Legen Sie die Maßeinheit auf eine verwendbare flache Bank oder in einen Dampfschrank wenn erforderlich und garantieren, dass die Luftentlüftungsöffnungen auf der Rückseite und der Unterseite vom Hindernis frei sind. 6. Stecken Sie das Netzkabel in die Buchse auf der Geräterückseite ein. 7.
-
Page 11: Informazioni Sulla Sicurezza E
INFORMAZIONI SULLA SICUREZZA E L’INSTALLAZIONE Leggere attentamente il presente manuale prima di usare il CB-200D. AVVERTENZA Il contatto con gli oggetti a bassa temperatura può causare le ustioni fredde. Gli utenti dovrebbero essere informati di seguenti rischi potenziali: • PRESTARE ATTENZIONE ED INDOSSARE GUANTI PROTETTIVI PER LE MANI •... - Page 12 5. Disponga l’unità su un banco piano adatto o in un armadietto di vapore a richiesta, accertandosi che i cunicoli di ventilazione sulla parte posteriore e sul lato siano esenti dall’ostruzione. 6. Inserire il cavo di rete nella presa che si trova sul retro dello strumento. 7.
-
Page 13: Información De Seguridad E Instalación
INFORMACIÓN DE SEGURIDAD E INSTALACIÓN Lea atentamente este manual antes de utilizar el CB-200D. ADVERTENCIA El contacto con los objetos a baja temperatura puede causar quemaduras frías. Los usuarios deben ser conscientes de los peligros potenciales siguientes: • TENGA CUIDADO Y LLEVE GUANTES DE PROTECCIÓN PARA PROTEGERSE LAS MANOS •... - Page 14 6. Conecte el cable de alimentación en el enchufe situado en la parte trasera del instrumento. 7. Encienda el instrumento: Interruptor de alimentación encendido Interruptor de alimentación apagado CABLE DE REPUESTO Si es necesario sustituir el cable de alimentación, se debe utilizar un cable de 1mm de código armonizado H05VV, conectado a un enchufe IEC320.
-
Page 15: Specification
SPECIFICATION Temperature 0.0 to 40.0°C Temperature range Temperature accuracy ±1°C °C or °F Temperature units Peltier Cooling technology 0.1°C Temperature display resolution Orange LED, 5 digits Temperature display m/s, h/m, d/h up to 9 days Timer Dimensions Height 225mm Width 240mm Length 190mm... -
Page 16: Operation
OPERATION INSTALLATION See also the sections on Safety and Installation. 1. Place the unit on a suitable flat bench or in a fume cupboard if required, ensuring that the air vents on the rear and underside are free from obstruction. 2. -
Page 17: Setting The Operating Temperature
SETTING THE OPERATING TEMPERATURE Set Point Indicator Set Point Indicator 1. To view the current set temperature, press the SET button. The set temperature will be displayed and is indicated by the set point indicator in the top left hand corner of the display. 2. -
Page 18: Setting The Count Down Time
SETTING THE COUNT DOWN TIME The timer can be set to count down time in minutes and seconds, hours and minutes or days and hours up to a maximum of 9 days. Indicator point Indicator point 9. First set the timer to count down mode as described in steps 6 to 8. -
Page 19: Changing The Temperature Units
17. To restart the timer after a pause, press the PLUS button. 18. To stop the timer and reset, press the TIMER button. 19. When the count down timer reaches zero, a buzzer will sound and the timer will begin to count up to indicate the over-run time. -
Page 20: Faqs
FAQ'S Q1 How can I cool the beads more quickly? A1 If you intend to use the CB-200D to keep samples cool, then the block inserts can be stored in a refrigerator and then inserted into the unit when required. Q2 I have a Cole-Parmer Block Heater;... -
Page 21: Fuses
fuses If the display on the front panel is not lit, one of the two fuses may have blown. Check that there is no external cause, such as a faulty plug or lead. Check both fuses and replace the faulty fuse with a new one of the correct value (fuse values are given on the label next to the power inlet). - Page 22 ACCESSORIES The following block inserts are available for use with the CB-200D and can be ordered from Antylia Scientific or your Cole-Parmer dealer: Please visit www.coleparmer.com for a full list of available accessories. Product Tube size (diam.) Number of holes Block dimensions code (mm)
- Page 23 This product meets the applicable CE Directives that interference will not occur in practise. Where and UKCA Legislation for radio frequency there is a possibility that injury, damage or loss might interference and may be expected not to occur if equipment malfunctions due to radio interfere with, or be affected by, other equipment with similar frequency interference, or for general advise before qualifications.
- Page 24 Ordering Information Order No. Series Model Legacy SKU CB-200D 36620-17 CB-200 FBLOCKICE Warranty Registration India T: +91 22 61394444 T: +44 (0) 1480 272279 E: info@antylia.com E: uk.sales@antylia.com W: coleparmer.co.uk W: coleparmer.in China Germany T: +1 847 549 7600 T: +49 (0) 9377 92030 E: sales@antylia.com E: de.sales@antylia.com W:coleparmer.com...
Need help?
Do you have a question about the CB-200 Series and is the answer not in the manual?
Questions and answers