HeartSine samaritan SAM 350P User Manual
Pad trainer
Hide thumbs
Also See for samaritan SAM 350P:
- User manual (60 pages) ,
- User manual (60 pages) ,
- User manual (16 pages)

Subscribe to Our Youtube Channel
Related Manuals for HeartSine samaritan SAM 350P


Summary of Contents for HeartSine samaritan SAM 350P
- Page 1 EN-US HeartSine samaritan PAD Trainer ® ® user manual SAM 350P SAM 360P SAM 450P Trainer Trainer Trainer...
-
Page 2: Table Of Contents
For quick and easy identification, each HeartSine Training scenarios the rescuer on the rate of the CPR they are providing Trainer has a gold face while each HeartSine AED has Training scenario descriptions to the patient. SAM 450P uses impedance cardiogram a navy blue/black face. -
Page 3: Get To Know Your Heartsine Trainer
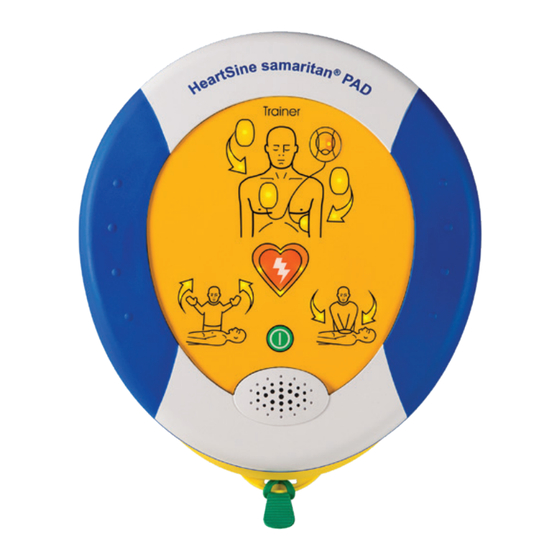
EN-US Get to know your HeartSine Trainer Get to know your HeartSine Trainer HeartSine SAM 350P Trainer layout HeartSine SAM 360P Trainer layout Data port Power port Data port Power port Remove blue cover and plug in Plug in power cable to charge the... -
Page 4: Heartsine Sam 450P Trainer Layout
Note: You should ensure that the Trainer-Pak is installed before using the HeartSine Trainer this indicator is flashing green when turned on. If You will not need to remove the Trainer-Pak to use or maintain the HeartSine Trainer. However, if the need CPR Rate Advisor flashing red, charge the arises to remove and/or install the Trainer-Pak, follow these steps. -
Page 5: Heartsine Sam 350P Trainer Remote Control
EN-US Get to know your HeartSine Trainer Get to know your HeartSine Trainer HeartSine SAM 350P Trainer remote control HeartSine SAM 360P Trainer remote control Volume control Off button Volume control Off button Press + to increase the volume Press to turn off the HeartSine... -
Page 6: Heartsine Sam 450P Trainer Remote Control
Set up your HeartSine Trainer EN-US Get to know your HeartSine Trainer HeartSine SAM 450P Trainer remote control with CPR Rate Advisor 1. Unpack your HeartSine Trainer buttons Contents include: Rate control buttons Note: See previous page for a If the student’s compressions are... - Page 7 7. Store your HeartSine Trainer in the carry case when it’s not being used. 4. Press the On/Off button on the HeartSine Trainer to turn it on. • Place the remote control, battery charger, spare electrode pads • Listen for the voice prompts to ensure the HeartSine Trainer is...
-
Page 8: Use Your Heartsine Trainer
See Training scenarios on page 22 for a description of each training scenario. Notes: • By default, the HeartSine Trainer will function in training scenario 1 until the default setting is changed 2. From the remote control, press a training scenario button (1-6) to using the HeartSine Trainer Configuration Tool or a different training scenario is selected on the remote select a training scenario. - Page 9 No compressions/Good speed button once to play the until either the HeartSine Trainer is turned off or you press the prompt “Begin CPR” and change the CPR Rate Advisor indicator...
-
Page 10: Student
Student 6. At any time, press the Pause/Play button to pause or play the 1. Place the HeartSine Trainer on the floor next to you, press the training scenario. (Push once to pause and a second time to On/Off button and follow the directions. - Page 11 5. Place first pad. • Place the first pad as shown in picture 8. Follow the prompts. 9. When finished, press the On/Off button to turn off the HeartSine Trainer. 6. Peel second pad. • With one thumb on the liner and one thumb on the pad, peel the...
-
Page 12: Training Scenarios
Repeat steps 6-8 until CPR mode CPR mode Repeat steps 6-8 until Repeat steps 6-8 until HeartSine Trainer is turned HeartSine Trainer is turned HeartSine Trainer is turned HeartSine Trainer is turned Repeat steps 4 to 9 until Repeat steps 4 to 9 until... -
Page 13: Mode Descriptions
EN-US Training scenarios Training scenarios Mode descriptions For each training scenario the list of prompts and required activity for each mode are provided here: Mode Prompts Activity Mode Prompts Activity Check pads “Check pads.” • Student follows prompts No shock advised “Stop CPR.”... -
Page 14: Maintain Your Heartsine Trainer
Trainer-Pak cartridge with the tops and bottoms aligned correctly. 6. Slide the bottom cover of the Trainer-Pak cartridge into place. 3. Turn over the HeartSine Trainer to locate the blue rewind handle on the back of the Trainer-Pak. EN-US... -
Page 15: Batteries
HeartSine Trainer pad and attach it to the Velcro on the same electrode pad in the • The HeartSine Trainer and battery charger are designed for indoor use only; do not use in wet or damp new pair. -
Page 16: Disposal
The HeartSine Trainer is a reusable device. If maintained in accordance with the instructions in this manual it 1. Connect the HeartSine USB cable to the data port on the HeartSine Trainer and to a USB port on the has a warranty period of two years from the date of manufacture. - Page 17 Change the volume 2. Launch the HeartSine Trainer Configuration Tool (TrainerConfig) app. You can change the volume of the prompts and metronome on the HeartSine Trainer. When delivered, the volume of the HeartSine Trainer will be set to “Max.” TrainerConfig 1.
- Page 18 In the unlikely event that two devices with the same ID number are being used at the same time, you can assign a new ID number to the HeartSine Trainer. It will be necessary to pair the device with its remote control after 2.
- Page 19 6. When you begin to hear a series of 12 beeps, release the Off button and replace the battery cover. You can change the language of the prompts on the HeartSine Trainer to any one of a selection of languages.
- Page 20 You can change the duration of the CPR periods within the training scenarios, to between 30 and 240 seconds. You can upgrade the firmware (software) on your HeartSine Trainer to the latest version. Be sure to download the latest Trainer Configuration Tool software from the HeartSine website (heartsine.com).
-
Page 21: Configure The Heartsine Trainer Configuration Tool
Configure the HeartSine Trainer Configuration Tool 3. Click “Apply”. A dialog box will appear to indicate that the application will be restarted for the changes to Within Settings, you can change the language used for the HeartSine Trainer Configuration Tool and enable or take effect. - Page 22 Agents”) are substantially free from defects in material and workmanship. This limited warranty applies only Tool app to indicate a later version of software is available, and you will be directed to the HeartSine website to the original end user and may not be assigned or transferred. An original end user is one who is able to where you can download the latest version.
-
Page 23: Limited Warranty Statement
800 442 1142. Our technical representative will try to resolve your issue over the phone. If necessary, and at our sole discretion, we will arrange for service or a replacement of your HeartSine product. You must not send back any product without our authorization. - Page 24 Notes EN-US...
- Page 25 Stryker or its affiliated entities own, use, or have applied for the following HeartSine Technologies, Ltd. trademarks or service marks: CPR Rate Advisor, HeartSine, samaritan, Stryker, 207 Airport Road West Trainer-Pak. All other trademarks are trademarks of their respective owners Belfast or holders.
Need help?
Do you have a question about the samaritan SAM 350P and is the answer not in the manual?
Questions and answers