Table of Contents
Advertisement
Quick Links
Advertisement
Table of Contents

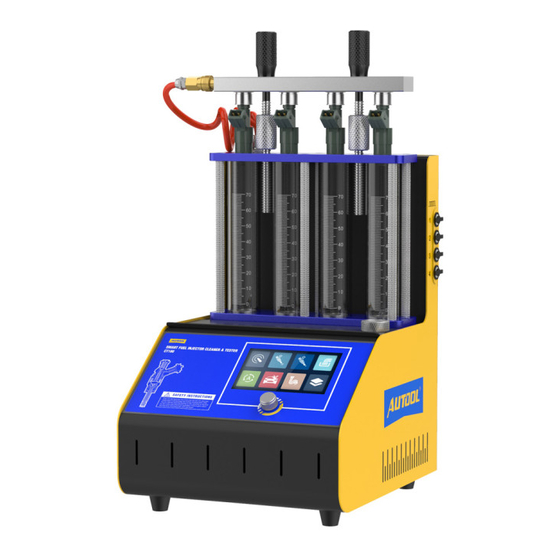
Summary of Contents for Autool CT180
- Page 1 AUTOOL CT180 Fuel Injector Tester User Manual www.autooltech.com...
-
Page 2: Copyright Information
AUTOOL. The information contained herein is designed only for the use of this unit. AUTOOL is not responsible for any use of this information as applied to other units. -
Page 3: Safety Precautions
Disclaimer information available at the time of publication. The manufacturer resume the right of modify this manual and the machine itself with no prior notice. Safety Precautions Read all service procedures and precautions, installation instructions and equipment operating manuals thoroughly. Failure to observe these precautions, or the improper use of equipment, could result in property damage, serious injury or death. - Page 4 Functions carbon deposits on the injector completely. monitor the spraying status of each injector with the help of backlight. This test is also for reverse flush. on the injectors on vehicle. Features injectors. injectors. cleaning, testing injectors and real-time monitoring of the dynamic values. be drained by pushing a button on the control panel after the test.
- Page 5 Structure Overview A-Power socket & ON/OFF Switch & Fuse For introduce AC power into the unit, and there’s a fuse socket, and a ON/OFF switch to turn on/off the unit. B-Control/display panel All the data will be shown on this touch screen, and adjustment of parameter could be done by finger tap.
-
Page 6: Control Panel
Control Panel All control of the unit is finished on a single touch LCD and a knob, which can be turned left/right to select and press to confirm. All explanation with a >>> means its a menu item. All explanation with a * mark, means its editable, and a window as below would pop up while tap the entry. - Page 7 Uniformity/Spray-ability test Leakage test Injecting flow test Automatic Test...
- Page 8 Mode Injecting for 8 seconds, On-Vehicle Test Fuel Drain Setting The setting page is used to setup the default value while the unit every time start up.
-
Page 9: Installation
Installation glass tube. pressing bolts. Operating Procedures Preparation aged O-ring with another same type O-ring to avoid leakage during testing. Put the outside of injectors in gasoline or detergent, and wipe them with soft cloth after cleaning the outside oil sludge carefully. side of the unit and observe the liquid level in the fuel level viewer.Do NOT exceeding the Max line. -
Page 10: Operation
Operation Ultrasonic Cleaning Injector Cleaner takes advantage of the penetrability and cavitation impact wave caused by ultrasonic wave traveling through the medium to provide powerful cleaning on objects with complex shapes, cavities and pores, so that the stubborn carbon deposits can be removed from the injectors. Procedures Connect the power supply: connect one end of the power cable to the power socket on ultrasonic cleaner and the other end to power socket. - Page 11 Installing and testing procedures for side-supply injectors<while parts are available> (Remember to apply a little lubricating grease.) any. <Run> button to start the testing. 。 Note: Injector Cleaner & Tester is running. A specific cylinder can be selected by setting the number of the cylinder.
- Page 12 tion. In order to prevent spillover, set the related parameter with reference to the following formula :Pulse Reverse flush Injector Cleaner & Tester can also perform reverse flush by connecting with flush-back adaptor at flowing from the outlet to the inlet of the injector. Reverse flush may remove the dirt inside the injector or Procedures: Note: Leakage Test...
- Page 13 Injecting Flow Test amount. The deviation reflects the wear or clogging in the injector, instead of electrical parameter variation. Procedures (For installation refer to Uniformity/Sprayability Test): Tap <Injecting flow test> icon on the main screen, and tap <Run> button to start the test. Adjust the fuel pressure according to the injector specification.
- Page 14 Connecting Disconnect the connections of fuel supply hoses (C、D) and fuel return hoses (A、 fuel system (wrap the connector with towel when disconnecting the connector). Choose proper connec- Connect the disconnected other ends (A、D) with proper hose, or remove the fuel pump fuse, or disconnect the power cable of engine fuel pump.
-
Page 15: Appendix 1: Pressure Gauge Of Injection System
Appendix 1: Pressure Gauge of Injection System COMPANY MODEL TOYOTA 3.0 0.284 PREVIA 0.27—0.33 LEXUS 300 400 0.265—0.304 TOYOTA CAMRY 3.0 0.265—0.304 LAND CRUISER 0.30 COROLLA 0.27—0.31 ACCORD 2.0 2.2 0.285 HONDA CIVIC 1.5L 0.255—0.285 LEGEND 3.2L 0.27—0.304 BLUE BIRD 0.25 NISSAN MAXIMA...


Need help?
Do you have a question about the CT180 and is the answer not in the manual?
Questions and answers