3Disc Heron IOS User Manual
Hide thumbs
Also See for Heron IOS:
- User manual (72 pages) ,
- Quick start manual (12 pages) ,
- User manual (22 pages)
Table of Contents
Advertisement
Quick Links
Advertisement
Table of Contents

Related Manuals for 3Disc Heron IOS


Summary of Contents for 3Disc Heron IOS
- Page 1 User Manual Version 3.7 IOS-FPM-71-001_EN...
- Page 2 Document Software version Date (d.m.y) Heron™ IOS User Manual 01.08.2018 IOS-FPM-71-001_EN 01.10.2019 01.01.2020 20.09.2021 3.4.x 27.10.2021 3.4.x 09.11.2021 01.02.2022 3.5.x 08.04.2022 15.06.2022 3.6.x 20.07.2022 20.10.2022 3.7.x 09.11.2022 Come and join the growing...
-
Page 4: Table Of Contents
1.4 Certification and compliance ................... 10 1.5 Regulatory ........................10 1.6 Intended Use ........................10 1.7 Classifications ........................11 1.8 3DISC Privacy Policy and GDPR Privacy Statement ............11 2. Components Overview ..........12 2.1 Hardware Components....................12 2.2 Software Components ..................... 12 2.3 System Requirements and Specifications ................ - Page 5 5. Configuring Settings & Preferences ......31 5.1 General Settings ......................31 5.2 Configuring Data Settings ....................33 5.3 Configuring Sound Settings....................36 5.4 Configuring User Settings ....................36 5.5 Configuring Upload Settings .................... 37 5.6 Configuring Case Setup Settings ..................37 5.7 Configuring Lab Sheet Settings ..................
- Page 6 Undercuts: User View ¶ ......................77 Undercuts: Auto-Detect ¶ ..................... 77 7.17 Using the Region Lock tool ¶ ................78 7.18 Using the Trim tool ....................78 7.19 Using the Measurement Tool ¶ ................79 7.20 Carrying Out A Bite Alignment ................80 Changing between automatic and manual mode ..............
- Page 7 Displaying a Case Order Form in HeronCloud ............113 9.13 Adding a Comment to a Case .................. 113 9.14 Contacting 3DISC Support in HeronCloudTM ............114 10. Maintenance ............115 10.1 Cleaning the Handpiece ..................115 10.2 Cleaning and Sterilizing Tips................115 10.3...
- Page 8 12. Support, Warranty and Repair Service ....129 12.1 Support ........................129 Operating Issues Checklist ....................129 12.2 Standard Warranty ....................129 12.3 Repair Service ......................130 12.4 Out of Warranty Repair Service ................130...
-
Page 9: Introducing The Heron™ Ios
Combined with the HeronClinic™ 3D Scanning and Case Management software, and the HeronCloud™ file-sharing platform for ordering and communicating with labs, the Heron IOS solution provides a comprehensive, intuitive and fully digital experience. We hope you enjoy your new intraoral scanner solution. -
Page 10: Certification And Compliance
· Conventional crowns · Implant-based bridges · Anatomic crowns · Tooth-based bridges · Copings · Orthodontic aligners · Provisional crowns · Nightguards · Anatomical pontics · Splints · Reduced pontics · Retainers · Provisional pontics · Bleach trays · Sleep appliances ·... -
Page 11: Classifications
Equipment not suitable for use in the presence of a flammable anesthetic mixture with air or with oxygen or nitrous oxide. 1.8 3DISC Privacy Policy and GDPR Privacy Statement Your privacy and the privacy of the patient data managed by you is important to 3DISC. -
Page 12: Components Overview
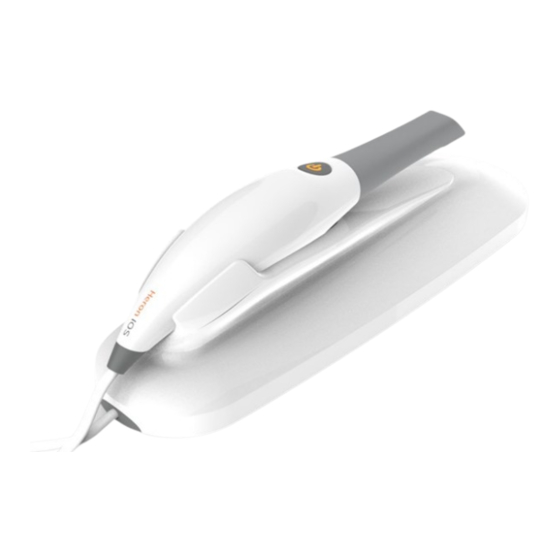
Components Overview The Heron™ IOS system is composed of hardware and software components. 2.1 Hardware Components The Heron IOS system is composed of the following hardware components*: 1. Heron IOS Scanner 2. Heron IOS base 3. Removable autoclavable tips 4. USB 3.0 cable 5. -
Page 13: System Requirements And Specifications
2.3 System Requirements and Specifications Scanner Specifications Hand-held (chairside) scanner that creates Scanner Type optical impressions for dental restorations. Compact, lightweight, ergonomic – designed Design to be operated with little physical effort. Size: L 306mm, W 98mm, H 72mm Dimensions Base Weight: 150 grams Dimensions Scanner Size: L 256mm, W 43mm, H 43mm... -
Page 14: Software Output And Design Software Compatibility
Compatibility with CAD/CAM Systems PLY, OBJ Compatible with most Dental CAD systems 2.5 Minimum Computer Requirements The following requirements have been defined by 3DISC to ensure the HeronClinic software operates properly. The related configurations have been tested by 3DISC. For an online version, visit:... - Page 15 NOTE: The use of 4K (3840 x 2160 pixels) or Ultra- Wide (3440 x 1440 pixels) resolutions is also possible, however the impact on performance has not been quantified by 3DISC at this stage. Software Configuration Recommendations 3DISC recommends deactivating all Windows Windows automatic updates automatic updates (except for security updates).
-
Page 16: Environment Conditions
These PC requirements may be revised without notice by 3DISC to take into account observations made on the field or additional test results performed by our teams. IMPORTANT: Compatibility of AMD GPUs is not guaranteed with the Heron IOS. Not meeting minimum hardware requirements will affect the performance of the scanner. -
Page 17: Reusable Tips
The scanner body consists of the Docking Base and Handpiece, which are connected by a flexible, non-detachable cable. 2.10 Calibration The Heron™ IOS™ is factory calibrated. In the case of calibration issues due to transport, please contact your reseller or 3Disc support technician. -
Page 18: Installing And Connecting The Heron™ Ios
A 4-5mm (3/16th in) distance between wall and bottom screw head is recommended. If the docking base is not properly installed there is a Caution possibility of the base falling and damaging the scanner. IMPORTANT: 3DISC is not responsible for accidents or damage caused in the event the scanner falls. -
Page 19: Connecting The Heron™ Ios
3.2 Connecting the Heron™ IOS For an online version, visit: Getting Started with Heron™ IOS To install and connect the Heron™ IOS Scanner: Step 1. Place the docking base on a flat, stable surface and place the Heron™ IOS handpiece securely on the base. - Page 20 Step 4. Connect the other end of the USB 3.0 cable to the computer. IMPORTANT: Make sure to use a USB port that is compatible with USB 3.0 (SuperSpeed), usually indicated by this symbol: not doing so may result system malfunction or reduced performance.
-
Page 21: Configuring Windows High Performance Graphics Mode
Configuring Windows High Performance Graphics Mode On laptop computers, battery settings in Windows should be configured to high performance mode only, with no battery saving option (Settings/System/Battery). To select High Performance mode for the HeronClinic application: 1. In Windows Graphic settings: click to activate Hardware-accelerated GPU scheduling 2. - Page 22 IMPORTANT: On laptop computers, battery settings in Windows should be configured to high performance mode only, with no battery saving option (Settings/System/Battery). WARNING: Unsuitable installation sites WARNING: Unsuitable installation sites: • Locations with excessive humidity or dust • Locations subject to high temperature •...
-
Page 23: Getting Started With Heronclinic
Getting Started With HeronClinic For an online version, visit: Getting Started with Heron™ IOS 4.1 Launching HeronClinic™ Once you have connected the Heron™ IOS scanner, you are ready to launch the HeronClinic™ software installed on your computer. Step 1. Click on the HeronClinic™ desktop icon to launch the HeronClinic™... -
Page 24: Accessing The Admin User Account
Data collected is used in accordance with the General Data Protection Regulation (GDPR) and is not shared with third parties. For information, see: section 1.8 3DISC Privacy Policy and GDPR Privacy Statement • https://gdpr-info.eu/ • Accessing the Admin User Account The HeronClinic™... -
Page 25: Adding A New User Account
Step 4. Select Users in the left-hand Settings menu, and click on Add and Edit Users. Step 5. Select the default “Heron Clinic” User profile, and click on the Edit icon to customize the default Admin User account. Note: The default admin ID “heronclinic” cannot be modified. -
Page 26: Password Protecting A User Account
The HeronCloud enables users to easily and efficiently setup and manage file transfers and connections with labs. Note: The Heron IOS HeronCloud platform is designed to facilitate file sharing and manage connections with laboratories. It is not a cloud storage service. - Page 27 For more information, see below: Chapter 9 - Communicating With Labs: • 9.1 - Linking a HeronClinic™ account to HeronCloudTM 9.2 - Creating A HeronCloud™ User Account (Clinic) •...
-
Page 28: Accessing The Heronclinic Tm Start Screen
4.5 Accessing the HeronClinic Start Screen User accounts are displayed in the left-hand menu of the HeronClinic™ Home Page. To access the User Start Screen: Step 1. Click on your User profile in the left-hand menu of the HeronClinic Home page. The HeronClinic™... -
Page 29: Access Directly Your Heroncloud Tm Account
You can display a list of Patients by: • Gender Case Creation Date (or range of dates) • Date of Birth • Select A User Start Page Default View To select a preferred Default View for the User Start Page: Step 1. - Page 30 Step 2. In General settings, Select Enable Direct Scan Workflow. (Note: this option is disabled by default). The Start Scanning bar is displayed in the User Start Screen. Next Steps For information on configuring HeronClinic Settings, see: Chapter 5 - Configuring Settings & Preferences •...
-
Page 31: Configuring Settings & Preferences
• Access resources: access the latest online user documentation, • 3DISC Online Help, 3Disc support portal... If you make a support request, you will be asked to specify the software version, User Interface (UI) version and Scanner Serial Number (S/N). - Page 32 3DISC Online Help Click to access the 3DISC Online Help. Click to allow secure remote control of your Teamviewer workstation by a 3Disc support technician. Support Page 3DISC support homepage. Click to restore default settings for the HeronClinic™ Restore Default Settings software.
-
Page 33: Configuring Data Settings
5.2 Configuring Data Settings Data settings enable users to: • Configure Case/Database Import/Export settings Carry out Case/Database Import/Export • Share/Restrict access to the Database • • Program automatic deletion of raw scan data (Auto Clean) Case/Database Export To configure Case/Database Export settings: Step 1. - Page 34 Step 3. [CTRL]+left-click to select multiple cases. Step 4. [CTRL]SHIFT+left-click to select a range of cases. All files related to the selected case(s) will be exported to the folder configured in Data Settings. Note: The destination folder must be empty. Case/Database Import To configure Case/Database Import settings, in Data Settings:...
- Page 35 Auto Clean Raw Scan Data Auto Clean settings enable you to automatically clean project data for cases after 1 week, 1 month or 3 months (default period: 3 months). Auto Clean will delete raw scan data, while still keeping case data sets available for review (indication and prescription remain available for cleaned cases).
-
Page 36: Configuring Sound Settings
5.3 Configuring Sound Settings Sound settings enable you to activate/deactivate the Audio Guidance feature during scanning, and to preselect sound effects and volume. Note: if the computer's volume is deactivated or muted the user will not hear the sounds. Sound Settings Description Sound Setting Description Activate to use Sound Guidance during scanning... -
Page 37: Configuring Upload Settings
5.5 Configuring Upload Settings The Upload setting enables users to select a default lab to transfer files to via their HeronCloud account. The default connection will be selected automatically when preparing orders to send to a lab. See below: Finalizing an Order 5.6 Configuring Case Setup Settings For an online version, visit: Case Setup Settings... - Page 38 Select Shade System In Select Shade System, click to select the desired Shade System: Vita Classic or Vita 3D-Master. Hide Patient Name Activate the Hide Patient Name feature to anonymize patient identity. This can be useful to protect patient privacy or to use anonymous case examples for training and presentation purposes.
- Page 39 Restoration Selector: Alternative When the Alternative option is selected in Settings, in the Case Setup page the Choose Restoration Type selector is displayed as shown: Restoration Selector: Standard When the Standard option is selected in Settings, in the Case Setup page the Choose Restoration Type selector is displayed as shown: Restoration Selector: Simple If the main work of your practice is limited to crown, coping or...
- Page 40 Restoration Selector: Advanced/Specialist ¶ When the Advanced Restoration Selector option is selected in Settings, in the Case Setup page the Choose Restoration Type selector is displayed as shown: When the Specialist Restoration selector option is selected in Settings, in the Case Setup page the Choose Restoration Type selector is displayed as shown: Edit Restorations The Restoration Editor enables you...
- Page 41 • Click Up or Down in the Restoration Editor to bring Restorations or Materials higher or lower in the list of available options. To Edit Restorations options, in Case Setup settings: Step 1. Click Edit to open the Restoration Editor. Step 2.
- Page 42 Step 4. Click Save and Close to save changes, or Click Close to close without saving changes. Step 5. Restart the HeronClinic to apply changes. Case Setup Settings Description Case Setup Setting Description Teeth Numbering System Select order form teeth numbering system Shade System Select order form Shade System Activate this feature to anonymize patient identity.
-
Page 43: Configuring Lab Sheet Settings
5.7 Configuring Lab Sheet Settings Lab Sheet settings enable users to customize Order forms for use by their organization, by adding the name, address and corporate logo to their Lab Sheets, and selecting a page format (A4/US Letter). Order Forms are published in PDF format, and created automatically based on the Case Setup Options and Lab Sheet settings selected by you. - Page 44 Hole Highlighting While Scanning When automatic hole highlighting is activated, this option highlights those areas during the live scan. This enables the user to see where holes are and complete them. 3D Projection Click to select either Perspective or Parallel default view of scanned arches.
- Page 45 3D Settings Description Description 3D Scan Setting 3D scanning software automatically fills any regions in the scan or “holes” where data is missing. Holes are filled when the user stops Hole Filling scanning and the model is displayed on the screen.
-
Page 46: Managing Patients & Cases
Managing Patients & Cases For an online version, visit: Managing Patients & Cases To start a User session, select a User account in the left- hand menu of the HeronClinic Start Screen. This will open the User Start Screen. To create a User Account, see above: Adding a New User Account 6.1 Managing Patient Profiles... - Page 47 Gender • Creation Date (or range of dates) • Date of Birth • Step 3. Click the Filter icon, and in the Filters dialog box select filter details. Step 4. Click Apply to apply the filter, or Cancel to cancel any modifications made to the filter. An active filter is indicated by a circle as shown.
- Page 48 Edit, Delete or Merge Patient Profiles It is possible to Edit, Delete or Merge a Patient profile by clicking on the 3-point icon to the right of the Patient folder and selecting the desired option. For information on merging patient profiles, see below: Merging a Direct Scan with a Patient Profile.
-
Page 49: Managing Patient Cases
6.2 Managing Patient Cases Previewing a Patient Case The Case Finalization page provides detailed case information at-a-glance: creation date, case ID, restoration types, status, and any 3D models and 2D images associated with the case... To preview a patient case: Step 1. - Page 50 Step 4. Click on the relevant icon in the left-hand menu. For information on using the Finalization page, see below: • Chapter 88 - Finalizing a Patient Case...
-
Page 51: Using Direct Scan
6.3 Using Direct Scan It is possible to skip the Case Setup step and directly access Heron IOS Scanning module. To do so, select the Start Scanning click bar in the HeronClinic Start Screen. In the case of a Direct Scan, the scan data is not associated with an existing patient profile, and is attributed an automatically generated patient ID. - Page 52 Step 1. Click on the 3-point icon to the right of the selected case as shown Step 2. Click Clone in the drop-down list. Note: You cannot clone a case for which scan data has already been deleted. Moving a Case If a case has been associated with an incorrect patient profile, you can move a case from one patient profile to another.
-
Page 53: Viewing Case Status
6.5 Viewing Case Status To access Case status details in the Finalization page: Step 1. Click on the status icon shown above. The expanded list provides information on the User, Case ID, Lab, Date the case was last modified, and the send status. Case Status Icons Case Status Description... -
Page 54: Setting Up A Case In Heronclinic Tm
6.6 Setting Up a Case in HeronClinic The following workflow briefly describes the typical steps and options available to set up a patient case in HeronClinic For an online version, visit: Creating a Patient Case Task 1: Create a New Case To create a new patient case: Step 1. - Page 55 Task 2: Select tooth/teeth for restoration Step 1. Click on the tooth or teeth to select for restoration. The Choose Restoration Type menu displays automatically. NOTE: You select a default Teeth Numbering System in Case Setup Settings options. Selecting teeth for a bridge restoration: To select multiple teeth to be bridged: Step 2.
- Page 56 To change the selected restoration type: Step 5. Right-click on the selected tooth to Delete then select another restoration type. Configuring a default Restoration Selector You can choose between different Restoration Selector options in Case Setup Settings. See above: Restoration Selector. Note: When you select restorations using a default selector, you cannot switch to an alternative selector in the Case Setup page without first deleting already selected restorations.
- Page 57 Restoration options Restoration option Description Manufacturer Available Manufacturers System Available Manufacturer Systems/Models Connection Type Available implant Connection types and sizes Material Available printed model materials Shade Available shade systems and shades NOTE: Available restoration options are displayed automatically depending on the selected restoration. Configuring Restoration Settings Available restoration options can be configured in the Case Setup Settings.
- Page 58 Order Form & Scan Options Description Patient ID Patient Name or Anonymized ID Lab Connection Connection to lab configured in the HeronCloudTM Delivery Date Requested delivery date for your order Printed Model Check this option to order a printed model Include a scan of the opposing teeth (selected by default).
- Page 59 The Scan Workflow Menu Depending on selected Case Setup options, relevant scanning steps will be automatically added to the Scan Workflow menu. For information on scanning with Heron IOS, see below: Chapter 7 - Scanning with HeronTM IOS • Finalizing Patient Cases...
-
Page 60: Scanning With Heron Tm Ios
Scanning with Heron For an online version, visit: Scanning with Heron IOS 7.1 Before You Scan Before scanning, take time to familiarize yourself with the Scanning tools and features available in the Heron IOS solution and the HeronClinic interface. Scan Tools Overview following scan tools are available with the current version. -
Page 61: Using The Scan Tip
7.2 Using the Scan Tip Each scanner is delivered with three (3) reusable tips, that can be sterilized in an autoclave up to 250 times. Step 1. Attach the tip with the mirror side facing down- ward. Firmly press the tip onto the scanner until you hear it lock into place. -
Page 62: An Example Scan Workflow Menu
7.3 An Example Scan Workflow Menu In the example shown below, based on the selected Restorations, the Scan Workflow indicates 6 Scan Steps and Finalization of the Order. Step 1. Pre-Op Scan Used to integrate pre-operative scans in the scan workflow. Step 2. -
Page 63: Useful Scanning Tips
7.4 Useful Scanning Tips Before You Scan ¶ To scan the maxillary arch, rotate tip to face up • To make the scanning process more comfortable for maxillary scans, remove the tip by pressing the button located under the handpiece and rotate the scanner tip 180 degrees. - Page 64 When Scanning… • Keep close to teeth (recommended distance from tip to tooth is 0-12 mm) Scan slowly and smoothly, to avoid interrupting the 3D • reconstruction (minimum 1 second per tooth) Keep teeth in center of the field of view •...
-
Page 65: Accessing The Heronclinic Tm Scan Workflow
7.5 Accessing the HeronClinic Scan Workflow To access the Scan Workflow: Step 1. Click NEXT in the Case Setup page, Step 2. Select the Maxillary arch in the left-hand Menu by clicking on the icon, or by using the Down key on your keyboard. 7.6 Scanning the Maxillary Arch Step 3. -
Page 66: Recommended Scanpath Strategy
Evolution of Scanpath Strategy Please note that the current Scanpath Strategy may evolve to take into account the latest algorithmic developments in 3D imaging. If in doubt, check with your 3DISC support contact. Scanning the Maxillary Arch For an online version, visit:... - Page 67 Step 1. Scan Maxillary Occlusal End-to-End First scan the OCCLUSAL surface from molar to molar, with a slow smooth motion, ensuring full occlusal surface is captured for all molars and premolars. This initial path will drive the cross-arch accuracy of the scan, so always stay flat on the teeth.
-
Page 68: Scanning The Mandibular Arch
Step 4. Scan Maxillary Palatal End-to-End Scan the PALATAL area from molar to molar, ensuring the connection of the surfaces (overlap): Scan with 45°angle to get part occlusal + part • palate Scan with 90°angle to get remaining • part of palate When you are finished scanning: Step 5. -
Page 69: Scan Memory Use
7.9 Scan Memory Use Over-scanning may use up available memory space. When the warning “Scan memory is running low please conclude scan” is displayed, no more frames will be added to the scan after this point. If the result is unsatisfactory, It is recommended you delete and redo the scan. -
Page 70: Using Scan Tools
7.11 Using Scan Tools At each step of the scan workflow, you can use the features available in the right-hand Scan Tools menu. For an online version, visit: Using Scan Tools For an overview of available scan tools for this release, see above: Scan Tools Overview. -
Page 71: Using The Quality Map
7.12 Using the Quality Map ¶ Quality Map tool enables you to assess in real-time if enough data has been collected in the area of interest of the scan. For an online version, visit: Using the Quality Map © Quality Map To access the 1. -
Page 72: Disable/Enable Captured Color
Disable/Enable Captured Color ¶ To make contours more visible, you may wish to disable the natural color of the digital 3D model. Disable Captured Color 1. Click on the Disable Captured Color icon in the extended Color Palette menu. 2. To return to the natural colors of the scan, click again on the Disable/Enable... -
Page 73: Using Auto-Realignment
3. Click on the Delete icon to delete as necessary. 4. Click on the Close icon in the top right-hand corner to close the fullscreen view. Live View Screenshots taken during the scan can be viewed in Finalization page. 7.14 Using Auto-Realignment ¶ The Auto-Realignment tool carries out realignment of the scans, optimizing the scan data based on Artificial Intelligence (AI). -
Page 74: Using Heronclinic™ Live Scan Tools
7.15 Using HeronClinic™ Live Scan Tools ¶ During the HeronClinic™ Scan Workflow Live Scan Tools are displayed below the digital 3D Model. For an online version, visit: Using HeronClinic™ Live Scan Tools Live Scan Tool Description Undercuts Tool Undercuts Tool enables you to detect and calculate undercuts: User View:... -
Page 75: Using The Undercuts Tool
7.16 Using the Undercuts tool ¶ The HeronClinic™ Undercuts Tool automatically detects and calculates undercuts on the digital 3D model: User View: enables the practitioner to choose the insertion axis that will • be used to calculate undercuts on the dental arch Auto Detect: •... -
Page 76: Positioning The 3D Digital Model
Positioning the 3D Digital Model ¶ To position the 3D digital model: Click on the Navigation icon of the Region selector | • Navigation toggle button. Using the Navigation tool , Left-Click+Drag the 3D digital model to • the desired axis of insertion for the restoration. Selecting a Region ¶... -
Page 77: Undercuts: User View
Undercuts: User View ¶ The User View option enables you to choose the insertion axis, used to calculate undercuts on the dental arch. Navigation tool , Left-Click+Drag the 3D digital model to • Using the the desired axis of insertion for the restoration. Click on the User View button. -
Page 78: Using The Region Lock Tool
7.17 Using the Region Lock tool ¶ The HeronClinic™ Region Lock Tool allows you to lock data for a region/regions while scanning, to avoid any further updates of that region. To Select a Region to lock: Brush Region Selector | Navigation •... -
Page 79: Using The Measurement Tool
To use the Trim tool: Step 1. Click on the Trim icon in the Live Scan Tools menu. Step 2. Select the Trim brush size. Step 3. Click on the Navigation icon of the Trim | Navigation toggle button: using the Navigation tool , Left-Click+Drag to position the 3D digital model. -
Page 80: Carrying Out A Bite Alignment
7.20 Carrying Out A Bite Alignment The Heron™ IOS enables you to carry out fast and accurate Bite Alignment based on the previously scanned Maxillary and Mandibular arches. To advance to the Bite Alignment step: Click Next, or • the Bite Alignment icon in the left-hand Scan •... -
Page 81: Automatic Bite Alignment
Step 7. Repeat for adjacent tooth as necessary… Note: Take your time when scanning gingival regions. The Heron IOS software calculates the 3D bite reconstruction based on gingival data. This makes it possible to successfully scan edentulous areas of the arch. -
Page 82: Bite-Alignment Using A Single Bite Segment
Auto-locking of bite scan Once the software recognizes the scanned bite segment: • A sound signal is heard The scan automatically locks • The initial scanned arches are overlayed • A green checkmark displays in the top-left of the • screen, indicating you have finished scanning that segment. -
Page 83: Carrying Out A Manual Bite Alignment
Note: In the event of a quadrant scan, you will be asked to scan only the side of the quadrant. When doing full arch scans, you will be prompted to scan bilateral. Based on the left/right bite segment scans, the Heron™ IOS will automatically reconstruct the alignment of the full Maxillary and Mandibular arches in occlusal mode. - Page 84 Step 2. Scan a 2-3 teeth and 7-8mm gum segment on the LEFT molar/pre-molar region in Occlusion. You will be prompted to select a mandibular paired point on the bite segment. Step 3. Click Select Point and choose a point on the mandibular arch of the LEFT bite segment.
- Page 85 B. Align Maxillary-Paired Points Step 8. Click Select Point and choose a point on the maxillary arch of the LEFT bite segment. Step 9. When you have positioned the marker, left- click: a yellow dot will indicate the selected maxillary-paired point. Step 10.
-
Page 86: Auto-Realignment
7.23 Auto-Realignment Auto-Realignment feature enables you to optimize the scans of the maxillary and mandibular arches. The Heron IOS software’s AI will recalculate the results using specially developed imaging algorithms, retaining only the most accurate frames for 3D image reconstruction. -
Page 87: Using Bite Alignment Tools
7.24 Using Bite Alignment Tools The Bite-Alignment tools allow you to visually inspect the quality of the alignment scans. The Bite-Alignment Tool menu is displayed below the 3D reconstructed image. Occlusion Distance Map To visually check the clearance distance between the maxillary and mandibular arch scans: Step 1. -
Page 88: Finalizing A Patient Case
Finalizing a Patient Case For an online version, click: Finalizing a Case in HeronClinic 8.1 Finalizing an Order When you have completed the Scan Workflow for a patient, you are ready to finalize your order : Step 1. Click on the Finalization icon in the left-hand Scan Workflow menu, or click Next: This will launch the Finalization... - Page 89 Finalization Option Description Patient Details Patient Name, Date of Birth, Gender, Patient ID. For Patient Details options go to: Task 5: Enter Order Form Options Lab Details Lab connection, Requested Delivery Date, Printed Model. For details of Lab options go to: Task 5: Enter Order Form Options Order Form &...
-
Page 90: Using Case Finalization Tools
8.2 Using Case Finalization Tools For an online version, click: Using Case Finalization Tools Accessing Case Finalization Tools Case Finalization Tools are available in the Case Finalization 3D Models tab. To access 3D Model Case Finalization Tools Step 1. Click on the 3D Models tab. Step 2. - Page 91 Icon Case Finalization Tool Description Choose Color Display Choose between natural captured color, grayscale and bi-color display of digital 3D Model. Measurement Tool enabling you to take measurements on the digital 3D Model. Margin Line Tool The Margin Line Tracing tool enables you to trace margin lines on 3D models, in order to enhance the accuracy of lab restoration work.
-
Page 92: Using The Margin Line Tool
8.3 Using the Margin Line Tool The Margin Line Tool enables you to trace margin lines on 3D models, in order to ensure the accuracy of restorations ordered from the lab. To access the Margin Line Tool, in the Finalization Page: •... -
Page 93: Modifying A Margin Line
STEP 2. Highlight Tooth To highlight a tooth/zone: Click-left • To expand zone size: Click-left again (repeat as necessary). • To adjust the zone size: HOLD[CTRL] + scroll wheel • Click Next. • STEP 3. Draw Margin Line: To start margin line: Click-left then trace line. •... -
Page 94: Using The Model Closing Tool
8.4 Using the Model Closing Tool ¶ The Model Closing tool enables you to prepare 3D models for printing. To access the Model Studio Model Closing tool, in the Finalization Page: 1. Click to expand the 3D Models tab to full-screen. 2. -
Page 95: Reviewing 2D Images
3. Click EXPORT 4. Select or create an export folder, and Click OK. The closed model files are exported in the Case File Format selected in the Case Finalization page. For more information, visit: Case Finalization Options ¶ 5. Click Close to exit the Model Studio page. 8.5 Reviewing 2D images You can consult 2D images taken during the scan by clicking on the 2D IMAGES tab in the Finalization page:... -
Page 96: Check And Send Your Order
images by selecting and clicking on the delete icon. Step 5. Click OK to Confirm. Step 6. Click the top-right corner to leave fullscreen view. 8.6 Check And Send Your Order Verify Patient & Restoration details Step 1. Verify & complete as necessary Patient and Restorations information defined during the Case Setup step. -
Page 97: Verify Lab Order Details
Verify Lab Order Details Verify and complete Lab order details: Step 1. Verify/select the desired lab connection displayed in the LAB menu. Note: In Configuring Upload Settings, you can add lab connections, and select a default lab from those connected to your HeronCloud account. See above: Configuring a default lab connection Step 2. -
Page 98: Hide Patient Name When Sending To The Lab
Institution Name, • • Institution Address, Page Size, • • Institution Logo. Step 2. Verify Case, Patient and Order details on the Lab Sheet. Verify Restoration information. • Verify attached files and file format. • On page 2 of the Lab Sheet: Verify 3D Models and 2D Photos. -
Page 99: Resending A Modified Order Form
Resending a Modified Order Form If you wish to modify and resend an order to a lab, you will be asked if you want to replace the order sent or create a new order: If you choose to replace the case already sent to •... -
Page 100: Communicating With Labs
9. Communicating With Labs For an online version, visit: Communicating with Labs The HeronCloud enables you to send orders directly to labs, manage the progress and status of orders, and create and manage groups of Dental Clinic and Dental lab profiles. To send orders to a lab via the HeronCloud™... -
Page 101: Creating A Heroncloud™ User Account (Clinic)
Step 3. Select Use HeronCloud™ in the Add or Edit Users dialog box. Step 4. Click Save. HeronCloud™ Login window will open automatically, inviting you to Login or to Create a New Account. 9.2 Creating A HeronCloud™ User Account (Clinic) To create a user account in HeronCloud Step 1. - Page 102 Step 5. Click HOME to access the HeronCloud™ Sign In page. Step 6. Select a language in the scroll-down menu. Step 7. Enter your Admin account email address and password. Step 8. Click Sign In to access your HeronCloud™ Clinic account.
-
Page 103: Overview Of The Heroncloud Tm Dashboard
9.3 Overview of the HeronCloud Dashboard The HeronCloud Dashboard provides an at-a-glance overview of activity and options associated with your account: The Dashboard enables users to: 1. Access Patient Cases and configure connections with labs. 2. Configure account settings: Groups, Personal Settings, User Profile, Login/out. -
Page 104: Configuring Heroncloud Tm User Settings
9.4 Configuring HeronCloud User Settings To configure user settings in HeronCloud Step 1. In the bottom left-hand menu, click on your account ID. Step 2. expanded list, select the desired option. following configuration options are available for your HeronCloud account: HeronCloud Settings Description Opens the Profile page, where you can enter and edit your... -
Page 105: Configuring View & Notification Settings
9.6 Configuring View & Notification Settings To configure view & notification settings, in the HeronCloud Profile expanded list: Step 1. Click Personal Settings. Step 2. In the Personal Settings page: • Click checkboxes to select View and Notification settings for your HeronCloud account. -
Page 106: Configuring Connections With Labs
9.7 Configuring Connections with Labs When you have created a HeronCloud™ account and are logged in, you can now configure connections with the labs of your choice. Adding a lab connection To add a connection with a lab: Step 1. Click Connections in the HeronCloud™... -
Page 107: Selecting Default Upload Settings In Heronclinic Tm
Selecting Default Upload Settings in HeronClinic You can select a default lab connection in HeronClinic™, to transfer files to via your HeronCloud account: Step 1. Click the HeronClinic™ Settings icon. Step 2. Scroll to Upload Settings. Step 3. Click Select Default Lab, and choose a lab from the expanded list. -
Page 108: Managing Cases In Heroncloud Tm
9.8 Managing Cases in HeronCloud To access patient cases in the HeronCloud Dashboard: Step 1. Click on the Cases icon in the left-hand menu. The Cases page is displayed, showing the list of uploaded cases Step 2. Click on a case to display case details. The HeronCloud Cases page enables users to: 1. -
Page 109: Managing Case Status In Heroncloud Tm
9.9 Managing Case Status in HeronCloud Filtering Cases To filter cases in HeronCloud Step 1. Select the filter icon at the top of the list of cases. Step 2. Select the status, creation period, and/or an institution/user. Step 3. Click Apply. To remove an active filter click Reset All. -
Page 110: Case Status Descriptions And Permissions
Case status descriptions and permissions The following case status are available in HeronCloud Status Description Managed by Open Case uploaded by Clinic to HeronCloud Clinic Case being processed by Lab In Progress (case status modified by lab) Case treated and completed by Lab Completed (case status modified by lab) Case closed and reopened. -
Page 111: Displaying 3D Views In Heroncloud Tm
9.10 Displaying 3D Views in HeronCloud To display the 3D View a selected case: Step 1. Click SHOW 3D. Step 2. To view the 3D model in full screen: click on the icon in the top right-hand corner. Step 3. To increase/decrease the transparency for an arch: drag the slider left/right. -
Page 112: Downloading Case Files In Heroncloud Tm
9.11 Downloading Case Files in HeronCloud Downloading specific case files To download specific case files, in the Case details page: Step 1. Scroll down to Attachments. Step 2. Click on the arrow icon opposite the file attachment. Downloading all case files To download all files for a selected case: Step 3. -
Page 113: Displaying A Case Order Form In Heroncloud Tm
9.12 Displaying a Case Order Form in HeronCloud To display a Case Lab Sheet/Order Form in HeronCloud Step 1. Click the Printable Order Form button at the bottom of the Case details page. This will open the Lab Sheet/Order Form in .pdf format. Configuring Lab Sheet/Order Form settings For information on configuring Lab Sheet/Order Form settings, see above: •... -
Page 114: Contacting 3Disc Support In Heroncloudtm
Dashboard: Step 1. Click on Ask Support in the HeronCloud Dashboard. This opens the Contact page of the 3DISC website. Step 2. Click Ask a question/Book a demo/3DISC Support and enter your request. NOTE: All 3DISC online support requests are encrypted to respect user and patient data protection. -
Page 115: Maintenance
10. Maintenance 10.1 Cleaning the Handpiece The entire body, cord and base of the scanner must be wiped down using a Federal Environmental Protection Agency (EPA) approved disinfectant that is labeled and specified for tuberculocidal/ mycobactericidal activity. Do not use disinfectant on the nozzle. - Page 116 Step-by-Step Procedure Step 1. Clean the tip with soapy water, ensuring that the mirror is clean and free of smudges, stains, or any residue. Avoid using abrasive cloth materials as this will scratch the mirror. Step 2. After drying the tip exterior, carefully dry the interior and mirror with lint free wipes ensuring you do not scratch the sur- face.
-
Page 117: Disposal
If unauthorized changes have been made to the delivered system and accessories, the warranty by 3DISC becomes void. 3DISC will not accept any responsibility or liability for the improper functioning of the product in such a case. -
Page 118: Safety Guidelines And Warnings
If unauthorized changes have been made to the delivered system and accessories, the warranty by 3DISC becomes void. 3DISC will not accept any responsibility or liability for the improper functioning of the product in such a case. -
Page 119: General Warnings
11.3 General Warnings System Modification : Modifying the system may result in physical injury to the WARNING patient and operator, and damage to the system. Approved Software The Heron™ IOS device is designed to operate with the HeronClinic™ software. : The Heron™ IOS scanner should only be used with WARNING approved, compatible software. -
Page 120: Dropped Equipment
Dropped Equipment : If the scanner tip is dropped, ensure that the mirror WARNING is not damaged and that it is not detached; if the tip is damaged it should be disposed of immediately. If the scanner handpiece is dropped or bumped, ensure that no part of the system is damaged as it could affect performance. -
Page 121: Eye Safety
11.6 Eye Safety : During operation, the system emits a bright, flashing WARNING light from its tip. Although the system complies with standard IEC 62471 (Photobiological safety of lamps and lamp systems), prolonged exposure to flashing light may result in discomfort, seizure or eye irritation. - Page 122 : Portable RF communication equipment (including WARNING peripherals such as antenna cables and external antennas) should not be used within 30 cm of any part of the Heron™ IOS, including cables specified by the MANUFACTURER. Otherwise, performance degradation of this equipment may occur. NOTE: During operation of the system, the handpiece and the tip may get slightly warm;...
-
Page 123: Accessories
11.9 Accessories : Only use 3DISC approved accessories. Not using WARNING 3DISC approved accessories may result in deterioration of performance. Accessory 3DISC Part Number USB 3.0 Cable IOS-CP-00-043 AC/DC Power Adapter IOS-CP-00-088 Heron™ IOS is intended for use in a professional healthcare setting with electromagnetic environment specified below. - Page 124 Electrostatic ± 8 kV ± 8 kV Surface should be wood, discharge /Contact /Contact concrete, or ceramic tile. If floors (ESD) IEC ± 2 kV, ± 4 ± 2 kV, ± 4 are covered 61000-4-2 kV, ± 8 kV, kV, ± 8 kV, ± with synthetic material, the ±...
- Page 125 Conducted RF 3V 0.15- 3V 0.15- part of the Heron™ IOS system, IEC 61000-4-6 80MHz 80MHz including cables, than the 6V in ISM 6V in ISM recommended separation bands bands distance calculated from the between between equation applicable to the 0.15 MHz 0.15 MHz frequency of the transmitter.
- Page 127 11.11 Symbols on the Heron IOS and Transport Case Symbol Description Manufacturer’s trade name and address (ISO 15223-1) Date of manufacture (ISO 15223-1) Equipment Power On/Off (push/push) USB 3.0 plug Warning, Consult Accompanying Documents General mandatory action manual General prohibition indication...
- Page 128 INMETRO Certification Mark Ukraine Conformity Mark...
- Page 129 Support section of the 3DISC website. 12.2 Standard Warranty 3DISC warrants its non-consumable hardware products to be free from defects in materials and workmanship. The warranty covers the cost of parts and labor to repair the product.
- Page 130 repair should be properly packaged. To obtain warranty service, follow the procedure described in the Repair Service section. Failure to do so will cause delays and additional expense to the customer. The warranty is valid when the product is used for its intended purpose and does not cover products which have been modified without written permission from 3D Imaging and Simulation Corp.
- Page 131 We hope this User Manual was helpful to you. For additional material and user information go to: 3disc.com/support-resources/ Heron™ IOS User Manuals Heron™ IOS How-to Videos Heron™ IOS Training Videos...
- Page 132 Europe USA & Canada 3DISC Europe 3D Imaging and Simulations Corp. 3DISC Dental Connect Americas 191, avenue Charles de Gaulle, 365 Herndon Pkwy #18 92200, Neuilly-sur-Seine, Herndon, VA 20170 France Tel : +33 (0)1 42 25 73 98 Tel: +1 703 430 6080...
Need help?
Do you have a question about the Heron IOS and is the answer not in the manual?
Questions and answers