3Disc Heron IOS User Manual
Hide thumbs
Also See for Heron IOS:
- User manual (132 pages) ,
- Quick start manual (12 pages) ,
- User manual (42 pages)
Table of Contents
Advertisement
Quick Links
Advertisement
Table of Contents

Related Manuals for 3Disc Heron IOS


Summary of Contents for 3Disc Heron IOS
- Page 1 User Manual Version 3.4.x IOS-FPM-71-001-3.1_EN...
- Page 2 Document Software Version Date Heron™ IOS User Manual 08.01.2018 IOS-FPM-71-001 10.01.2019 01.01.2020 09.20.2021 3.4.x 10.27.2021 3.4.x 11.09.2021 3.4.x 11.23.2021 Come and join the growing...
-
Page 4: Table Of Contents
Introducing the Heron™ IOS ..........6 1.1 Introduction ........................... 6 1.2 What’s new in this version ......................6 1.3 Indications supported ......................6 1.4 Certification and compliance ....................6 1.5 Regulatory ........................... 7 1.6 Intended Use ........................7 1.7 Classifications ........................7 2. - Page 5 5.4.2 Scanning the Mandibular Arch ................39 5.4.3 Tri m mi n g scans ......................40 5.4.4 Using the Quality Map tool ..................40 5.4.5 Bite Alignment ......................41 5.4.6 Auto-Realignment ....................45 5.4.7 Using Bite Alignment Tools ..................46 5.4.8 Finalizing A Patient Case ..................
-
Page 6: Introducing The Heron™ Ios
Introducing the Heron™ IOS 1.1 Introduction Thank you for purchasing the Heron™ IOS from 3DISC. The Heron™ IOS is designed and developed to produce high-quality digital intraoral scans or models, for dental restoration or analysis. The Heron™ IOS solution is designed with you as a dentist and your patient in mind. -
Page 7: Regulatory
• IEC 60601-1, Medical electrical equipment - Part 1: General requirements for basic safety and essential performance • IEC 60601-1-2, Medical electrical equipment - Part 1-2: General requirements for basic safety and essential performance - Collateral Standard: Electromagnetic disturbances - Requirements and tests: •... -
Page 8: Components Overview
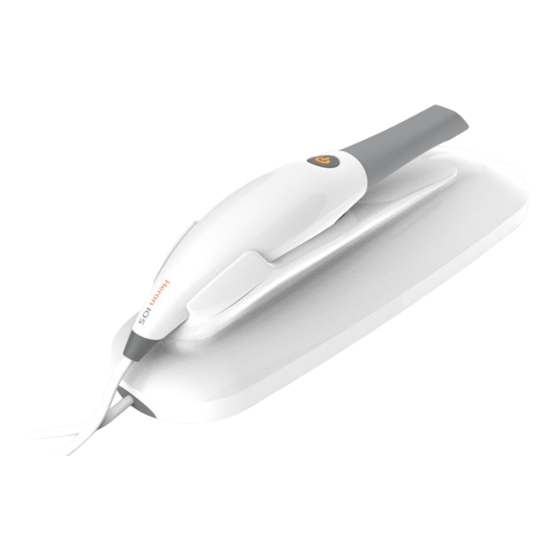
2. Components Overview The Heron™ IOS system is composed of hardware and software components. 2.1 Hardware Components The Heron IOS system is composed of the following hardware components: 1. Heron IOS Scanner 2. Heron IOS base 3. Removable autoclavable tips 4. -
Page 9: System Requirements And Specifications
3. System Requirements and Specifications 3.1 System Specifications 3.1.1 Scanner Specifications Scanner Type Hand-held (chairside) scanner that creates optical impressions for dental restorations. Design Compact, lightweight, ergonomic – designed to be operated with little physical effort. Dimensions Base Size: L 306mm, W 98mm, H 72mm Dimensions Scanner Weight: 150 grams Size: L 256mm, W 43mm, H 43mm... -
Page 10: Software Output And Design Software Compatibility
Possible contact duration by operator <10 min. Note: May vary with hardware configuration Operator accessible part Handpiece Possible contact duration by patient 10 min ≤ t Patient accessible part (Type B Applied Part) Tip (autoclavable) Computer – Scanner Interface USB 3.0 3.2 Software output and design software compatibility Output File Format STL, PLY, OBJ... -
Page 11: Environment Conditions
3.4 Environment Conditions Operating Temperature 10°C to 40°C Operating Relative Humidity 10% to 80% (non-condensing) Storage Temperature - 20°C to 60°C Storage Relative Humidity 10% to 80% (non-condensing) Indoor use only Installation Category Pollution Degree Ingress of Liquids IPXO Protective Class Class IIIb Overvoltage category II per IEC 60664-1... -
Page 12: Scanner Docking Base And Handpiece
The scanner body consists of the Docking Base and Handpiece, which are connected by a flexible, non-detachable cable. 3.8 Calibration The Heron™ IOS™ is factory calibrated. In the case of calibration issues due to transport, please contact your reseller or 3Disc support technician. Page 12 User Manual... -
Page 13: Wall Mount Installation Instructions (Optional)
If the docking base is not properly installed there is a Caution possibility of the base falling and damaging the scanner. IMPORTANT: 3DISC is not responsible for accidents or damage caused in the event the scanner falls. Page 13... -
Page 14: Setting Up Your Heron™ Ios
4. Setting up your Heron™ IOS 4.1 Connecting Heron™ IOS Installing and connecting the Heron™ IOS Solution To install and connect the Heron™ IOS Scanner: Place the docking base on a flat, stable surface and place the Heron™ IOS handpiece securely on the base. Connect the AC/DC power adapter cable to the docking base (the connector socket is located underneath the base). - Page 15 5. Connect the AC/DC power adapter to a power outlet. WARNING: Unsuitable installation sites: Locations with excessive humidity or dust Locations subject to high temperature Locations subject to shaking or vibration Locations exposed to considerable electrical or magnetic noise, or other forms of electromagnetic energy NOTE: It is strongly recommended to plug the USB cable to a USB port located at the back of the computer;...
-
Page 16: Launching Heronclinic
4.2 Launching HeronClinic™ Once you have connected the Heron™ IOS, you are ready to launch the HeronClinic™ software installed on your computer. On the computer, click on the HeronClinic™ desktop icon to launch the HeronClinic™ software. On first launch, the HeronClinic™ Startpage will display a default HeronClinic™... -
Page 17: Connecting Heron™ Ios To Heroncloud
4.2.2 Connecting Heron™ IOS To HeronCloud™ The Heron™ IOS Solution enables users to connect to its dedicated cloud platform HeronCloud to easily and efficiently setup and manage file transfers and connections with labs. If you select Use HeronCloud™ in the Add or Edit Users dialog box, the HeronCloud™ Login window will open automatically, inviting you to Login or to Create a New Account. -
Page 18: Getting Started With Heronclinic Tm
4.3 Getting Started With HeronClinic Using the HeronClinic Start Screen When you login to HeronClinic, the Patients or Cases default view is displayed (selected in settings). Patients/Cases View You can toggle between Patients and Cases views, and Filter or search desired Patients/Cases. - Page 19 • Click to open the Create New Patient dialog box. A Patient ID will be auto-generated. This • can be edited as required. • Enter Patient details and any useful medical notes. Click to Create. • Create new case Click on the Create New Case click bar to directly access the Order Form window in the Heron™...
-
Page 20: Configuring Heronclinic Tm Settings
4.4 Configuring HeronClinic Settings Settings Menu System settings can be accessed by clicking the System icon located in the top right-hand corner of the HeronClinic™ interface. To access a specific Settings group, you can select from the left-hand Settings Menu, filter by search or scroll down. - Page 21 Check for Software Updates software updates. An automatic check is done at launch Click to access User manual online User Manual Click to allow secure remote control of your Teamviewer workstation by a 3Disc support technician. Support Page 3DISC support homepage. Page 21...
- Page 22 Data Settings Data settings enable you to specify Import and Export Database and Export Path settings. You can also choose to share or restrict access to the Database. Description Data Setting Description Click on the EXPORT button to select the HeronClinic Data folder and Export folder, and Export Database...
- Page 23 Import Database Click on the IMPORT button to select the HeronClinic Data folder and Import folder. You can import All or Selected Cases. Sound Settings Sound settings enable you to activate/deactivate the Sound Guidance feature during scanning, and to preselect sound effects and volume. The sound setting enables you to configure the volume and sound effect from the computer during the scan.
- Page 24 User Settings In User settings you can Add or Edit Users using the administrator account (HC). User dossiers can be password protected, and linked to a HeronCloud account. Add And Edit Users Click the right-hand Edit icon to enter/modify User information: email, name and photo.
- Page 25 Customizing Restorations Click the Edit button to open the Restoration Editor. The Restoration Editor enables users to select/deselect Restoration types and materials available when filling out case Order forms. Customizing Implants Click the Edit button to open the Implants Editor. The Implants Editor enables users to customize the Manufacturers, Systems and Connection types that are available...
- Page 26 Add To/Delete From Implants Library Elements may be added to or deleted from the Implants library by clicking on the icons at the base of each column. Click Reset to reset to default values. Order Form PDF Settings These System settings enable users to customize Order forms for use by their organization, by...
-
Page 27: Using Heronclinic
5. Using HeronClinic 5.1 Managing Patient cases Previewing Patient Cases Select a Patient profile in the left-hand column of the Case Management interface to preview cases already linked to a patient. Edit, Delete or Merge a Patient profile It is possible to Edit, Delete or Merge a Patient profile by clicking on the icon to the right of the Patient name. - Page 28 Accessing the Order Form window Adding or Creating a new case automatically opens the Order Form window, and the icon is highlighted in the HeronClinic Scanning Workflow menu. Opening a Case When you select an already existing patient case and click Open Case, HeronClinic Scanning workflow will open at the step in the Scanning workflow last worked on.
-
Page 29: The Heronclinic Tm Scan Workflow
5.2 The HeronClinic Scan Workflow The following walkthrough shows the typical steps and options available in the HeronClinic Scan Workflow. 1. Create a New Case Click Create New Case in the HeronClinic Start screen, or select a patient and in the Preview window click Add Case: This opens the HeronClinic... - Page 30 Order Form details Description Patient ID Patient Name or Anonymized ID Connection to lab configured in the HeronCloud HeronCloud™ Connection Requested order delivery date Delivery Date Printed Model Order a printed model Include a scan of the opposing teeth (selected by Antagonist Scan default) HR Processing...
- Page 31 5. Choose Restoration Type Click on a Restoration Type in the left-hand menu: • options available for the selected restoration type are displayed automatically. Select the Restoration Type: • the tooth to which the restoration is applied is highlighted in blue/green. To change the selected restoration type: Right-click on the selected tooth to delete and then •...
- Page 32 You can customize Order Forms to specific ordering, restoration and patient requirements in system Order Form Settings. Example Scan Workflow Menu In the example shown opposite, based on the selected Restorations, the Scan Workflow indicates 6 steps. 1. Pre-Op Scan Used to integrate pre-operative scans in the scan workflow.
-
Page 33: Before You Scan
5.3 Before You Scan Before scanning, take time to familiarize yourself with the Scanning tools and features available in the Heron IOS solution and the HeronClinic interface. 5.3.1 Operating the scanner Start Scan To begin scanning, press the Start/Stop button on the top of the scanner, or click the Start/Stop icon in the right-hand Scanning Tools menu. -
Page 34: Using The Scanner Tip
5.3.2 Using the Scanner Tip Each scanner is delivered with three (3) reusable tips, that can be sterilized in an autoclave up to 250 times. 1. Attach the tip with the mirror side facing down- ward. Firmly press the tip onto the scanner until you hear it lock into place. -
Page 35: The Scanning Live View
5.3.3 The Scanning Live View The Live View window in the lower left displays what the Heron IOS Scanner is actually seeing. 3D reconstruction of the scan is displayed in the middle of the screen. If the scanner loses connection with the reconstructed image, the Live View perimeter frame will be displayed in red. -
Page 36: Recommended Scan Workflow
5.4 Recommended Scan Workflow Before launching a scan, make sure the Heron IOS Scanner is correctly connected to the computer via the USB 3.0 cable and the HeronClinic™ software is running. Make sure the computer on which the HeronClinicTM software is installed is connected to an external power source. - Page 37 Recommended Maxillary Scan Path When scanning the Maxillary arch, we recommend you scan in the following order: 1. Occlusal – 2. Buccal – 3. Palatal IMPORTANT: Before use, the scanner’s removable tip must be sterilized using an autoclave. See below: Section 7.2 Cleaning and Sterilization of Tip.
- Page 38 Scan gum 3-4mm in molar/pre-molar area on LEFT side. iii. Scan BUCCAL area from molar to center line on RIGHT side, ensuring the connection of surfaces: • Scan with 45°angle to get part occlusal + part buccal Scan with 90°angle to get last •...
-
Page 39: Scanning The Mandibular Arch
Processing Data When the scan is complete: i. Turn the scanner off using the Start/Stop button on the handle of the scanner. The Heron software will process the Maxillary scan data before moving on to the next phase of the Scan Workflow. If scanning both arches: ii. -
Page 40: Trimming Scans
5.4.3 Trimming scans You can click the Brush tool in the right-hand Scan Tool Menu to trim and modify scanned images. Click and Hold [Ctrl] to select the surface area to be removed, then Delete. IMPORTANT: Trimmed data cannot be recovered. Click OK to Confirm Trim Operation. -
Page 41: Bite Alignment
5.4.5 Bite Alignment The Heron™ IOS enables you to carry out Automatic Bite Alignment based on the previously scanned Maxillary and Mandibular arches. Note: When you select Bite Alignment, allow a few seconds for the arch scans to load. 1. Carrying Out An Automatic Bite Alignment The Automatic Bite-Alignment feature enables the 3D software to automatically recognize the patient’s maxillary and mandibular arches based on a brief scan of a segment of the patient’s bite in occlusion. - Page 42 Based on the left and right-side bite scans, the Heron™ IOS will automatically reconstruct the alignment of the full Maxillary and Mandibular arches in occlusal mode. Note: The Automatic Bite Alignment may take a minute or two to process. When the Automatic Bite Alignment is completed, the 3D reconstructed image is displayed as shown.
- Page 43 Choose an easily identifiable surface, without dense image complexity. This will make it easier for the software to recognize the selected position. When you have positioned the marker, HOLD [Ctrl] and click: a yellow dot will indicate the selected mandibular-paired point.
- Page 44 selected maxillary-paired point. Click Confirm Point. The bite scan segment and the selected maxillary-paired point is displayed automatically in the top right-hand of the screen. You will be prompted to select the corresponding paired point on the maxillary scan. Click Select Point and choose a point on the maxillary arch of the LEFT side bite scan segment.
-
Page 45: Auto-Realignment
5.4.6 Auto-Realignment Once you have carried out the Bite Alignment in the Heron IOS Scan Workflow, you can use the Auto-Realignment feature to optimize the scans. Click on the Auto-Realignment icon in the Scanning Tools menu. You will be prompted to confirm the optimization. -
Page 46: Using Bite Alignment Tools
5.4.7 Using Bite Alignment Tools When you have successfully completed the Bite Alignment for your patient, you can use the Bite-Alignment tools to visually inspect the quality of the alignment scans. The Bite-Alignment Tool menu is displayed below the 3D reconstructed image of the bite alignment. -
Page 47: Finalizing A Patient Case
5.4.8 Finalizing A Patient Case When you have finished scanning and alignment operations: 1. Click on the Finalizing icon in the Scan Workflow menu or click Next: This will open the Case Finalization page. HeronClinic™ Case Information & Settings Settings Description Patient Patient ID... - Page 48 2. Verify Patient and Restorations information, and select the desired lab connection you have already configured in HeronCloud. 3. Enter the desired delivery date (if connected, the lab’s interactive calendar will display here to provide available dates). You can preview 3D models and any 2D images taken in the preview window.
-
Page 49: Communicating With Labs
6. Communicating With Labs To send orders from HeronClinic™ to labs via the HeronCloud™ platform, you will have 1. Link your HeronClinic™ account to the HeronCloud platform. 2. Configure a connection with the lab in HeronCloud. Note: In HeronClinic™, you can also communicate directly with labs by exporting files to your computer and transferring them via a third party platform. -
Page 50: Configuring A Connection With A Lab In Heroncloud
6.2 Configuring a Connection with a Lab in HeronCloud When you have created a HeronCloud™ account and are logged in, you can now configure connections with the labs of your choice. Adding a lab connection To create a connection with a lab: 1. -
Page 51: Managing Case Details In Heroncloud
The status of your Connection Request is displayed: (Accepted/Waiting for approval) Selecting Default Upload Settings in HeronClinic When you have configured your HeronCloud™ account and added lab connections, you can select a default lab connection in HeronClinic™ to transfer files to, via your HeronCloud account: 1. -
Page 52: Configuring Heroncloud Settings
• View associated 3D elements Download all files and information for a case • HeronCloud™ will provide the lab you have configured a connection to, and to which you have sent the order from HeronClinic, with secure access to all Patient Case files associated with the Order. - Page 53 HeronCloud Settings Description Opens the Account Management window, where you can Edit Profile enter and edit your HeronCloud account details. Opens the Change Password window. Change Password Enables you to setup and manage Shared Groups. Manage Group Enable you to configure view settings, and push Settings notification settings for your HeronCloud account.
- Page 54 4. Select the desired options. 5. Click Save to save selected View & Notification settings. Page 54 User Manual...
-
Page 55: Maintenance
7. Maintenance 7.1 Cleaning the Handpiece The entire body, cord and base of the scanner must be wiped down using a Federal Environmental Protection Agency (EPA) approved disinfectant that is labeled and speci- fied for tuberculocidal/ mycobactericidal activity. Do not use disinfectant on the nozzle. NOTE: All components of the scanner (excluding the tips) must be wiped down and not sprayed. - Page 56 Step-by-Step Procedure Step 1: Clean the tip with soapy water, ensuring that the mirror is clean and free of smudges, stains, or any residue. Avoid using abrasive cloth materials as this will scratch the mirror. Step 2: After drying the tip exterior, carefully dry the interior and mirror with lint free wipes ensuring you do not scratch the sur- face.
-
Page 57: Disposal
If unauthorized changes have been made to the delivered system and accessories, the warranty by 3DISC becomes void. 3DISC will not accept any responsibility or liability for the improper functioning of the product in such a case. -
Page 58: Safety Guidelines And Warnings
If unauthorized changes have been made to the delivered system and accessories, the warranty by 3DISC becomes void. 3DISC will not accept any responsibility or liability for the improper functioning of the product in such a case. -
Page 59: General Warnings
8.3 General Warnings 8.3.1 System Modification : Modifying the system may result in physical injury to the WARNING patient and operator, and damage to the system. 8.3.2 Approved Software The Heron™ IOS device is designed to operate with the HeronClinic™ software. See section 5 below for details. -
Page 60: Dropped Equipment
8.4.2 Dropped Equipment : If the scanner tip is dropped, ensure that the mirror WARNING is not damaged and that it is not detached; if the tip is damaged it should be disposed of immediately. If the scanner handpiece is dropped or bumped, ensure that no part of the system is damaged as it could affect performance. -
Page 61: Eye Safety
Only use the power adapter supplied as a part of WARNING the system. 8.6 Eye Safety : During operation, the system emits a bright, WARNING flashing light from its tip. Although the system complies with standard IEC 62471 (Photobiological safety of lamps and lamp systems), prolonged exposure to flashing light may result in discomfort, seizure or eye irritation. -
Page 62: During Systems Operation
8.8 During Systems Operation : The Heron™ IOS system contains delicate optical WARNING and mechanical elements and therefore should be handled carefully. Do not drop, bump, or shake the handpiece or the tip. Always place the handpiece on the Base when not in use. Do not put stress on the cable connecting the handpiece to the Base. - Page 63 If not used properly, there may be loss of transmission of image information or slow transmission temporarily. Accessories WARNING: Only use 3DISC approved accessories. Not using 3DISC approved accessories may result in deterioration of performance. Accessory 3DISC Part Number USB 3.0 Cable...
- Page 64 (ESD) IEC ± 2 kV, ± 4 ± 2 kV, ± 4 with synthetic material, the 61000-4-2 kV, ± 8 kV, kV, ± 8 kV, ± relative humidity should be at ± 15 kV /air 15 kV /air least 30%. Electrical fast ±...
- Page 65 6V in ISM 6V in ISM recommended separation bands bands distance calculated from the between between equation applicable to the 0.15 MHz 0.15 MHz frequency of the transmitter. and 80 MHz and 80 MHz Recommended separation 80% AM at 80% AM at distance: 1KHz 1KHz...
- Page 66 Recommended Separation Distances Between Portable and Mobile RF Communications Equipment and the Heron™ IOS System that is not Life- Supporting Heron™ IOS System is intended for use in the electromagnetic environment in which radiated RF disturbances are controlled. The customer can help prevent electromagnetic interference by maintaining a minimum distance between portable and mobile RF communications equipment (transmitters) and the Heron™...
- Page 67 Non-ionizing electromagnetic radiation Direct Current Type(B) Level of protection against electric shock Consult operating instruction for use. European Conformity mark Prescription symbol Non-sterile (Scanner-Tips) (IOS-FPL-71-001) User manuals are available electronically at the link provided (3disc.com/support) Page 67...
- Page 68 INMETRO Certification Mark Ukraine Conformity Mark Page 68 User Manual...
-
Page 69: Support, Warranty And Repair Service
Support section of the 3DISC website. 9.2 Standard Warranty 3DISC warrants its non-consumable hardware products to be free from defects in materials and workmanship. The warranty covers the cost of parts and labor to repair the product. -
Page 70: Repair Service
Please keep the shipping container for future use. Products returned to the factory for repair should be properly packaged. To obtain warranty service, follow the procedure described in the Repair Service section. Failure to do so will cause delays and additional expense to the customer. - Page 71 We hope this User Manual was helpful to you. For additional material and user information go to 3disc.com/support. Heron™ IOS User Manuals Heron™ IOS How-to Videos Heron™ IOS Training Videos 3disc.com/support Page 71...
- Page 72 USA & Canada Europe East 3Disc Europe 3D Imaging and Simulations Corp. Americas 10-12 RUE DE L'AMIRAL HAMELIN, 365 Herndon Pkwy #18 75116 PARIS, Herndon, VA 20170 France United States Tel : +33 (0)1 42 25 73 98 Tel: +1 703 430 6080...
Need help?
Do you have a question about the Heron IOS and is the answer not in the manual?
Questions and answers