
Related Manuals for Cameo EVOS W7 IP


Summary of Contents for Cameo EVOS W7 IP
- Page 1 USER´S MANUAL BEDIENUNGSANLEITUNG MANUEL D`UTILISATION MANUAL DE USUARIO INSTRUKCJA OBSŁUGI MANUALE D‘ USO EVOS W7 IP ® IP65 LED WASH-MOVING HEAD CLEW7IP...
-
Page 2: Table Of Contents
CONTENTS / INHALTSVERZEICHNIS / CONTENU / CONTENIDO / TREŚĆ / CONTENUTO ENGLISH INFORMATION ON THIS USER MANUAL INTENDED USE DEFINITIONS AND SYMBOLS SAFETY INSTRUCTIONS NOTES ON PORTABLE OUTDOOR DEVICES PACKAGING CONTENT INTRODUCTION CONNECTIONS, OPERATING AND DISPLAY ELEMENTS OPERATION SET-UP AND INSTALLATION CARE, MAINTENANCE AND REPAIR DIMENSIONS TECHNICAL DATA... - Page 3 DEUTSCH INFORMATIONEN ZU DIESER BEDIENUNGSANLEITUNG BESTIMMUNGSGEMÄSSER GEBRAUCH BEGRIFFS- UND SYMBOLERKLÄRUNGEN SICHERHEITSHINWEISE HINWEISE FÜR ORTSVERÄNDERLICHE OUTDOOR-GERÄTE LIEFERUMFANG EINFÜHRUNG ANSCHLÜSSE, BEDIEN- UND ANZEIGEELEMENTE BEDIENUNG AUFSTELLUNG UND MONTAGE PFLEGE, WARTUNG UND REPARATUR ABMESSUNGEN TECHNISCHE DATEN ERLÄUTERUNGEN ZUR IP-SCHUTZART MINDESTABSTAND ZUR BELEUCHTETEN FLÄCHE MINDESTABSTAND ZU NORMAL ENTFLAMMBAREN MATERIALIEN ENTSORGUNG HERSTELLERERKLÄRUNGEN DMX CONTROL / DMX STEUERUNG / PILOTAGE DMX /...
-
Page 4: Information On This User Manual
This device has been developed and manufactured to the highest quality standards to ensure many years of trouble-free operation. Please read this user manual carefully to be able to quickly put your new Cameo Light product to optimum use. For more information about Cameo Light, please visit our website INFORMATION ON THIS USER MANUAL •... -
Page 5: Safety Instructions
This symbol identifies hazards that can cause electric shock. This symbol identifies hazardous areas or hazardous situations. This symbol indicates hazards caused by hot surfaces. This symbol indicates hazards caused by intense light sources. This symbol indicates a device in which there are no user-replaceable parts. This symbol indicates additional information on the operation of the product. - Page 6 ATTENTION: 1. Do not operate the device if it has been exposed to large temperature fluctuations (for example, after transport). Moisture and condensation can damage the device. Switch on the device only when it has reached room temperature. 2. Make sure that the voltage and frequency of the mains supply correspond to the values indicated on the device.
- Page 7 3. The exterior surface of the device can become very hot during regular operation. Ensure that accidental touching of the housing is not possible. Always allow the lamp to cool sufficiently before removal, maintenance work and charging etc. ATTENTION: 1. Do not install and operate the device in the vicinity of radiators, heat accumulators, ovens, or other heat sources.
- Page 8 WARNING: Devices with wireless signal transmission are not suitable for use in sen- sitive areas in which radio operation can lead to potentially detrimental interactions. These include e.g.: • Hospitals, health centres or other healthcare facilities that provide patient treatment with skilled personnel and equipment.
-
Page 9: Notes On Portable Outdoor Devices
Please check the completeness and integrity of the delivery and notify your distribution partner immediately after purchase if the delivery is not complete or if it is damaged. The packaging includes: X 1 x EVOS W7 IP Moving Head X 1 x power cable X 2 x Omega bracket... -
Page 10: Connections, Operating And Display Elements
Connection via supplied power cable (when not in use, always close with the rubber sealing cap). POWER OUT IP65 power output socket with rubber sealing cap. Enables power supply to other CAMEO spotlights. Ensure that the total current consumption of all connected devices does not exceed the value specified on the device in amperes (A) (when not in use, always close with the rubber sealing cap). - Page 11 PRESSURE EQUALISATION ELEMENT Pressure equalisation element to prevent condensation inside the housing. In order to ensure its proper function, the element must be protected from dirt. LC DISPLAY The illuminated LC display shows the currently activated operating mode (main screen), the menu items in the selection menu and the numerical value or operating status of certain menu items.
- Page 12 PAN LOCK Mechanical locking device to prevent the horizontal rotation of the head during transport. Dis- connect the unit from the mains, move the head parallel to the base (4 possible positions) and push the locking lever in the direction of the pan rotation axis to lock it in position. Unlock the device before startup.
-
Page 13: Operation
OPERATION NOTES As soon as the spotlight is correctly connected to the power supply, the following will be displayed in succession: "Welcome to Cameo", the model name and the software version. After this process, 030°C 030°C the spotlight is operational and starts up in the previously selected mode. - Page 14 Note on the main screen in operating modes with external control: When the control signal is interrupted, the characters in the display start flashing; when the control signal is present again, the flashing stops. Warning message: If the warning symbol (triangle with exclamation mark) appears in the display, there is an error in one or more components of the unit.
- Page 15 CONTROL MENU The control menu is used to select the various operating modes and set their options in the respective sub-menus. The DMX address, DMX operating mode, universe, IP address and subnet mask are globally set for all operating modes, where relevant. DMX OPERATION VIA XLR CABLE Starting from the main screen, press MENU to enter the main menu.
- Page 16 Select with UP and DOWN, confirm with ENTER, change value or status with UP and DOWN, confirm with ENTER, return with MENU. Setting the DMX start address Selecting the DMX mode Select reception options: 1. Backup by XLR = If W-DMX is interrupted, XLR takes over (assuming a wired connection is established).
- Page 17 Disable Current Send to Universe (alternative to “User Universe”)
- Page 18 User Universe Send to (alternative to “Current Universe”) OPERATION VIA SACN Starting from the main screen, press MENU to enter the main menu. Use UP and DOWN to select the Control menu and press ENTER. Now select the menu item sACN and confirm again. Infor- mation on the sub-menu items in the sACN menu and the corresponding setting options can be found in the table below.
- Page 19 Selecting the DMX mode Disable Current Universe (alternative to “User Universe”)
- Page 20 User Universe (alternative to “Current Universe”) OPERATION VIA ART-NET AND DMX The operating mode Art-Net+DMX offers the possibility of controlling the LEDs and the head mo- vement separately via Art-Net and DMX. You can choose whether the LEDs should be controlled via Art-Net and the head movement via DMX, or vice versa.
- Page 21 Select with UP and DOWN, confirm with ENTER, change value or status with UP and DOWN, confirm with ENTER, return with MENU. Setting the DMX start addresses Main and Pixel Selecting the control signal for Pixel Control Main Address with Master Dimmer (Yes) or without Master Dimmer (No) RGB or RGBW Pixel Control Network settings: IP address: set 1st block,...
- Page 22 Select with UP and DOWN, confirm with ENTER, change value or status with UP and DOWN, confirm with ENTER, return with MENU. Setting the DMX start addresses Main and Pixel Selecting the control signal for Pixel Control Main Address with Master Dimmer (Yes) or without Master Dimmer (No) RGB or RGBW Pixel Control Network settings:...
- Page 23 Select with UP and DOWN, confirm with ENTER, change value or status with UP and DOWN, confirm with ENTER, return with MENU. Setting the DMX start address Main RGB or RGBW Pixel Control DMX control via XLR cable (XLR Only) or W-DMX (Wireless Only).
- Page 24 STAND-ALONE OPERATION (Scenes) Similar to a DMX control unit, the stand-alone operating mode Scenes makes it possible to set pan, tilt, dimmer, RGBW, zoom, pan/tilt macros etc. directly on the device with values ranging from 000 to 255. A total of 8 individual scenes (Scene 1–8) can be created, edited, saved and recalled. Starting from the main screen, press MENU to enter the main menu.
- Page 25 Transfer scenes 1 to 8 via XLR cable to one or more slave units (same model, same software version). Execute procedure with Yes. The scene memory of the slave units will be overwritten. Cancel the procedure with No. 0% -> 100% 0% ->...
- Page 26 Pan, small -> large Tilt, small -> large (starts Pan/Tilt, small -> large from current Pan/Tilt Pan/Tilt, inverse small -> large position) Circle, small -> large Circle, inverse small -> large Random, small -> large Pan movement speed, fast -> slow SYSTEM SETTINGS (Settings) Starting from the main screen, press MENU to enter the main menu.
- Page 27 Light intensity increases linearly with DMX value Light intensity can be finely adjusted at lower DMX values and broadly adjusted at higher DMX values Light intensity can be broadly adjusted at lower DMX values and finely adjust- ed at higher DMX values Selection of Light intensity can be finely adjusted dimmer curve,...
- Page 28 Does not reverse pan direction Reverses pan direction Does not reverse tilt direction Device head Reverses tilt direction settings Automatic position correction is enabled Automatic position correction is disabled No blackout during head movement Blackout during head movement The fan speed is automatically adjusted depending on the temperature in the device head Reduced maximum fan speed, resulting in slightly Fan control...
- Page 29 Displays the temperature of the LED unit (LED), the device head (Head) Main Menu Settings and the device base (Base) in degrees Celsius and Fahrenheit Control Display Displays the rotational speed of the two fans in the device head in RPM Signal Fail Settings Dimmer...
-
Page 30: Set-Up And Installation
Control Display Signal Fail Settings Dimmer Color Calibration Info Pan/Tilt Motors Cancle restore user settings 2 Fan Settings Default 2 Service Restore user settings 2 Auto Lock Recall Quick-Light Default Cancle restore user settings 2 Default 3 Restore user settings 2 Main Menu Info Restore factory settings... -
Page 31: Care, Maintenance And Repair
Important note: Overhead installation requires extensive experience, including calcu- lation of working load limits, installation materials used and regular safety checks of all installation materials and spotlights. If you do not have these qualifications, do not attempt to perform an installation yourself. Refer instead to a qualified professional. CARE, MAINTENANCE AND REPAIR In order to ensure the long-term, proper functioning of the device, it must be regularly cleaned and, if necessary, serviced. -
Page 32: Dimensions
5. Devices must be stored in a dry environment and protected from dust and dirt. 6. To ensure correct and safe operation, all accessible or removable lenses and light-emitting apertures must be cleaned regularly. MAINTENANCE AND REPAIR (qualified personnel only) DANGER! There are live components in the device. -
Page 33: Technical Data
TECHNICAL DATA Item No: Product type: LED wash light Type: Outdoor Moving Head Colour spectrum RGBWW LED: Number of LEDs: LED type: 40 W RGBWW LED PWM frequency: 800 Hz, 1200 Hz, 2000 Hz, 3600 Hz, 12 kHz, 25 kHz Beam/field angle: Beam angle 4.5°... -
Page 34: Explanation Of Ip Protection Class
Operating voltage: 100–240 V AC / 50–60 Hz Power consumption: 900 W Luminous flux: 12500 lm 2700 K = Ra94 3000 K = Ra91 CRI: 3800 K = Ra90 Warm White LED 3300 K = Ra79 Power connections: Neutrik powerCON TRUE1 IN + OUT (max. 3 A) Ambient temperature –15°C to 45°C (in operation):... -
Page 35: Minimum Distance To Illuminated Surface
IPX3 Protection against falling spray water up to 60° from the vertical IPX4 Protection against splashing water on all sides IPX5 Protection against water jets (nozzle) from any angle IPX6 Protection against strong water jets IPX7 Protection against temporary submersion 4. -
Page 36: Manufacturer's Declarations
MANUFACTURER’S DECLARATIONS Manufacturer's warranty & limitation of liability Adam Hall GmbH, Adam-Hall-Str. 1, 61267 Neu-Anspach, Germany / E-mail Info@adamhall.com / +49 (0)6081 / 9419-0 Our current warranty conditions and limitation of liability can be found at: https://cdn-shop.adamhall.com/media/pdf/Manufacturers-Declarations-CAMEO_DE_EN_ES_FR.pdf For service requests, please contact your distribution partner. FCC Statement This equipment has been tested and found to comply with the limits for a Class B digital device, pursuant to part 15 of the FCC Rules. - Page 37 ISED Statement English:This device contains licence-exempt transmitter(s)/receiver(s) that comply with Innovati- on, Science and Economic Development Canada’s licence-exempt RSS(s). Operation is subject to the following two conditions: (1) This device may not cause interference. (2) This device must accept any interference, including interference that may cause undesired operation of the device.
- Page 38 EC Declaration of Conformity Declarations of conformity for products subject to the LVD, EMC, RoHS Directive can be requested from info@adamhall.com Declarations of conformity for products subject to RED can be downloaded from www.adamhall. com/compliance/ SUBJECT TO MISPRINTS AND ERRORS, AS WELL AS TECHNICAL OR OTHER MODIFICATIONS!
- Page 39 Dieses Gerät wurde unter hohen Qualitätsanforderungen entwickelt und gefertigt, um viele Jahre einen reibungslosen Betrieb zu gewährleisten. Bitte lesen Sie diese Bedienungsanleitung sorgfäl- tig, damit Sie Ihr neues Produkt von Cameo Light schnell und optimal einsetzen können. Weitere Informationen über Cameo Light erhalten Sie auf unserer Website CAMEOLIGHT.COM.
- Page 40 Dieses Symbol kennzeichnet Gefahren, die einen elektrischen Schlag verursachen können. Dieses Symbol kennzeichnet Gefahrenstellen oder gefährliche Situationen. Dieses Symbol kennzeichnet Gefahren durch heiße Oberflächen. Dieses Symbol kennzeichnet Gefahren durch intensive Lichtquellen. Dieses Symbol kennzeichnet ein Gerät, in dem sich keine vom Benutzer austausch- baren Teile befinden.
- Page 41 ACHTUNG: 1. Nehmen Sie das Gerät nicht in Betrieb, wenn es starken Temperaturschwankungen ausgesetzt war (beispielsweise nach dem Transport). Feuchtigkeit und Kondensat könnten das Gerät beschädigen. Schalten Sie das Gerät erst ein, wenn es Umge- bungstemperatur erreicht hat. 2. Stellen Sie sicher, dass die Spannung und die Frequenz des Stromnetzes mit den auf dem Gerät angegebenen Werten übereinstimmen.
- Page 42 VORSICHT: 1. Bei beweglichen Bauteilen wie Montagebügeln, oder sonstigen beweglichen Bau- teilen besteht die Möglichkeit sich zu klemmen. 2. Bei Geräten mit motorisch angetriebenen Bauteilen besteht Verletzungsgefahr durch die Bewegung des Gerätes. Plötzliche Gerätebewegungen können zu Schreckreaktionen führen. 3. Die Gehäuseoberfläche des Geräts kann sich im regulären Betrieb stark erwärmen. Stellen Sie sicher, dass ein versehentliches Berühren des Gehäuses ausgeschlos- sen ist.
- Page 43 SIGNALÜBERTRAGUNG PER FUNK (Z.B. W-DMX ODER AUDIO-FUNKSYSTEME): Die Qualität und Leistungsfähigkeit kabelloser Signalübertragungen ist generell abhängig von den Umgebungsbedingungen. Einfluss auf die Reichweite und Signalstabilität haben z.B.: Abschirmung (z.B. Mauerwerk, Metallbauten, Wasser) Hohes Funkaufkommen (z.B. starke W-LAN Netze) Interferenzen Elektromagnetische Strahlung (z.B. LED-Videowände, Dimmer) Alle Reichweitenangaben beziehen sich auf Freifeldanwendung mit Sichtkontakt ohne Störeinflüsse! Der Betrieb von Sendeanlagen unterliegt behördlichen Bestimmungen.
- Page 44 Sie Ihren Vertriebspartner bitte unverzüglich nach dem Kauf, falls die Lieferung nicht komplett oder beschädigt ist. Im Lieferumfang des Produkts sind enthalten: X 1 x EVOS W7 IP Moving Head X 1 x Netzkabel X 2 x Omega-Bügel X Bedienungsanleitung...
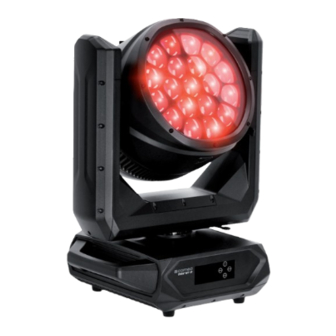
- Page 45 EINFÜHRUNG MOVING HEAD EVOS W7 IP65 ® CLEW7IP STEUERUNGSFUNKTIONEN: 16-Kanal, 18-Kanal, 23-Kanal, 33-Kanal, 43-Kanal und 87-Kanal DMX-Steuerung Art-Net4 sACN Kling-Net W-DMX ™ RDM enabled Master / Slave Betrieb Standalone Funktionen EIGENSCHAFTEN: IP65 Schutzart.19 x 40 W RGBW LEDs. Zoomfunktion. Stroboskop. Pan und Tilt Motoren mit 16- Bit Auflösung.
- Page 46 Anschluss mit Hilfe des mitgelieferten Netzkabels (bei Nichtgebrauch stets mit der Gummidicht- kappe verschließen). POWER OUT IP65 Netzausgangsbuchse mit Gummidichtkappe. Dient der Netzversorgung weiterer CAMEO Scheinwerfer. Achten Sie darauf, dass die gesamte Stromaufnahme aller angeschlossenen Geräte den auf dem Gerät in Ampere (A) angegebenen Wert nicht überschreitet (bei Nichtgebrauch stets mit der Gummidichtkappe verschließen).
- Page 47 DRUCKAUSGLEICHSELEMENT Druckausgleichselement zur Vermeidung von Kondenswasserbildung im Gehäuseinneren. Um die einwandfreie Funktion zu gewährleisten, ist das Element vor Verschmutzung zu schützen. LC-DISPLAY Das beleuchtete LC-Display zeigt die aktuell aktivierte Betriebsart (Hauptanzeige), die Menüpunk- te im Auswahl-Menü und den Zahlenwert bzw. Betriebszustand in bestimmten Menüpunkten an. Erfolgt innerhalb circa einer Minute keine Eingabe, wechselt die Anzeige im Display automatisch zur Hauptanzeige.
- Page 48 PAN LOCK Mechanische Verriegelungsvorrichtung, um beim Transport das Verdrehen des Kopfes in horizon- taler Richtung zu verhindern. Trennen Sie das Gerät vom Netz, bringen den Kopf parallel zur Basis (4 mögliche Positionen) und drücken den Arretierhebel zum Verriegeln in Richtung Pan-Drehachse. Entriegeln Sie die Vorrichtung vor Inbetriebnahme des Geräts.
- Page 49 ANMERKUNGEN Sobald der Scheinwerfer korrekt am Stromnetz angeschlossen ist, wird während des Startvor- gangs nacheinander „Welcome to Cameo“, die Modellbezeichnung und die Softwareversion im Display angezeigt. Nach diesem Vorgang ist der Scheinwerfer betriebsbereit und startet in der Betriebsart, die zuvor aktiviert war.
- Page 50 Hinweis zur Hauptanzeige in den Betriebsarten mit externer Steuerung: Sobald das Steuer-Signal unterbrochen wird, beginnen die Zeichen im Display zu blinken, liegt das Steuer-Signal wieder an, stoppt das Blinken. Warnmeldung: Erscheint das Warnsymbol (Dreieck mit Ausrufezeichen) im Display, liegt bei einer oder mehreren Komponenten des Geräts ein Fehler vor.
- Page 51 KONTROLLMENÜ (Control) Das Kontrollmenü ermöglicht die Auswahl der verschiedenen Betriebsarten und deren Einstel- loptionen in den entsprechenden Untermenüs. DMX-Adresse, DMX-Betriebsart, Universum, IP Adresse und Subnetzmaske werden in jeder Betriebsart betriebsartübergreifend eingestellt, sofern relevant. DMX-BETRIEB VIA XLR-KABEL Ausgehend von der Hauptanzeige gelangen Sie durch Drücken auf MENU in das Hauptmenü (Main Menu).
- Page 52 W-DMX Auswahl mit UP und DOWN, bestätigen mit ENTER, Wert bzw. Status ändern mit UP und DOWN, bestätigen mit ENTER, zurück mit MENU. Address Einstellen der DMX-Startadresse 001 - 512 Channel 16CH / 18CH / 23CH / 33CH / Auswählen des DMX-Modus Mode 43CH / 87CH Empfangsoptionen auswählen: 1.
- Page 53 Art-Net Auswahl mit UP und DOWN, bestätigen mit ENTER, Wert bzw. Status ändern mit UP und DOWN, bestätigen mit ENTER, zurück mit MENU. Einstellen der Address DMX-Start- 001 - 512 adresse Auswählen Channel 16CH / 18CH / 23CH / 33CH / 43CH / des DMX- Mode 87CH...
- Page 54 Select 000 - 254 Universe Art-Net to Send Mode Art-Net to DMX and Link W-DMX Connect User Unlink Universe Send to Send Mode (alternativ Sending zu “Current Link Options Universe”) Art-Net to W-DMX Connect Unlink BETRIEB VIA SACN Ausgehend von der Hauptanzeige gelangen Sie durch Drücken auf MENU in das Hauptmenü (Main Menu).
- Page 55 Auswählen Channel 16CH / 18CH / 23CH / 33CH / 43CH / des DMX- Mode 87CH Modus IP Address xxx.xxx.xxx.xxx Subnet xxx.xxx.xxx.xxx Mask Universe 000 - 254 Network Settings Universe 000 - 127 Group Disable sACN to Send Mode sACN to DMX and Link W-DMX...
- Page 56 Select 000 - 254 Universe sACN to sACN to Send Mode DMX and Link W-DMX Connect Unlink User Universe Send to (alternativ Send Mode Sending zu “Current Options Link Universe”) sACN to W-DMX Connect Unlink BETRIEB VIA ART-NET UND DMX Die Betriebsart Art-Net+DMX bietet die Möglichkeit, die LEDs und die Kopfbewegung separat über Art-Net und DMX zu steuern.
- Page 57 Art-Net + DMX Auswahl mit UP und DOWN, bestätigen mit ENTER, Wert bzw. Status ändern mit UP und DOWN, bestätigen mit ENTER, zurück mit MENU. Main Address 001 - 502 Einstellen der DMX-Startadressen Main und Address Pixel Pixel Address 001 - 437 Art-Net >...
Need help?
Do you have a question about the EVOS W7 IP and is the answer not in the manual?
Questions and answers