
Subscribe to Our Youtube Channel
Related Manuals for Hans Grohe Ecostat Classic Square 15728 1 Series


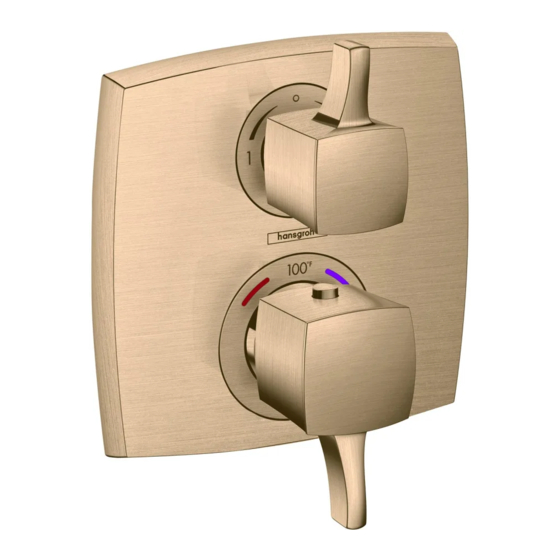
Summary of Contents for Hans Grohe Ecostat Classic Square 15728 1 Series
- Page 1 EN Installation / User Instructions / Warranty FR Instructions de montage / Mode d'emploi / Garantie ES Instrucciones de montaje / Manejo / Garantía Ecostat Classic Ecostat Square Square 15728XX1 15714XX1 Ecostat E Ecostat S 15708XX1 15758XX1...
-
Page 2: Technical Information
English Technical Information Water pressure Recommended 15 - 75 PSI (0.1 - 0.5 MPa) Maximum 145 PSI (1 MPa) Hot water temp. Recommended 120°-140° F (48° - 60° C)* Maximum 158°F (70° C)* Max. flow rate 6.6 GPM (25 l/min) @ 44 PSI (0.3 MPa) * Please know and follow all applicable local plumbing codes when setting the temperature on the water heater. - Page 3 Français Données techniques Pression d’eau recommandée 15 - 75 PSI (0.1 - 0.5 MPa) maximum 145 PSI (1 MPa) Température d’eau chaude recommandée 120°-140° F (48° - 60° C)* maximum 158°F (70° C)* Capacité nominale 6.6 GPM (25 l/min) @ 44 PSI (0.3 MPa) * Vous devez connaître et respecter tous les codes de plomberie locaux applicables pour le réglage de la température du chauffe-eau.
- Page 4 Español Datos tecnicos Presión en servicio recomendada 15 - 75 PSI (0.1 - 0.5 MPa) max. 145 PSI (1 MPa) Temperatura del agua caliente recomendada 120°-140° F (48° - 60° C)* max. 158°F (70° C)* Caudal máximo 6.6 GPM (25 l/min) @ 44 PSI (0.3 MPa) * Debe conocer y cumplir todos los códigos locales aplicables para ajustar la temperatura del calentador...
- Page 5 Ecostat E Ecostat Square Ecostat Classic Square Ecostat S 15708XX1 15714XX1 15728XX1 15758XX1 ⅝" (15 mm) ⅝" (15 mm) ⅝" (15 mm) ⅝" (16 mm) 2⅝"-3¾" 2"-3⅛" 2"-3⅛" 2"-3⅛" (66 - 94 mm) (52-80 mm) (52 - 80 mm) (52-80 mm) Installation Suggestion / Suggestion d'installation / Sugerencia para la instalación This trim set is for use in a two- function shower (a).
- Page 6 Service Stops / Butées d’arrêt d’isolation / Cierres de servicio closed ferme cerrado open 4 mm ouvert abierto 4 mm Important Avis Importante The 01850181 iBox Universal Le corps d'encastrement iBox cuerpo empotrado iBox Plus rough valve (not included) Universal Plus, #01850181, (non Universal Plus, #01850181, (no incorporates service (isolation) compris) inclut les arrêts d'isola-...
- Page 7 Flush the hot and cold supplies / Rincez les conduites d’alimentation de l’eau chaude et de l’eau froide / Lave los suministros frío y caliente Remove the dust cover. Open both stops. 90° Retirez l’étiquette. 4 mm Ouvrez l’eau à les butées d’arrêt d’isolation. 4 mm Retire la etiqueta.
- Page 8 Close the stops. Fermez l’eau chaude et l’eau froid à les butées 90° d’arrêt d’isolation. 4 mm 4 mm Cierre los pasos del agua caliente y del agua fría en los cierres de servicio.
- Page 9 Install the sealing gasket / Installez le joint d'étanchéité / Instale la junta de sellado Square and SoftCube escutcheons only: Push the flexible sealing gasket into the channel on the rear of the escutcheon. Écusson Square et SoftCube uniquement : Poussez le joint d'étanchéité...
-
Page 10: Installation / Installation / Instalación
Installation / Installation / Instalación To reduce the risk of scald injury and property damage, make sure the stops are closed. Cut the plaster shield so that it extends ¹⁄₁₆" - ⅛" (1-2 mm) from the finished wall surface. Seal the wall around the plaster shield with waterproof sealant. - Page 11 Install the function block. Install and tighten the function block screws using a 4 mm Allen wrench. Insérez le bloc de fonction. Installez les vis du bloc de fonction à l’aide d’une clé Allen de 4 mm. Inserte el bloque de función. Instale los tornillos del bloque de función con una llave Allen de 4 mm.
- Page 12 Add ½" to this measurement. Cut each screw so that it is X + ½" long. Ajoutez ½ po à cette longueur « X ». Notez cette nouvelle longueur. Coupez les vis de façon à ce que celui-ci dépasse de ½...
- Page 13 Open the stops. Install the carrier plate so that the notch is at the bot- tom. Install and tighten the four cut screws. 4 mm Ouvrez l’eau à les butées d'arrêt d'isolation. 90° Installez la plaque-support de façon à ce que 90°...
- Page 14 Lubricate the diverter stem with a small amount of white plumber's grease. Install the handle adapter and the snap connector. Tighten the screw using a 3 mm Allen wrench. Lubrifiez la tige de manoeuvre avec une petite quan- tité de graisse de plomberie blanche. °...
- Page 15 TEST THE VALVE: Turn the diverter handle to the “on” position. Turn the thermostatic mixer stem counter-clockwise until it stops. Measure the temperature of the output water. If the water is hotter than 120°F (49° C) ° F or that permitted by local plumbing code, adjust the high temperature limit stop (see page 16.) TESTEZ LE ROBINET: Ouvrez la robinet.
- Page 16 Turn the thermostatic mixer stem until the output water is 104°F (40°C). Turn the water off. ° F Tournez la tige de la cartouche jusqu’à ce que l’eau soit à une température de 104°F (40°C). Fermez l’eau. Gire el vástago del cartucho hasta que el agua de salida esté...
- Page 17 Set the high temperature limit stop / Réglez la butée de limite d’eau chaude / Fije el tope de límite de alta temperatura ° F 2 mm °F 2 mm 3 mm **Follow all applicable local plumbing codes when setting the high temperature limit stop. To prevent scald injury, the maximum output temperature of the shower valve must be no higher than 120°F (49°C).
- Page 18 3 mm 0.74 ft-lb 1 Nm ° F ° F Justify the handle / Réglez la poignée / Ajuste la manija ° F °F 2 mm 2 mm...
- Page 19 Replacement Parts / Pièces détachées / Repuestos Ecostat S 15758XX1 92594000 97350000 98156000 4 mm (36x2) 96525000 98283000 95255000 27 mm 98133000 96454000 (16x2) 98153000 94073000 (30x5) 98471000 95253XX0 98197000 (44x4) (20x1.5) 98282000 98146000 98913000 (25x1.5) 95252000 (M34x1.5) 92146000 27 mm (25x2.5) 93831XX0 98793000...
- Page 20 Ecostat Classic Square 15728XX1 92594000 97350000 94073000 4 mm 96525000 98283000 95255000 27 mm 98133000 (16x2) 96454000 95253XX0 98153000 98197000 (30x5) (20x1.5) 98282000 98146000 (25x1.5) 98913000 92146000 (M34x1.5) (25x2.5) 95252000 27 mm 98793000 92216XX0 98471000 (44x4) 95843000 3 mm 88796XX0 88795XX0 95521000 (1°)
- Page 21 User Instructions / Instructions de service / Manejo fermé ouvert cerrado abierto ° F ° F ouvert abierto ° F cold froid chaud chaud frío caliente caliente ° F ° F ° F 104° F >104° F...
- Page 22 Check valve maintenance / Entretien de les clapets anti-retour/ Mantenimiento de las válvulas antirretornos ° F °F 2 mm 2 mm 3 mm °F 4 mm...
- Page 23 27 mm red / rouge / rojo 27 mm 5.9 ft-lb 8 Nm 4 mm 3.6 ft-lb 5 Nm 0.74 ft-lb 1 Nm...
- Page 24 ° F ° F 3 mm 3 ft-lb 4 Nm °F ° F 2 mm 2 mm...
-
Page 25: Maintenance
Maintenance Use caution with skin contact to hot water • To prolong the life of the themostatic cartridge, to reduce the risk of scald injury. Before regularly run it through its full range of servicing the valve, turn the water off temperatures. -
Page 26: Entretien
Entretien Lors de l’entretien du robinet, fermez de temps en temps en position très chaude et très l’eau à l’aide des butées d’arrêt dans la froide. pièce intérieure iBox Universal Plus ou à la vanne d’arrêt principale. Si vous ne comptez pas utiliser la douche pendant un laps de temps prolongé, •... -
Page 27: Mantenimiento
Mantenimiento Al realizar el mantenimiento de la • Para garantizar el funcionamiento duradero del válvula, corte el suministro de agua termostato, el mando del mismo debería girarse usando las llaves de paso de servicio en de vez en cuando del extremo frío al extremo caliente. - Page 28 Cleaning Recommendation for Hansgrohe Products Modern bathroom faucets, kitchen faucets and shower products are made from different materials to comply with the needs of the market with regard to design and functionality. To avoid damage to the product, it is necessary to take proper care of it.
- Page 29 Important • Les residus de produits pour le corps comme les savons liquides, shampooings, gels de douche, teintures pour cheveux, parfums, apres-rasage et vernis a ongles peuvent causer des deteriorations. Rincez le produit avec de l’eau propre après chaque utilisation. •...
- Page 31 Hansgrohe, Inc. Limited Warranty Offering our customers the highest quality at all times is a funda- • abuse, neglect or improper or incorrectly performed mental part of the Hansgrohe, Inc. company philosophy. We offer installation, maintenance or repair, including the use consumers a limited warranty on our hansgrohe and AXOR of abrasive or caustic cleaning agents or “no-rinse”...
- Page 32 PRODUCT FOR AN UNINTENDED APPLICATION), FREEZING This warranty gives you specific legal rights, and you may also WATER, EXCESSIVE WATER PRESSURE, PIPE CORROSION IN have other rights which vary from state to state. THE HOME IN WHICH THE PRODUCT IS INSTALLED, ABUSE, PRODUCT INSTRUCTIONS AND QUESTIONS NEGLECT OR IMPROPER OR INCORRECTLY PERFORMED INSTALLATION, MAINTENANCE OR REPAIR, INCLUDING...
Need help?
Do you have a question about the Ecostat Classic Square 15728 1 Series and is the answer not in the manual?
Questions and answers