Table of Contents
Advertisement
Quick Links
Two-STAge nonconDenSing gAS fUrnAceS wiTH fixeD & VAriAble SpeeD blowerS - 80+ AfUe
inSTAllATion inSTrUcTionS
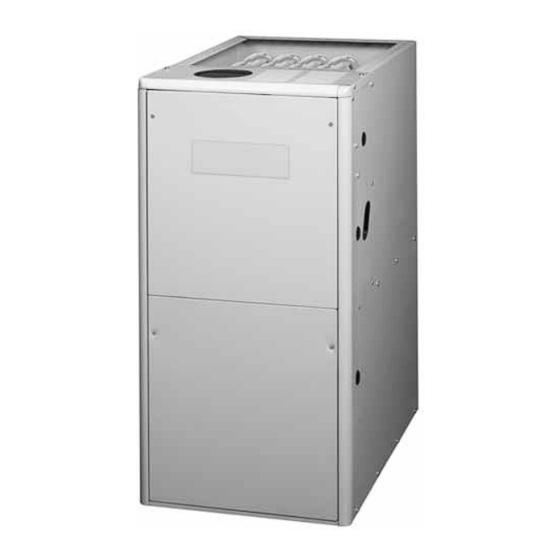
*TA Upflow / HorizonTAl fUrnAce
fire or exploSion HAzArD
• Failure to follow safety warnings exactly
could result in serious injury or property
damage.
• Installation and service must be performed
by a qualified installer, service agency or
the gas supplier.
• Do not store or use gasoline or other
flammable vapors and liquids in the vicinity
of this or any other appliance.
wHAT To Do if YoU SMell gAS
• Do not try to light any appliance.
• Do not touch any electrical switch; do not
use any phone in your building.
• Leave the building immediately.
• Immediately call your gas supplier from a
neighbors phone. Follow the gas suppliers
instructions.
• If you cannot reach your gas supplier, call
the fire department.
DO NOT DESTROY. PLEASE READ CAREFULLY & KEEP IN A SAFE PLACE FOR FUTURE REFERENCE.
wArning / AVerTiSSeMenT
*TK Downflow fUrnAce
riSQUe D'incenDie oU D' exploSion
• Le non-respect des avertissements de sécurité
pourrait entraîner des blessures graves, la mort
ou des dommages matériels.
• L'installation et l'entretien doivent être effectués
par un installateur qualifié, un organisme de
service ou le fournisseur de gazstaller, service
agency or the gas supplier.
• Ne pas entreposer ni utiliser de l'essence ni
d'autres vapeurs ou liquides inflammables dans le
voisinage de cet appareil,ni de tout autre appareil.
QUe fAire S'il Y A Une oDeUr De gAz
• Ne pas tenter d'allumer aucun appareil.
• Ne toucher à aucun interrupteur électrique;
n'utiliser aucun téléphone dans le bâtiment.
• Évacuer l'immeuble immédiatement.
• Appeler immédiatement le fournisseur de gaz en
employant le téléphone d'un voisin. Respecter à
la lettre les instructions du fournisseur de gaz.
• Si personne ne répond, appeler le service des
incendies.
Advertisement
Table of Contents

Related Manuals for Nortek TA Series


Summary of Contents for Nortek TA Series
- Page 1 Two-STAge nonconDenSing gAS fUrnAceS wiTH fixeD & VAriAble SpeeD blowerS - 80+ AfUe inSTAllATion inSTrUcTionS *TA Upflow / HorizonTAl fUrnAce *TK Downflow fUrnAce wArning / AVerTiSSeMenT riSQUe D’incenDie oU D’ exploSion fire or exploSion HAzArD • Le non-respect des avertissements de sécurité •...
-
Page 2: Table Of Contents
TAble of conTenTS iMporTAnT SAfeTY inforMATion ......3 STArT-Up & ADJUSTMenTS........23 Pre-Start Check List ..........23 reQUireMenTS & coDeS .........3 Start-up Procedures ..........23 Combustion Air Quality ..........4 Verifying & Adjusting Input Rate ........23 Clearances to Combustible Materials .......4 Verifying & Adjusting Temperature Rise....24 Heating Load .............4 Verifying Burner Operation ........24 Installation in a Garage ..........5... -
Page 3: Important Safety Information
iMporTAnT SAfeTY inforMATion • Follow all precautions in the literature, on tags, and on labels provided with the equipment. Read and INSTALLER: Please read all instructions before servicing thoroughly understand the instructions provided with this equipment. Pay attention to all safety warnings and the equipment prior to performing the installation and any other special notes highlighted in the manual. -
Page 4: Combustion Air Quality
• When supply ducts carry air circulated by the furnace the use of indoor air in most applications is acceptable to areas outside the space containing the furnace, the except as listed: return air shall also be handled by duct(s) sealed to •... -
Page 5: Installation In A Garage
This gas-fired furnace may be installed in a residential cleArAnceS To coMbUSTible MATeriAlS* garage with the provision that the burners and igniter are located no less than 18 inches (457mm) above the UPFLOW & DOWNFLOW APPLICATIONS floor. The furnace must be located or protected to prevent physical damage by vehicles. -
Page 6: Combustion Air & Venting Requirements
coMbUSTion Air & VenTing reQUireMenTS wArning: AVerTiSSeMenT: cArbon MonoxiDe poiSoning HAzArD riSQUe D’eMpoiSonneMenT AU Failure to follow the steps outlined below MonoxYDe De cArboneD for each appliance connected to the venting Le non-respect des consignes suivantes portant system being placed into operation could sur chacun des appareils raccordés au système d’évacuation mis en service pourrait entraîner result in carbon monoxide poisoning or death. -
Page 7: Installation In A Confined Space
iMporTAnT inforMATion: Air From Inside • Provisions must be made during the installation of If combustion air is taken from the heated space, the two this furnace that provide an adequate supply of air openings must each have a free area of at least one square for combustion.Furnace installation using methods inch per 1,000 Btuh of total input of all appliances in the other than those described in the following sections... -
Page 8: Air Directly Through An Exterior Wall
Ventilation louvers at each end of attic Vent or Vent or Chimney Chimney Outlet air duct must be Attic Insulation at least 1 sq. in. per 12" Max 4,000 Btuh of total input rating. Must NOTE: Each - - - - - - - - - - - -... -
Page 9: Alternate Method Of Providing Air From Outside
Alternate Method of Providing Air from Outside: Category I Venting If acceptable under local Codes, it is permitted to provide This furnace is listed as a Category I vented appliance. outside air using one opening (See NFGC). Generally, Category I furnaces generally operate with a slight confined spaces must have 2 openings in the space for negative pressure (draft) and must be vented vertically or combustion air. -
Page 10: Horizontal Venting
Horizontal Venting • The venting system should be designed to have the minimum number of elbows or turns. All horizontal runs • Horizontal vent systems must be sealed with a high shall slope upwards from the furnace at ¼ inch per temperature sealant that can withstand temperatures of running foot of vent. -
Page 11: Circulating Air Requirements
circUlATing Air reQUireMenTS • When a cooling system is installed which uses the furnace blower to provide airflow over the indoor coil, the coil must be installed downstream (on the outlet wArning: side) of the furnace or in parallel with the furnace. •... -
Page 12: Downflow Furnaces
• Position the supply air ductwork onto the furnace static duct system of a home. *TA series gas furnaces are ensuring even alignment of furnace air opening and shipped ready for installation in the upflow or horizontal supply air duct. -
Page 13: Locating The Furnace
To determine the required clearances needed for installation, refer to Figure 21, (page 28) for overall The *TA series gas furnace can be installed horizontally dimensions. in an attic, basement, crawl space or alcove (Figure • The furnace must be installed on a solid surface... -
Page 14: Downflow Furnaces
Downflow Furnaces The furnace must not be installed directly on carpeting, tile, or any combustible material other than wood flooring. To install the furnace on combustible flooring, a special sub-base is required. wArning: Nuts (x2) Failure to install the downflow sub-base kit may Bolt Threaded Washer... -
Page 15: Pressure Switch Tubing
Pressure Switch Tubing Figure 10 displays the proper routing of pressure switch tubing for *TA & *TK furnaces. On both furnaces, the tubing connects at one end of the pressure switch and is routed directly to the static tap on the inducer assembly. noTe: The control board in the *TA illustration has been omitted for clarity of tubing installation. -
Page 16: Gas Supply & Piping
gAS SUpplY & piping • All gas piping must be installed in compliance with local codes and utility regulations. In the absence wArning: of local codes the gas line installation must comply with the latest edition of the National Fuel Gas Code (ANSI Z223.1) or (CAN/CGA B149.1 or .2) Installation fire or exploSion HAzArD Codes. - Page 17 UPFLOW MODELS Note “A” Note “A” Left Side Entry Right Side Entry DOWNFLOW MODELS Note “A” Note “A” Left Side Entry Right Side Entry coMponenTS: (1) Automatic Gas Valve (2) Burner Assembly (3) Dripleg (4) Elbow (w/ manual shut-off) (5) Ground Joint Union (6) Manifold (7) Plug (8) Shut - Off Valve...
-
Page 18: High Altitude Application
The furnaces are shipped from the factory with orifices AVerTiSSeMenT: and gas regulator settings for natural gas operation at sea level altitudes. At 2000 feet, the NFGC requires that this appliance be derated 4% for each 1000 feet of altitude. riSQUe D’inDenDie oU D’exploSion For example, the input needs to be reduced 8% at 2,000 Le non-respect des avertissements de sécurité... -
Page 19: Conversion To Lp / Propane
Conversion to LP / Propane elecTricAl wiring wArning: wArning: The furnace was shipped from the factory ELECTRICAL SHOCK, FIRE OR equipped to operate on natural gas. Conversion exploSion HAzArD to LP / Propane gas must be performed by Failure to follow safety warnings exactly could qualified service personnel using a factory result in serious injury or property damage. -
Page 20: Grounding
iMporTAnT noTeS: Grounding • An electrical disconnect must be installed readily wArning: accessible from and located within sight of the furnace. See Figure 14 or the wiring diagram label To minimize personal injury, the furnace cabinet inside of the control door. Any other wiring methods must have an uninterrupted or unbroken electrical must be acceptable to authority having jurisdiction. -
Page 21: Single Stage Ac & Single Stage Thermostat
are wired to the terminal strip on the integrated control in the furnace. Recommended minimum wire gauge for thermostat wiring is shown in Table • The thermostat should be mounted about 5 feet above the floor on an inside wall. DO NOT install the thermostat HIGH EFFICIENCY on an outside wall or any other location where its BLOWER MOTOR... -
Page 22: Autostaging For Two-Stage Thermostats
output to the terminal marked DEHUM. The thermostat noTe: If the autostage jumper is in the on position and should be set so that the DeHUM output should be high a w1 demand is present when power is applied to the (positive) when dehumidification is needed. -
Page 23: Heat Anticipator
to connect the r & DeHUM via a field supplied normally Verifying & Adjusting Input Rate open relay. See Figure 19, (page 22). The r & DeHUM The input rate must be verified for each installation to terminals should be connected across the normally open prevent over-firing of the furnace. -
Page 24: Verifying & Adjusting Temperature Rise
For typical duct systems, the temperature rise will fall 2-STAGE GAS VALVES within the limits specified on the rating plate with the blower speed at the factory recommended setting. If Lo Input HI Input the measured temperature rise is outside the specified Adjusting Screw Adjusting Screw limits, it may be necessary to change the speed of the... -
Page 25: Operating Sequence
operATing SeQUence 10. If autostaging is enabled (single stage thermostat) the demand for heat has lasted more than the selected The operating sequences for the heating, cooling, and fan time, the furnace automatically moves up to high fire. modes are described below. Refer to the field and furnace Autostage times are either SHorT (8 minutes), long wiring diagrams: Figure 14, (page 20) -
Page 26: Maintenance
MAinTenAnce • To achieve the best performance and minimize equipment failure it is recommended that a yearly wArning: maintenance checkup be performed. At a minimum, this check should include the following items: Air Filter(s) - Air filter(s) are not supplied with the furnace ELECTRICAL SHOCK, FIRE OR as shipped from the factory. - Page 27 9. Carefully remove the burner assembly from the furnace. 16. Attach a round wire brush to a length of high grade Do noT DAMAge THe igniTer wHile reMoVing stainless steel cable. Attach the other end of the cable to THE BURNER ASSEMBLY. a variable speed reversible drill.
-
Page 28: Figures & Tables
figUreS & TAbleS TOP VIEW BOTTOM VIEW *TA 80+ Upflow / HorizonTAl fUrnAce Front Brace cAbineT DIM. DIM. DIM. DIM. Size Bottom Panel ‘A’ Cabinet 14 1/4 10 3/4 12 5/8 12 7/8 ‘B’ Cabinet 17 1/2 11 3/4 15 7/8 16 1/8 ‘C’... -
Page 29: Airflow Data
Airflow Data HEATING / COOLING AIRFLOWS (CFM) & TEMPERATURE RISES (° F) ExTERNAL STATIC PRESSURE (IN.W.C.) MoTor SwiTcH MoDel nUMber SeTTingS & (0 = OFF, 1 = ON) HeATing inpUT (BTUH) cfM riSe cfM riSe cfM riSe cfM riSe cfM riSe cfM riSe cfM riSe cfM riSe 1,000 44 *TA / TK - 060c - 23A1 (60,000) - Page 30 HEATING / COOLING AIRFLOWS (CFM) & TEMPERATURE RISES (° F) ExTERNAL STATIC PRESSURE (IN.W.C.) MoTor SwiTcH MoDel nUMber SeTTingS & (0 = OFF, 1 = ON) HeATing inpUT (BTUH) cfM riSe cfM riSe cfM riSe cfM riSe cfM riSe cfM riSe cfM riSe cfM riSe 1,125 66 1,040 71 1,205 61 1,120 66 1,040 71 1,305 57 1,225 60 1,150 64 1,070 69...
- Page 31 NOMINAL HEATING AIRFLOWS (CFM) & TEMPERATURE RISE (° F) SwiTcH SeTTingS for HeAT *TA / TK - 060c - VA1 (0 = OFF, 1 = ON) INPUT (BTU) 60,000 TEMP RISE (° F) “A” CABINET 1,040 1,120 1,200 SwiTcH SeTTingS for HeAT *TA / TK - 080c - Vb1 *TA - 100c - Vb1 (0 = OFF, 1 = ON)
- Page 32 NOMINAL COOLING / HEAT PUMP AIRFLOWS (CFM) FOR VARIABLE SPEED FURNACES “B” CABINET “A” CABINET SwiTcH SeTTingS SwiTcH SeTTingS (0 = OFF, 1 = ON) (0 = OFF, 1 = ON) noMinAl A/c noMinAl A/c & Hp cApAciTY & Hp cApAciTY HeAT cool HeAT...
-
Page 33: Electrical Information
Electrical Information NOT USED EXPANSION PORT CONNECTION TO FURNACE CONTROL BOARD MOTOR WIRE HARNESS FAN SPEED 1 2 3 4 5 6 7 8 COOL HEAT STATUS Figure 22. Two-Stage Fixed Speed Motor Control Board STATUS LIGHTS L2-IN L2-OUT W_OUT Y/Y2_OUT L1-IN Y1_OUT... - Page 34 COOL HEAT FAN SPEED LINE- N LINE- N XMFR-N LINE LINE XMFR Figure 25. Wiring Diagram for Two-Stage, Fixed Speed Upflow Furnaces...
- Page 35 COOL HEAT FAN SPEED BLACK BLACK LINE- N LINE- N XMFR-N LINE LINE XMFR Figure 26. Wiring Diagram for Two-Stage, Fixed Speed Downflow Furnaces...
- Page 36 COOL HEAT FAN SPEED LINE- N LINE- N XMFR-N LINE LINE XMFR Figure 27. Wiring Diagram for Two-Stage, Variable Speed Upflow Furnaces...
- Page 37 COOL HEAT FAN SPEED LINE- N LINE- N XMFR-N LINE LINE XMFR Figure 28. Wiring Diagram for Two-Stage, Variable Speed Downflow Furnaces...
-
Page 38: Gas Information
Gas Information gAS flow rATeS gAS flow rATeS (CUBIC FEET PER HOUR) (CUBIC FEET PER HOUR) cUbic feeT per cUbic feeT per TiMe for TiMe for reVolUTion of gAS MeTer reVolUTion of gAS MeTer one reVolUTion one reVolUTion (SECONDS) (SECONDS) 1,800 3,600 1,500... - Page 39 propAne DerATion cHArT INPUT (BTU) & STAGE AlTiTUDe AboVe 60,000 80,000 100,000 120,000 140,000 SeA leVel ORIFICE SIZE 0 to 1,999 FT 10.0 10.0 10.0 10.0 10.0 MANIFOLD PRESSURE ORIFICE SIZE 2,000 to 2,999 FT MANIFOLD PRESSURE ORIFICE SIZE 3,000 to 4,999 FT MANIFOLD PRESSURE ORIFICE SIZE 5,000 to 5,999 FT...
-
Page 40: Natural Gas - High Heating Value
nATUrAl gAS wiTH HigH HeATing VAlUe INPUT (BTU) & STAGE AlTiTUDe AboVe 60,000 80,000 100,000 120,000 140,000 SeA leVel ORIFICE SIZE 0 to 1,999 FT MANIFOLD PRESSURE ORIFICE SIZE 2,000 to 2,999 FT MANIFOLD PRESSURE ORIFICE SIZE 3,000 to 3,999 FT MANIFOLD PRESSURE ORIFICE SIZE 4,000 to 4,999 FT... -
Page 41: Troubleshooting
TroUbleSHooTing • If the furnace still doesn’t operate, check the Flame Roll-out Switches (Figure 29) and reset if necessary. If the furnace fails to operate check the following: • If the furnace operates when the Flame Rollout Switch • Is the thermostat operating properly? is reset, contact a qualified service technician to identify •... - Page 42 UPFLOW / HORIZONTAL FURNACE (*TA SERIES) Main Air Limit Switch Furnace Control Board Inducer Gas Valve Assembly Pressure Switch Transformer Flame Sensor Igniter Gas Manifold Blower Door Switch Burner Assembly Roll-Out Switch Motor Control Box Motor Choke (C & D cabinets only)
-
Page 44: Installation / Performance Check List
Please read all instructions carefully before starting the installation. Return these instructions to the customer’s package for future reference. Specifications & illustrations subject to change without notice or incurring obligations (05/15). O’Fallon, MO, © Nortek Global HVAC LLC 2015. All Rights Reserved. 709045c (Replaces 709045B)
Need help?
Do you have a question about the TA Series and is the answer not in the manual?
Questions and answers