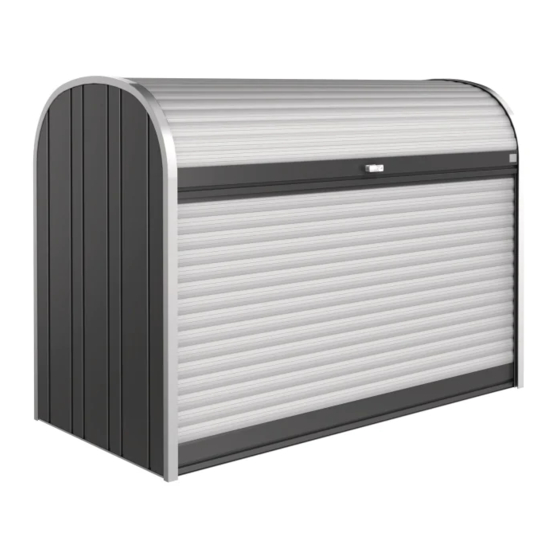
Biohort StoreMax 190 Owner's Manual & Assembly Instructions
Hide thumbs
Also See for StoreMax 190:
- Assembly manual (16 pages) ,
- Assembly manual (16 pages) ,
- Assembly manual (16 pages)

Related Manuals for Biohort StoreMax 190


Summary of Contents for Biohort StoreMax 190
- Page 1 OWNER‘S MANUAL & ASSEMBLY INSTRUCTIONS StoreMax® 190 Instrucciones de montaje de “StoreMax® 190” Notice de montage du “StoreMax® 190“ CAUTION sharp edges Gloves must be worn at all times to reduce risk of injury! QUALITY FROM A U S T R I A...
- Page 2 IMPORTANT DETAILS BEFORE STARTING ASSEMBLY! FOR YOUR SAFETY AND CORRECT ASSEMBLY, PLEASE READ AND FOLLOW ALL INSTRUCTIONS IN THE MANUAL CAREFULLY. ¡Detalles importantes antes de comenzar el montaje! Para su seguridad y correcto montaje, lea y siga atentamente todas las instrucciones del manual.
- Page 3 ADDITIONAL ASSISTANCE OF ONE PERSON WILL BE REQUIRED FOR SEVERAL ASSEMBLY STEPS. Se necesitará la ayuda de una persona para varios pasos de montaje. Vous aurez besoin de l’aide d‘une deuxième personne sur plusieurs étapes de montage. DIRECT SUNLIGHT MAY CAUSE THE SURFACE OF THE BOX TO BECOME HOT! DURING THE SUMMER, THE INSIDE MAY REACH HIGH TEMPERATURES.
-
Page 4: Care And Maintenance
Biohort shall not be responsible for any injury caused to the user during assembly, usage and possession. Cláusula de responsabilidad del producto. Biohort no se hace responsable de los daños causados al usuario durante el montaje, el uso y la posesión. -
Page 5: Parts Overview
PARTS OVERVIEW Lista de piezas · Liste des pièces Base plate Left and right side wall Rear wall panels (3 parts) Plaque de fond Parois latérales droite et gauche Paroi arrière (3 parties) Stiffening rail Front roller shutter Top roller shutter (with lock) Profil de renforcement Volet roulant antérieur Volet roulant supérieur (avec serrure) - Page 6 Parts list StoreMax ® liste des pièces pour le StoreMax 190 | liste des pièces pour le StoreMax 190 ® Note concerning article number: Remarque conc. num.d´articles: metallic dark grey = XS …. metallic quartz grey = XS ..metallic silver = S ..
- Page 7 Small parts packet paquet de petites pièces Quantity Description Art.-No. Dimensions / mm Pièce Désignation N° article Mesure / mm Nut driver Tournevis à embout spécial X2000060 S S t t a a i i n n l l e e s s s s s s t t e e e e l l s s c c r r e e w w , , s s h h o o r r t t ø...
- Page 8 Assembly steps Etapes d’assemblage "A" Detail "A" Place the base plate on a flat surface. Place the left back wall in the U-profile at the back of the base plate as shown. Make sure the back wall is positioned correctly: inside= light grey side, slot (see detail A &...
- Page 9 Insert the right wall into the U-profile of the right side of the base plate. (Attention: you can recognise the right wall by the fact that the roller shutter brake spring is positioned at the front - see photo on page 10). Connect the right wall to the back wall provisionally (as shown in photo on page 10) with the black plastic part (assembly aid, which will later serve as a spacer for the...
- Page 10 2. continued pring Likewise, screw the aluminium profiles on the left and right ressort with the long stainless steel screws on the back side to the base plate - please do not tighten the rear screws yet! Finally, place the back wall attachment plate onthe back wall as shown on page 11 - please do not bolt this part on yet! Montage des parois latérales: Emboîtez la paroi latérale droite (R) dans...
- Page 11 Front left Front right Back l’envers avant gauche avant droit Back l’envers Installation of the stiffening rail and the spacers: Take the stiffening rail as shown, insert it carefully into the box and bolt it hand-tight to the left and right ends (see arrows in the photo on page 11) only with one bolt/washer/nut each to the side walls.
- Page 12 Fixation du profil de renforcement et des pièces de distance: Prenez comme représenté le profil de renforcement et positionnez-le à l’intérieur du Store Max. Fixez les parois latéra- les et le profil de renforcement sur les côtés droit et gauche (voir flèches) avec une vis/rondelle/ écrou.
- Page 13 écrous à l’aide de la clé à canon SW7 et tous les vis inoxydables à l’aide d’un tournevis. Veillez à ce que votre «StoreMax 190» soit sur une surface plane. IMPORTANT: SHARP EDGES! USE WORK GLOVES TO PREVENT INJURY! Importante: ¡Cantos afilados! Utilice guantes de trabajo para evitar lesiones.
- Page 14 Carefully place the box on its front. Gently insert the "front" roller shutter (without lock!) with the outside facing upwards and with the rubber buffers first (see photo on page 14) into the inner (lower) guide groove of the aluminium arch. Make sure that the black plastic glides on the sides of the aluminium slats do not become damaged.
- Page 15 The rubber stoppers are also secured on the left and right with a short stainless steel screw each. Now upright your StoreMax 190. Montage des arrêts arrières du volet roulant: Les deux arrêt-ressorts sont emboîtés dans la rainure interne (voir photo), exercez une pression vers le bas jusqu’au butoir.
- Page 16 C C o o m m p p l l e e t t i i o o n n a a n n d d f f u u n n c c t t i i o o n n c c h h e e c c k k : : With the roller shutter in a closed position.
- Page 17 Contrôle de fonctionnalité et finissage: Le StoreMax 190 est fermé. Enfilez la ficelle en nylon à travers le trou de la dernière lamelle comme représenté et faites un nœud à l’endroit marqué en rouge. roulants. Le pied coulissant des arrêt-ressorts peut être huilé si nécessaire.
- Page 18 PAGE INTENTIONALLY LEFT BLANK. Página dejada intencionalmente en blanco. Page intentionnellement laissée blanche.
- Page 19 PAGE INTENTIONALLY LEFT BLANK. Página dejada intencionalmente en blanco. Page intentionnellement laissée blanche.
- Page 20 Qualität in Bestform GARDEN SHEDS – rely on quality & longevity Biohort stands for „LIFE IN THE GARDEN“ OUTDOOR BOXES – outdoor boxes for garden, patio & more Biohort Customer survey! Your opinion is important to us! BICYCLE STORAGE – for safe storage of bicycles, scooters & more Let us have your feedback about our products and services.
Need help?
Do you have a question about the StoreMax 190 and is the answer not in the manual?
Questions and answers