
Related Manuals for AlpicAir AM2O-51HPDC1D


Summary of Contents for AlpicAir AM2O-51HPDC1D
- Page 1 Owner's Manual Split Type Wall-mounted Air Conditioner AM2O-51HPDC1D AM3O-71HPDC1D AM4O-81HPDC1D Thank you for choosing our product. For proper operation, please read and keep this manual carefully.
-
Page 3: Table Of Contents
In line with the company’s policy of continual product improvement, the aesthetic and dimensional characteristics, technical data and accessories of this appliance may be changed without notice. GENERAL INFORMATION CONTENTS Conformity And Range Warning The Instructions Before Use Name of Parts Technical Data Outdoor Unit Working Temperature Range Electrical Connections... -
Page 4: Warning
GENERAL INFORMATION Warning Operation and Maintenance This appliance can be used by children aged from 8 years and above and persons with reduced physical, sensory ormental capabilities or lack of experience and knowledge if they have been given supervision or instruction concerning use of the appliance in a safe way and understand the hazards involved. - Page 5 GENERAL INFORMATION Warning If the air conditioner operates under abnormal conditions, it may cause malfunction,electric shock or fire hazard. When turning on or turning off the unit by emergency operation switch, please press this switch with an insulating object other than metal. Do not step on top panel of outdoor unit, or put heavy objects.
- Page 6 GENERAL INFORMATION Warning The air conditioner is the first class electric appliance. It must be properly grounding with specialized grounding device by a professional. Please make sure it is always grounded effectively, otherwise it may cause electric shock. The yellow-green wire in air conditioner is grounding wire, which can't be used for other purposes.
-
Page 7: The Instructions Before Use
THE INSTRUCTIONS BEFORE USE GENERAL INFORMATION WARNING When having a burning smell or The power supply must adopt the Never cut off or damage power ★ ★ ★ smoke,please turn off the power special circuit that with air switch cables and control wires. If the supply and contact with the ser- protection and assure it has enou- power cable and signal control... -
Page 8: Name Of Parts
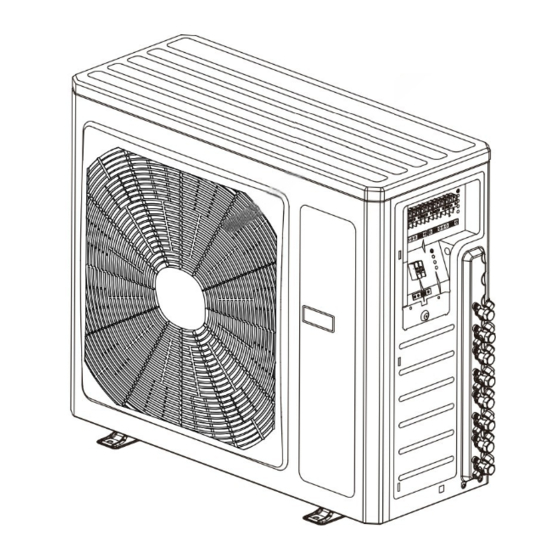
NAME OF PARTS GENERAL INFORMATION AM2O-51HPDC1D Warning Be sure to cut off the power supply before cleaning the air conditioner; otherwise electric shock might happen. Wetting of air conditioner may cause the risk of electric shock. Make sure not to wash your air conditioner in any case. -
Page 9: Technical Data
TECHNICAL DATA GENERAL INFORMATION MODE AM2O-51HPDC1D Electrical data Electricity supply 220-240V~,50Hz Fuse or air switch Minimum power cord section Size and clearance TECHNICAL DATA GENERAL INFORMATION MODE AM4O-81HPDC1D AM3O-71HPDC1D 、 Electrical data Electricity supply 220-240V~,50Hz Fuse or air switch Minimum power cord section... -
Page 10: Electrical Connections
ELECTRICAL CONNECTIONS INSTALLER AM2O-51HPDC1D AM2O-51HPDC1D 1. Remove the handle at the right side plate of the outdoor unit (one screw). Handle 2. Remove the cable clamp, connect the power connection cable with the terminal at the row of connection and fix the connection. - Page 11 ELECTRICAL CONNECTIONS INSTALLER AM3O-71HPDC1D: 1. Remove the handle at the right side plate of the An all-pole disconnection switch having a contact outdoor unit (one screw). separation of at least 3mm in all pole should be connected in fixed wiring. 3.
- Page 12 ELECTRICAL CONNECTIONS INSTALLER AM4O-81HPDC1D : 1. Remove the handle at the right side plate of the An all-pole disconnection switch having a contact outdoor unit (one screw). separation of at least 3mm in all pole should be connected in fixed wiring. 3.
-
Page 13: Installing The Outdoor Unit
INSTALLING THE OUTDOOR UNIT INSTALLER Location Install the drain fitting and the drain hose (for model with heat pump only) Use bolts to secure the unit to a flat, solid floor. Condensation is produced and flows from the out- When mounting the unit on a wall or the roof, make door unit when the appliance is operating in the sure the support is firmly secured so that it cannot heating mode. -
Page 14: Maintenance
Contact service center before installation to avoid the malfunction due to unprofessional installation. When picking up and moving the units, you must be guidedby trained and qualified person. Ensure that the recommende dspace is left around the appliance. AM2O-51HPDC1D 50cm or more... -
Page 15: Check After Installation
CHECK AFTER INSTALLATION INSTALLER Check Items Problems Owing to Improper Installation Is the installation reliable? The unit may drop, vibrate or make noises May cause unsatisfactory cooling (heating) Has the gas leakage been checked? effect Is the thermal insulation of the unit May cause condensation and water dropping sufficient? Is the drainage smooth? - Page 16 66129921520...
Need help?
Do you have a question about the AM2O-51HPDC1D and is the answer not in the manual?
Questions and answers