Table of Contents
Advertisement
Quick Links
Advertisement
Table of Contents

Related Manuals for Schweigen CLUM210


Summary of Contents for Schweigen CLUM210
- Page 1 RANGEHOOD & INSTALLATION GUIDE CLUM210 CLUM212 www.schweigen.com.au...
-
Page 2: Table Of Contents
Index Welcome Your State Regulatory Authority Important Safety Information Before Installation Product Use Ducted or Recirculating? Maintenance and Service Cleaning the Baffle Filters Electrical Cord Description Rangehood Cutout Size Operation Push Button Control Panel Speed Control Cleaning & Maintenance Surfaces Filters Cleaning the Interior Cleaning the Exterior... -
Page 3: Welcome
Please help us to continue this effort to protect the environment by using the appliance efficiently and dispose of the packaging in a responsible manner. We trust that you will enjoy your new Schweigen rangehood. Your State Regulatory Authority Different Australian states have varying legislative requirements for the installation of rangehood ducting. -
Page 4: Important Safety Information
2. Important Safety Information WARNING Please read this section thoroughly before attempting to operate the appliance. Inspect your product upon receipt. Any damage or defects MUST be reported within 48 hours, or no claim will be recognised. DO NOT INSTALL THIS APPLIANCE IF YOU FIND IT DAMAGED. If this product is installed damaged, neither the supplier, nor the retailer, will be responsible for the costs associated with the repair, replacement, removal or re-installation of the appliances. -
Page 5: Before Installation
19. Never cook foodstuff directly over the flame or have the gas burners on under the rangehood without using cookware. Before Installation 1. We recommend this appliance be installed or repaired by a qualified Schweigen Home Appliances technician. 2. Please see our website www.schweigen.com.au for recommended installers. -
Page 6: Product Use
2. Important Safety Information Product Use This product is designed for household use and should not be used for commercial applications. After use, always ensure that all controls are in the “OFF” position. When frying with a gas flame, take particular care not to allow the oil or grease in the pan to catch fire. -
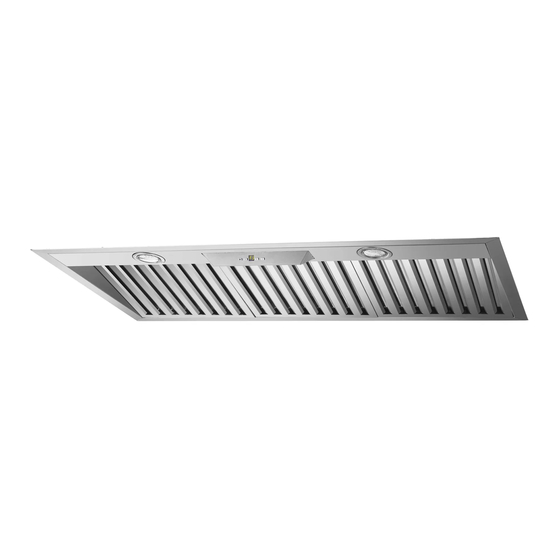
Page 7: Description
Use this as a guide only when designing your cabinet. We advise you to take the rangehood to your cabinet maker so they can tailor the cabinet to fit correctly. CLUM210: 966mm / CLUM212: 1166mm approx. Dimensions may be subject to change. -
Page 8: Operation
4. Operation T O U C H B U T T O N C O N T R O L P A N E L Remote control sensor Fan speed setting Turn light on/off Turn rangehood on/off R E M O T E C O N T R O L As well as the touch buttons, this rangehood comes with a remote control to operate the rangehood. -
Page 9: Cleaning & Maintenance
5. Cleaning & Maintenance Warning Always switch off and disconnect power before cleaning. Cleaning the Interior Clean the interior of the rangehood with a damp cloth and a neutral detergent or denatured alcohol. NOTE: Do not use denatured alcohol on the exterior of the rangehood. Do not clean the electric parts or the motor with liquids or solvents Cleaning the Exterior We recommended using a soft cloth, water and a liquid soap, rinsing it well and then drying it thoroughly. - Page 10 5. Cleaning & Maintenance Baffles For this appliance to function effectively, regular maintenance is a must. • The function of the baffle is to collect the grease particles given off during cooking. • Clogged heavy oil deposits restrict airflow and may cause the motor to overheat and become a fire hazard.
-
Page 11: Replacing The Light Bulb
5. Cleaning & Maintenance Replacing the Light Bulb DANGER Always switch off and disconnect the power cord before replacing any light bulbs. Failure to do so may cause serious injury. Please be aware that the light bulb will retain heat for a short period of time after being switched off. -
Page 12: Installation
6. Installation Rangehood Size vs Cooktop Size In addition to the size, the height of the rangehood above the cooktop is important to obtain the best performance. INADEQUATE ADEQUATE OPTIMAL Rangehood smaller than Rangehood same size as Rangehood larger than cooking zone cooking zone cooking zone... -
Page 13: Overhead Cabinet Rangehood Installation Position
6. Installation Overhead cabinet Rangehood Installation position It is important to consider the benchtop and overhead cabinetry depth before installing the rangehood. The information below is to be used as a guide only, drawings are not to scale and do not account for all circumstances. -
Page 14: Mounting Instructions - Outdoor/Alfresco
*IMPORTANT: If the user decides to install the rangehood at a distance of less than minimum height above the cooking surface, Schweigen declines responsibility for damages suffered by the rangehood due to excess heat or damage to objects, people and others caused directly or indirectly by a malfunction, breakage or fire. - Page 15 6. Installation Mounting Points for Body The diagrams below are a guide for all mounting points. Mounting Points CLUM210: 960 / CLUM212: 1160 68.3 CLUM210: 1000 / CLUM212: 1200 WARNING Please remove filters before installation. Failure to do so may damage the clips.
-
Page 16: Installation Example
TOP VIEW 6. Installation _n_. _LH Section_ Installation Example FRONT VIEW BOTTOM VIEW Step 1 Insert support frame into cabinet. The support will only be needed in certain circumstances. NOTE: The support frame is not included. The requirement of a support frame is dependent SIDE VIEW SIDE VIEW on the type and location of installation. -
Page 17: Ducting
_n_. _RH Section_ 6. Installation Ducting Please DO NOT crush or kink the ducting. 1. Crushed or kinked ducting creates sharp corners that creates turbulence. This reduces the size and efficiency of the ducting, lowers extraction and may cause excessive noise. 2. -
Page 18: Ducting Advice
6. Installation _n_. _LH Section_ Ducting Advice Straight ducting is the most effective installation Keep the curves or bends to a minimum. If they do exist, try to keep the angles as open as possible. Never reduce flue diameter right next Never fit reductions next to curves or bends in to the rangehood outlet fitting. -
Page 19: Roof Cowls / Roof Seal Kit - Dual 200Mm Ducts
_n_. _RH Section_ 6. Installation Roof Cowls / Roof Seal Kit – Dual 200mm ducts WARNING All electrical wiring should be kept inside the roof space. 1. Roof Cowls (Not supplied)* 2. Flexible Ducting must be pulled taut. DO NOT crush or kink the ducting. -
Page 20: Roof Cowls / Roof Seal Kit - Single 200Mm Duct
6. Installation _n_. _LH Section_ Roof Cowls / Roof Seal Kit – Single 200mm duct WARNING All electrical wiring should be kept inside the roof space. 1. Roof Cowl (Not supplied)* 2. Flexible Ducting must be pulled taut. DO NOT crush or kink the ducting. -
Page 21: Troubleshooting
In the event that the failure is not due to the faults mentioned in the Troubleshooting section, you can lodge an online Service Request. To lodge an online Service Request, visit our website www.schweigen. com.au/service-and-warranty and click on the link and complete the service request form. -
Page 22: Specifications
8. Specifications Dimensions 68.3 CLUM210: 960 / CLUM212: 1160 CLUM210: 1000 / CLUM212: 1200 Dual 200mm adaptor Technical Specifications Model CLUM210 /CLUM212 Feeding Voltage 220–240V 50Hz Lamp Power — LED (W) 2 x 3W ILCOS Code DRR-3-H-GU10-51/55 Page 22... -
Page 23: Disclaimer
All information supplied is to be used for general reference purposes only and is on the understanding that Schweigen will not be liable for any loss, liability or damage of whatever kind arising as a result of any reliance upon such information. All pictures used in the guide are for illustrative purposes only. - Page 24 Australia Unit 4/1-5 Lake Drive, Dingley Village, Victoria 3172. Phone 1300 881 693 Email sales@schweigen.com.au Web www.schweigen.com.au New Zealand 5 Tolich Place, Henderson, Auckland 0610. Phone 0800 200 510 Email info.parex@emerson.com Web www.parex.co.nz Revision V3 07/08/23...
Need help?
Do you have a question about the CLUM210 and is the answer not in the manual?
Questions and answers