
Related Manuals for Pulse Shower Spas Lanikai 1028-BN


Summary of Contents for Pulse Shower Spas Lanikai 1028-BN
- Page 1 Lanikai Shower System Model #1028 - BN, 1028-BN-1.8GPM, 1028-CH, 1028 - CH-1.8GPM, 1028-MB-1.8GPM PW-91028-1625BRN, PW-91028-1618BRN, PW-91028-1625CP, PW-91028-1618CP, PW-91028-1618BM Owner's Manual...
- Page 2 Lanikai Shower System Model #1028 Please Read The Following Instructions COMPLETELY Before Beginning! Our goal is to ensure your installation goes smoothly and safely. Please read these instructions carefully and follow recommendations for plumbing and mounting. After reading instructions, if you determine you do not have the necessary skills and/or tools, we recommend that a licensed plumbing contractor complete the installation.
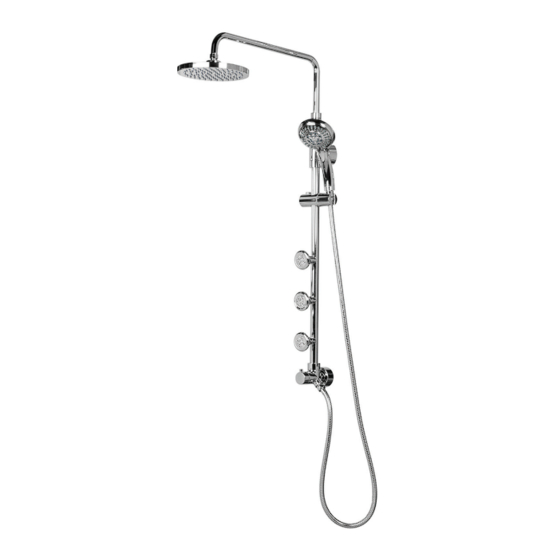
- Page 3 Lanikai Parts Legend 1. Showerhead 8. Body Jets 15. Wall Mount 2. Shower Arm 9. Handshower Holder 16. Mounting Screws..2 3. Shower Arm Riser 10. Handshower 17. Wall Anchors....2 4. Set Screws....3 11. Washer.......3 18. Allen Wrench 5. Escutcheon 12. Hose 19.
-
Page 4: Before You Begin
Installation Instructions BEFORE YOU BEGIN Measure the following to ensure your Lanikai Shower System will fit properly. New Construction Retrofit 28” minimum 28” minimum Make sure distance from water outlet and Remove existing shower arm and shower head. mixing valve trim (NOT INCLUDED) is a Make sure distance from water outlet and minimum 28"... - Page 5 Installation Instructions Step 1 Step 2 Screw shower arm riser (3) to shower pipe (7). Mixing valve (NOT INCLUDED) [Step 1] Apply a generous amount of PTFE (plumber's) Attach shower arm (2) to shower arm riser (3) and tape to end of end of nipple. secure.
- Page 6 Installation Instructions OPTIONAL CAUTION: Live Plumbing Attach assembled shower to inlet fitting (6) and OPTIONAL: If you wish to drill wall mount (15), place secure set screw (4) with allen wrench (18) provided. it on marked location and mark holes for drilling. Set wall anchors (17) in place.
- Page 7 Installation Instructions Insert washer (11) into the hex end of the handshower hose (12). Attach hose (12) to handshower outlet located on the bottom right of the diverter body (13). Insert washer (11) into the tapered end of the handshower hose (12) and attach the handshower (10). Place the tapered end of the hose into the hand shower holder (9).
-
Page 8: Care And Maintenance
C h e m i c a l s O r A b r a s i v e s ! MANUFACTURER'S LIFETIME LIMITED WARRANTY 1. Defects Covered; Warranty Period: Pulse Shower Spas, Inc. 5. No Other Warranties; Limitation of Liability: OTHER (“Pulse”) warrants to the original consumer purchaser who...
Need help?
Do you have a question about the Lanikai 1028-BN and is the answer not in the manual?
Questions and answers
Ref: model 1028BN hand shower holder Need the plastic sleeve holding the two holders together, secured by a screw. could you advise how I can get one of these. Thank you