
Related Manuals for MasterForce 240-5417


Summary of Contents for MasterForce 240-5417
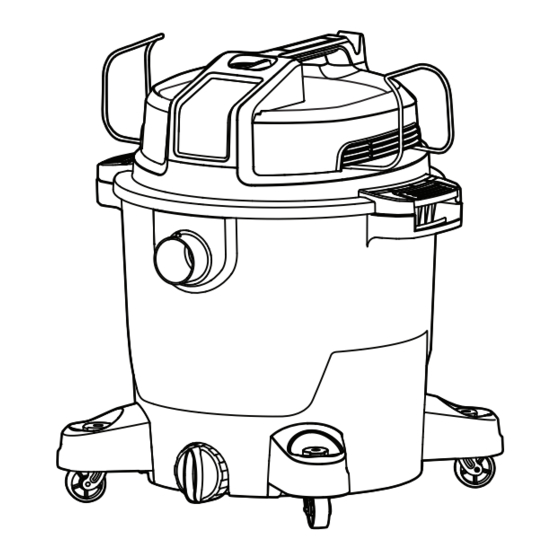
- Page 1 Wet/Dry Vacuums 240-5417 OPERATOR’S MANUAL CAUTION: To Reduce The Risk Of Injury, User Must Read And Understand Operator's Manual. Save These Instructions For Future Reference.
-
Page 2: Table Of Contents
TABLE OF CONTENTS SECTION PAGE Safety Instructions & Warnings ......................2 Double Insulation Instructions ......................4 Extension Cords ..........................4 Unpacking & Checking Carton Contents ..................5 General Assembly Instructions .......................7 Dry Vacuum Operation .........................10 Liquid Vacuum Operation ......................12 Blower Operation ..........................14 Maintenance ..........................16 Installing &... -
Page 3: Safety Instructions & Warnings
SAFETY INSTRUCTIONS & WARNINGS The purpose of safety symbols is to attract our attention to possible dangers. The safety symbols, and the explanations with them, deserve your careful attention and understanding. The symbol warnings do not by themselves eliminate any danger. The instructions and warnings they give are no substitutes for proper accident prevention measures. - Page 4 SAFETY INSTRUCTIONS & WARNINGS READ AND UNDERSTAND ALL • To reduce the risk of injury from accidental INSTRUCTIONS BEFORE USING THIS VACUUM. starting, unplug power cord before changing or cleaning filter. Read and understand this operator’s manual • Do not leave vacuum when plugged in. and all labels on the vacuum cleaner before Unplug from outlet when not in use and operating.
-
Page 5: Double Insulation Instructions
DOUBLE INSULATION INSTRUCTIONS This Wet/Dry Vacuum is double insulated, TYPE OF DUST IS VERY FINE WHICH MAY NOT eliminating the need for a separate grounding BE CAPTURED BY THE FILTER AND CAUSE system. Use only identical replacements parts. DAMAGE TO MOTOR. WHEN VACUUMING Read the instructions for Servicing Double- FINE DUST USE A FINE DUST FILTER. -
Page 6: Unpacking & Checking Carton Contents
UNPACKING & CHECKING CARTON CONTENTS Remove all contents from the box. Remove the power head and take out any contents inside the collection tank. Check each item against the carton contents list. Hose Extension Wands Vacuum Assembly Utility Nozzle Crevice Tool Floor Brush / Squeegee Foam Wet Filter Cartridge Filter... - Page 7 UNPACKING & CHECKING CARTON CONTENTS Handle On/Off Switch Hose Storage Rack Power Head Blower Port Latch Vacuum Port Collection Tank Accessory Storage Caster Foot Caster Drain Page 6...
-
Page 8: General Assembly Instructions
GENERAL ASSEMBLY INSTRUCTIONS A Philips head screwdriver is required. Fig. 3 WARNING: D O N O T P L U G T H E POWER CORD INTO A POWER OUTLET. MAKE SURE THE PLUG IS DISCONNECTED BEFORE ASSEMBLING THE WET/DRY V A C U U M . - Page 9 GENERAL ASSEMBLY INSTRUCTIONS align with the corresponding arrow and insert 9. Place the power head back on the collection into the slot until it is secured in place tank and secure into place using the latches (Fig. 6a-6d). (Fig. 10 & 11). Fig.
- Page 10 GENERAL ASSEMBLY INSTRUCTIONS NOISE DIFFUSER For quiet operation, install the noise diffuser into the blower port by inserting the locking end of the diffuser into the blower port and turning clockwise to lock into place (Fig. 14). Fig. 14 POLARIZED PLUG To reduce the risk of electrical shock, this appliance has a polarized plug (one blade wider than the other).
-
Page 11: Dry Vacuum Operation
DRY VACUUM OPERATION DRY VACUUMING 2. In order to prepare your vacuum for dry vacuuming, make sure the cartridge filter WARNING: B E S U R E T O R E A D , completely covers the filter cage against the UNDERSTAND, AND APPLY INFORMATION power head. - Page 12 DRY VACUUM OPERATION Fig. 5 Fig. 8 10. Once you have completed vacuuming, flip 7. Choose the desired accessory and insert onto the on/off switch to the ‘O’ OFF position and the end of the hose or extension wand (Fig. 6). unplug the power cord from the outlet.
-
Page 13: Liquid Vacuum Operation
LIQUID VACUUM OPERATION LIQUID VACUUMING Fig. 2 WARNING: B E S U R E T O R E A D , UNDERSTAND, AND APPLY INFORMATION ENTITLED ‘SAFETY INSTRUCTIONS & WARNINGS’. DO NOT VACUUM IN AREAS W I T H F LAM MABLE G AS E S, V AP OR S , O R E X P L O S I V E D U S T S I N T H E A I R . - Page 14 LIQUID VACUUM OPERATION I M P O R T A N T ! W h e n v a c u u m i n g l a r g e Fig. 5 quantities of liquids, do not immerse the nozzle completely in the liquid;...
-
Page 15: Blower Operation
BLOWER OPERATION This Wet/Dry Vacuum has blowing capabilities. 5. Choose the desired accessory and insert To use the blower feature, follow the instructions onto the end of the hose (Fig. 3). listed. Fig. 3 WARNING: ALWAYS WEAR SAFETY GOGGLES COMPLYING WITH ANSI Z87.1 (OR IN CANADA, CSAZ94.3) BEFORE USING BLOWER. - Page 16 BLOWER OPERATION Fig. 6 8. Once you have completed blowing, flip the on/off switch to the 'O' OFF position and unplug the power cord from the outlet (Fig. 7). Fig. 7 Page 15...
-
Page 17: Maintenance
MAINTENANCE EMPTYING THE COLLECTION TANK 4. Clear all dirt or debris from the collection tank and hose into a proper waste container (Fig. 4). WARNING: ALWAYS DISCONNECT Fig. 4 THE PLUG FROM THE POWER OUTLET BEFORE REMOVING THE POWER HEAD FROM THE COLLECTION TANK. - Page 18 MAINTENANCE Fig. 5 Fig. 6 Fig. 7 REPAIRS Repairs for this wet/dry vacuum should be performed only by qualified service personnel using only identical replacement parts. Page 17...
-
Page 19: Installing & Cleaning Cartridge Filter
INSTALLING & CLEANING CARTRIDGE FILTER INSTALLING CARTRIDGE FILTER REMOVING & CLEANING CARTRIDGE FILTER 1. Verify that the power cord is disconnected 1. Unlock and remove the filter retainer by from the outlet (Fig. 1). turning retainer handle counterclockwise. 2. With the removed power head in an upside- Fig. -
Page 20: Dust Bag Installation Instructions
DUST BAG INSTALLATION INSTRUCTIONS 1. Lift the power head off the collection tank 4. Place the power head back on the (Fig 1). collection tank and secure into place using latches (Fig 4). Fig. 1 Fig. 4 2. Slide the cardboard dust bag flange onto inlet port until it stops (Fig 2). -
Page 21: Installing & Cleaning Foam Wet Filter
INSTALLING & CLEANING FOAM WET FILTER INSTALLING FOAM WET FILTER CLEANING FOAM WET FILTER 1. Verify that the power cord is disconnected 1. With the removed power head in an upside- from the outlet (Fig. 1). down position, carefully remove the foam wet filter (Fig. -
Page 22: Troubleshooting
TROUBLESHOOTING WARNING: TO REDUCE THE RISK OF ELECTRIC SHOCK, UNPLUG BEFORE TROUBLESHOOTING. PROBLEM POSSIBLE CAUSE SOLUTION 1) Check the power supply, cord, 1) No power supply. breakers, and fuses. 2) Unplug and check the power cord. 2) Faulty power cord. If damaged, have it repaired by a The wet/dry vacuum will professional. -
Page 23: Exploded View & Parts List
EXPLODED VIEW & PARTS LIST Description Part # Description Part # Hose Storage Rack 551006102 Cartridge Filter 551298116 Power Head Assembly 10.1 Filter Retainer 551437107 Float 551006103 Hose 551641101 Filter Cage 551005104 Floor Brush/Squeegee Nozzle 551298107 Collection Tank Crevice Tool 551006113 Vaccum Port Assembly 551007105... -
Page 24: Notes
NOTES Page 23... -
Page 25: Warranty
The warranty coverage ends when the product becomes unusable for reasons ® other than defects in workmanship or material. If, during normal use, this MASTERFORCE wet/ dry vacuum breaks or fails due to a defect in material or workmanship, simply bring the vacuum ®... - Page 26 © 2011 Menard, Inc., Eau Claire, WI 54703 09/2021...
Need help?
Do you have a question about the 240-5417 and is the answer not in the manual?
Questions and answers
The vacuum is only a month old was working fine and then just shut off and won't come back on