Table of Contents
Advertisement
Cod. 6316191 - 08/2013
6333538 - 05/2023 - R1
Cod. 6316191 - 08/2013
EN
EN
BRAVA DGT HE
BRAVA DGT HE
Condensing sealed wall-mounted boiler
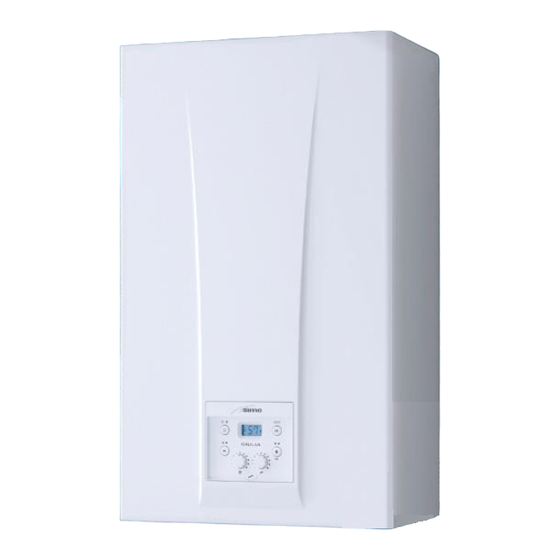
GIULIA COMBI 30
25 - 30 - 35
25 - 30 - 35
INSTALLATION AND SERVICING INSTRUCTIONS
INSTALLATION AND SERVICING INSTRUCTIONS
USER, INSTALLATION AND SERVICING INSTRUCTIONS
Cod.
ENSURE THAT THESE
ENSURE THAT THESE
INSTRUCTIONS ARE LEFT
INSTRUCTIONS ARE LEFT
FOR THE USER AFTER
FOR THE USER AFTER
COMPLETION OF THE
COMPLETION OF THE
BENCHMARK SECTION
BENCHMARK SECTION
PLEASE READ THE
PLEASE READ THE
IMPORTANT NOTICE
IMPORTANT NOTICE
WITHIN THIS GUIDE
WITHIN THIS GUIDE
REGARDING YOUR BOILER
REGARDING YOUR BOILER
WARRANTY
WARRANTY
199838
199838
199839
To consult the documentation,
visit our website www.sime.it
BOILER DETAILS
please position here a sticker
from installation pack
TRANSLATION OF THE ORIGINAL INSTRUCTIONS
Advertisement
Chapters
Table of Contents

Related Manuals for Sime GIULIA COMBI 30


Summary of Contents for Sime GIULIA COMBI 30
- Page 1 6333538 - 05/2023 - R1 Cod. 6316191 - 08/2013 BRAVA DGT HE BRAVA DGT HE Condensing sealed wall-mounted boiler GIULIA COMBI 30 25 - 30 - 35 25 - 30 - 35 INSTALLATION AND SERVICING INSTRUCTIONS INSTALLATION AND SERVICING INSTRUCTIONS USER, INSTALLATION AND SERVICING INSTRUCTIONS Cod.
- Page 2 For the first year all of our appliances are protected by our manufacturer’s guarantee which covers both parts and labour. As you would expect from Sime Ltd, it is our aim to provide our valued customers with the best in after sales and service.
- Page 4 The Benchmark Scheme Sime Ltd is a licensed member of the Benchmark Scheme which aims to improve the standards of installation and commissioning of domestic heating and hot water systems in the UK and to encourage regular servicing to optimise safety, efficiency and performance.
- Page 5 Dear Customer, MANUAL STRUCTURE Thank you for purchasing a Sime GIULIA COMBI boiler, a This manual is organized as follows. new-generation modulating condensing device with technical features and excellent performance, allowing you to satisfy your heating and instant domestic hot water requirements with the utmost safety and limited running costs.
- Page 6 - close the gas and water valves for the water heating system. – Fonderie SIME S.p.A. reserves the right to make improvements to its prod- – To ensure continued efficient oper- ucts at any time without prior notice,...
- Page 7 RESTRICTIONS DO NOT DO NOT – To allow children under the age of 8 to – To block the condensate drain. use the appliance. The appliance can – To pull, detach or twist the electrical be used by children no younger than 8 cables coming out of the appliance years old, by people with physical or even if the appliance is disconnected...
-
Page 9: Table Of Contents
USER INSTRUCTIONS TABLE OF CONTENTS USING THE BOILER GIULIA COMBI 30 MAINTENANCE Control panel ........10 Servicing. -
Page 10: Control Panel
USING THE BOILER GIULIA COMBI 30 NOTE: pressing any one of these buttons for more than 30 Control panel seconds generates a fault on the display without preventing boiler operation. The warning disappears when the button is released. DISPLAY . The symbol for Summer mode is displayed. -
Page 11: Preliminary Checks
– on the display, check that the operating mode on the dis- Preliminary checks play is "SUMMER” and if necessary select it by pressing and holding the button for at least 1 second. The internal WARNING temperature of the boiler will appear on the display –... -
Page 12: Fault / Malfunction Codes
SHUTDOWN Fault / malfunction codes If a fault/malfunction is detected during boiler operation, the message "AL" will appear on the display followed by the fault Temporary shutdown code. To temporarily interupt the boiler operation press and hold the button for at least one second, once if in "WINTER mode" If you see alarm “02”... -
Page 13: Maintenance
– isolate the power supply – isolate the gas cock – close the heating and domestic hot water isolation valves – drain the heating and domestic hot water system if there is the risk of freezing. CAUTION Contact the Qualified Technical Personnel if the pro- cedure described above cannot be easily carried out. - Page 15 DESCRIPTION OF THE APPLIANCE TABLE OF CONTENTS Main water circuit ......19 DESCRIPTION OF THE APPLIANCE Sensors.
-
Page 16: Description Of The Appliance
The main design choices aging and provides a code, the serial number of the boiler made by Sime for the GIULIA COMBI boilers are: and the bar code – the total pre-mix microflame burner combined with a steel... -
Page 17: Structure
Structure Combustion chamber door Pressure gauge (MA) Air inlet closing plate (separate Air/gas duct Flow meter (FLM) ducts) Safety thermostat System relief valve (VS) Exhaust sensor (SF) Air-gas mixer System drainage outlet (SI) Smoke outlet duct (CSFU) Boiler delivery sensor (SMC) System circulator pump Boiler air inlet duct (concentric Condensate siphon... -
Page 18: Technical Features
Technical features GIULIA COMBI DESCRIPTION CERTIFICATIONS Country of intended installation Fuel G20 /G31 PIN number 1312DN6705 Category II2H3P Type C13 - C33 Class NO 6 (< 56 mg/kWh) Nominal (50-30°C) 30,0 HEATING PERFORMANCE HEAT INPUT Nominal Minimum (G20-G31) 4,8 / 5,5 HEAT OUTPUT Nominal (80-60°C) 23,6... -
Page 19: Main Water Circuit
GIULIA COMBI DESCRIPTION COMBUSTION DATA Smoke temperature at Max/Min flow (80-60°C) °C 82 / 67 Smoke temperature at Max/Min flow (50-30°C) °C 68 / 50 Smoke flow Max/Min 14,2 / 2,3 at Max/Min flow rate (G20) 9,3 / 9,0 at Max/Min flow rate (G31) 10,2 / 10,0 NOx measured (*) mg/kWh... -
Page 20: Sensors
Sensors Circulation pump The sensors installed have the following characteristics: The flow-head performance curve available for the heating – Dual sensor (thermal safety/output) NTC R25°C; 10kΩ system is shown in the graph below. β25°-85°C: 3435 – domestic hot water sensor NTC R25°C; 10kΩ β25°-85°C: RESIDUAL HEAD (mbar) 3435 –... -
Page 21: Control Panel
DISPLAY 5.10 Control panel “SUMMER” . The symbol for Summer mode is displayed. If the symbols are flashing, this indicates that the chimney sweep function is active. . This symbol appears when the boiler is op- “WINTER” erating in Winter mode. If no operating modes have been enabled both symbols will be off. -
Page 22: Wiring Diagram
– Connect the earth wire to an effective earthing breaker conforming to EN standards that allows for system. Sime declines all responsible for any injury completely disconnecting the system in overvoltage or damage to persons, animals,or property as a result... - Page 24 The Benchmark Scheme Benchmark places responsibilities on both manufacturers and installers. The purpose is to ensure that customers are provided with the correct equipment for their needs, that it is installed, commis- sioned and serviced in accordance with the manufacturer’s instructions by competent persons and that it meets the require- ments of the appropriate Building Regulations.
- Page 25 INSTALLATION AND SERVICING INSTRUCTIONS Installer Checklist Please remember to carry out the following checks after installation. This will achieve complete customer satisfaction, and avoid unnecessary service calls. A charge will be made for a service visit where the fault is not due to a manufacturing defect.
-
Page 26: Installation
INSTALLATION CAUTION Description GIULIA COMBI 30 The appliance must only be installed by the Sime W (mm) Technical Service or by qualified professionals who D (mm) suitable protective safety equipment. MUST wear H (mm) Weight (kg) 27,5 Receiving the product... -
Page 27: New Installation Or Installation Of A Replacement
Naturally soft water areas can corrode aluminium heat exchangers. Adding Fernox F1 or Mb-1 will guard against corrosion. – Sime promote the fitting of TF1 System filter with any new boiler installation. – It is important to check the inhibitor concentration after ≥... -
Page 28: Plumbing Connections
CAUTION 6.10 Condensate outlet/collection The boiler should be located observing the required To ensure safe disposal of the condensate produced by the clearances, and provide safe, adequate service ac- flue gases, reference should be made to BS6798:2009. cess. The boiler incorporates a condensate trap which has a seal of 75 mm, therefore no additional trap is required. -
Page 29: Connecting The Flue
6.12 Connecting the flue CAUTION CAUTION – The appliance must be installed as a room sealed – Prior to fitting the flue, the condensate trap can be device and unless stated in writing from the man- filled by carefully pouring water into the exhaust ufacturer, in accordance with the current edition of section of the flue connection. -
Page 30: Using The Boiler Giulia Combi
Length of pipe Ø 60/100 Length of pipe Ø 80/125 Model Min. Max. Min. Max. GIULIA COMBI 30 LIST OF ø 60/100 ACCESSORIES Coaxial duct kit L. 790 code 8096250 Telescopic coaxial duct kit L. 695 code 8098605 Extension L. 1000 code 8096150 Extension L. -
Page 31: 6.12.3 Installation Of Separate Ducts 80Mm
Before connecting accessories, it is always advisable to lubricate the internal part of the gaskets with silicon products. Avoid using oils and greases. GIULIA COMBI 30 Load loss - mm H O Inlet Exhaust 1 Air/smoke divider, code 8089912 2 90° bend, code 8077450 (6 pcs) 0.25... -
Page 32: Electrical Connections And External Controls
If this cable needs to be replaced, an original spare must be + 25 m (outlet). requested from Sime . The heating control of the boiler can be achieved by connec- tion of either a volt free room thermostat, room thermostat/ timer or a dedicated control (listed below). -
Page 33: 6.13.1 External Temperature Sensor
– that before any work is done on the boiler, the mains power is disconnected by setting the main system switch to "OFF". (*) Sime declines all responsible for any injury or damage to persons, animals,or property as a result of failure to pro- vide adequate earthing of the appliance. -
Page 34: 6.13.2 External Timers And Room Thermostats
The heat demand can be by a "clean contact" conforming to EN607301 connected to TA (see section "Wiring diagram" ) or by use of a dedicated Sime Remote Control (Home or Home Plus). The boiler will automatically detect when a dedicated control is connected. -
Page 35: 6.14.2 System Filling
6.14.2 SYSTEM Filling – check the pressure on the pressure gauge (5) and if neces- sary top up until the correct pressure reading appears – close the automatic bleed valve (3) Remove the front panel: – it is recommended that the condensate trap is filled prior to –... -
Page 36: Commissioning
COMMISSIONING Preliminary operations – press the button once to select "WINTER mode" . The value of the heating water temperature detected at that mo- ment will appear on the display WARNING – Should it be necessary to access the areas in the bottom part of the appliance, make sure that the system components and pipes are not hot (risk of burning). -
Page 37: List Of Parameters
– to modify the value in the permitted range, press the but- tons > to increase it or < to decrease it – once the required value has been reached, press the button to confirm. When all the parameter modifications have been made, exit the parameter menu by pressing and holding down the but- tons <... - Page 38 Type Description Range Step Default Minimum power heating/domestic hot water 0 .. 100 (premixed) 0 = Disabled Domestic hot water preheating enabling 1 = Enabled 0 = not used 1 = remote alarm NO 2 = remote alarm NC 3 = zone valve 4 = automatic filling 5 = external request 6 = recirculation pump...
-
Page 39: Display Of Operating Data And Counters
In the event of a fault/malfunction the message "ALL" will ap- When all the values have been displayed, exit the menu by pear on the display with the alarm number eg. "ALL 04" (Do- pressing and holding down the button for approximately 5 mestic Hot Water Sensor Fault). -
Page 40: Checks
– isolate the gas cock Checks – loosen the screw of the “gas mains pressure point” (6) and connect a pressure gauge 7.6.1 Chimney sweep function The chimney sweeper function is used by the qualified mainte- nance technician to check the mains gas pressure, detect the combustion parameters and to measure the combustion effi- ciency. -
Page 41: Gas Conversion
– measure the CO and verify that it corresponds to the value Gas conversion appearing in the table. If not, turn the “CO adjuster screw models can be transformed from G20- to G31- GIULIA COMBI (splitter)” (7) of the gas valve until you obtain the CO value based operation by installing the “Nozzle kits for G31”, which of the table. -
Page 42: Heating Power Output Adjustment
– loosen the ring nut (3) and the spring clip (4) of the gas pipe Heating power output adjustment To comply with Building regulations, the heating output must – detach the gas pipe (5) from the gas valve and from the mix- be set according to the requirements of the installed heating er, making sure that the silicone pipe (6) does not hinder the system. -
Page 43: Maintenance
MAINTENANCE – remove the screws (3) securing the control panel (4) Servicing – move the panel (4) upwards (a) but keeping it in the side As a condition of the warranty and to ensure correct operation guides (5) to the end of travel and efficiency, it is important that the boiler is serviced every –... -
Page 44: Cleaning The Burner And The Combustion Chamber
8.3.2 Cleaning the burner and the combustion – Unscrew the four nuts (10) securing the combustion cham- chamber ber door (11) – pull the fan/sleeve/door unit (12) forwards and remove it The combustion chamber and the burner do not require any particular maintenance. -
Page 45: Checks
Checks Malfunction codes and possible solutions 8.4.1 Checking the flue LIST OF MALFUNCTION/FAULT ALARMS Check that the flue is undamaged and complete. Type Fault Solution 8.4.2 Checking the expansion vessel pressure - Restore pressure Low water pressure in - Check for any leaks in the It is recommended that the expansion vessel on the water side system system... - Page 46 Type Fault Solution - Check the voltage Fault due to low - Contact your network network voltage provider Incorrect supply - Contact your network frequency detected provider - Check the ignition/ detection electrode Flame loss more than - Check the gas supply 6 consecutive times (open valve) - Check mains gas pressure...
- Page 47 GAS BOILER SYSTEM COMMISSIONING CHECKLIST & WARRANTY VALIDATION RECORD Address: Boiler make and model: Boiler serial number: Commissioned by (PRINT NAME): Gas Safe registration number: Company name: Telephone number: Company email: Company address: Commissioning date: Heating and hot water system complies with the appropriate Building Regulations? Time, temperature control and boiler interlock provided for central heating and hot water Boiler Plus requirements (tick the appropriate box(s)) Weather compensation...
- Page 48 SERVICE & INTERIM BOILER WORK RECORD It is recommended that your boiler and heating system are regularly serviced and maintained, in line with manufacturers’ instructions, and that the appropriate service / interim work record is completed. Service provider When completing a service record (as below), please ensure you have carried out the service as described in the manufacturers’ instructions. Always use the SERVICE/INTERIM WORK ON BOILER SERVICE/INTERIM WORK ON BOILER Date:...
-
Page 49: Exploded Views
EXPLODED VIEWS Frame... - Page 50 Hydraulic assembly...
- Page 51 Exchanger / Combustion...
- Page 52 Control panel group...
- Page 53 Advised Advised Pos. Code Description Pos. Code Description parts parts 6229885 Hydraulic group gasket 6222003 D.H.W. filter 6226752 Silicone pipe ring øi12 6131440 Flowmeter sensor 6226719 Bushing 6281519 Plunged sensor + gasket 6119382 Siphon safety plug 6226645 Spring clip 6278935 Heat exchanger water/gas assy 6120560 Pump nipple 3/4"...
-
Page 54: Appendix 1 (Guidance Hhic)
10 APPENDIX 1 (GUIDANCE HHIC) Manufacturers Instructions Manufacturer’s instructions must be followed for the correct connection of the condensate discharge pipe from the boiler as this may vary due to the design of the boiler. For example a visible air break and trap is not required if there is a trap with a minimum condensate seal of 75 mm incorporated into the boiler. - Page 55 Figure 1 – Connection of condensate discharge pipe to internal soil and vent stack. Note – Check manufacturer’s instructions to see if an air break is required. Boiler Visible air break 75 mm trap Visible air break and trap not required if there is a trap with a minimum condensate seal of 75 mm incorporated into the boiler Soil and vent stack Invert...
- Page 56 Internal Condensate Pipe Discharge Termination Figure 2(a) – Connection of a condensate discharge pipe downstream of a sink, basin, bath or shower waste trap. Note – Check manufacturer’s instructions to see if an air break is required. Boiler Visible air break 75 mm trap Visible air break and trap not required if there is a trap with a minimum condensate seal of 75 mm incorporated into the boiler.
- Page 57 Internal Condensate Pipe Discharge Termination Figure 2(b) – Connection of a condensate discharge pipe upstream of a sink, basin, bath or shower waste trap Boiler Visible air break at plug hole – alternative connection can be below sink trap 75 mm sink, basin, bath or shower waste trap Open end of condensate discharge pipe direct into gully 25 mm min below grating but above water level;...
- Page 58 Internal Condensate Pipe Discharge Termination The possibility of waste pipes freezing downstream of the connection point should be considered when determining a suitable connection point - e.g. a slightly longer pipe run to an internal soil stack may be preferable to a shorter run connecting into a kitchen waste pipe discharging directly through the wall to an external drain.
- Page 59 Internal Condensate Pipe Discharge Termination Figure 3 – Connection of a condensate pump - typical method (NB manufacturer’s detailed instructions should be followed). Note – Any external pipe work should be insulated, pipe cut at 45 degrees and a drain/ leaf Condensate discharge from boiler Condensate pump Visible air break at plug hole...
- Page 60 External Connections External Connections pumped connection is impractical to install. The pipe work from the boiler should be of a minimum 19mm ID or as per manufacturer’s instructions and the condensate discharge pipe shall be run in a standard drainpipe material, e.g. poly (vinyl chloride) (PVC), un-plasticized poly (vinyl chloride) (PVC-U), acrylonitrile butadiene-styrene (ABS), polypropylene (PP) or chlorinated poly (vinyl chloride) (PVC-C).
- Page 61 External Connections Figure 4 – Connection of condensate discharge pipe to external soil and vent stack Boiler Visible air break 75 mm trap Visible air break and trap not required if there is a trap with a minimum condensate seal of 75mm incorporated into the boiler.
- Page 62 External Connections Alternative Solutions Cold weather protection methods approved or endorsed by boiler manufacturers and/or service organisations may be adopted if these are considered suitable by the parties involved. It is the responsibility of the manufacturer of these products to ensure they have completed the necessary testing or calculations to ensure the product offers suitable protection to prevent the condensate pipe from freezing.
- Page 63 External Connections Electric Trace Heating condensate pipe to raise the temperature of the condensate pipe in freezing conditions. Trace heating takes the form of an electrical heating element run in physical contact along the length of the condensate pipe. The pipe is usually covered with thermal insulation to retain heat losses from the pipe.
- Page 64 External Connections Figure 5 – External termination to rainwater downpipe (NB only combined foul/rainwater drain) Condensate discharge pipe from boiler Pipe size transition point Water/weather proof insulation 43mm 90° male/female bend External rain water pipe into foul water External air break Air gap Minimum internal diameter 19mm Minimum internal diameter 30mm...
- Page 65 External Connections External Termination of the Condensate Pipe Where the condensate discharge pipe is terminated over an open foul drain or gully, the pipe should terminate below the grating level, but above water level, in order to minimise “wind chill” at the open end. Pipe drainage and resistance to freezing will be improved if the termination end of the condensate pipe is cut at 45 degrees as opposed to a straight cut.
- Page 66 External Connections Figure 6 – External drain, gully or rainwater hopper Boiler Visible air break 38mm minimum trap Visible air break and trap not required if there is a trap with a minimum condensate seal of 38 mm incorporated into the boiler – refer to manufacturers instructions External length of pipe 3 m maximum Open end of condensate discharge pipe direct into gully 25 mm min below grating but above water level;...
- Page 67 External Connections Figure 7 – Example of a purpose made soakaway Condensate discharge pipe from boiler Ground (this section of the condensate discharge pipe may be run either above or below round level); End cut at 45° Diameter 100 mm minimum plastic tube Bottom of tube sealed Limestone chippings Two rows of three 12 mm holes at 25 mm centres, 50 mm from bottom of tube and facing...
-
Page 68: Appendix
Turn off appliance and call SIME LTD Technical HelplIne for advice. NOTE - if no flue gas sampling point is present and the correct pro- cedure is not specified in the manual, contact SIME LTD Technical the appliance must not be commissio- Helpline for advice. -
Page 69: 12 Annexes
12 ANNEXES 12.1 Boiler product board GIULIA COMBI D.H.W load profile declared C.H. energy efficiency class D.H.W. energy efficiency class Heat output (kW) C.H. annual energy consumption (GJ) D.H.W. annual combustible consumption (GJ) C.H. seasonal energy efficiency (%) D.HW. energy efficiency (%) Sound power dB(A) Specific precautionary measures to be adopted at the time of assembly, installation or maintenance of the equipment are contained in the boiler instruction manual... -
Page 70: Boiler Technical Sheet
24,016 Contact details Fonderie Sime S.p.A. Via Garbo 27, 37045 Legnago (VR) ITALIA a. High-temperature regime means 60°C return temperature at heater inlet and 80°C feed temperature at heater outlet. b. Low-temperature regime means for condensing boilers 30°C, for low-temperature boilers 37°C and for other heaters 50°C return temperature. - Page 72 Sime Ltd Unit 6 Flockton Park Holbrook Avenue Holbrook Industrial Estate, Sheffield, S20 3FF Phone: 0345 901 1114 www.sime.co.uk Email: enquiries@sime.co.uk...
Need help?
Do you have a question about the GIULIA COMBI 30 and is the answer not in the manual?
Questions and answers
Hi I’m a gas engineer, I just installed a boiler hot water works fine but the heating is not working ,not sure about the wiring i have a hive thermostat. I have removed the black loop wire . Would you able explain where do i need to connect the S/L. Please Thanks
The Sime GIULIA COMBI 30 boiler allows heating control through a volt-free room thermostat. The Hive thermostat can be wired to the boiler's S/L (Switched Live) terminal as follows:
1. Turn off power – Isolate the boiler’s power supply.
2. Locate the wiring terminals – Refer to the boiler's wiring diagram for the correct S/L terminal.
3. Connect the Hive thermostat:
- Remove the link between the boiler’s Live (L) and Switched Live (S/L).
- Connect the Hive receiver’s Common (C) to the boiler’s Live (L).
- Connect the Hive receiver’s Normally Open (NO) to the boiler’s Switched Live (S/L).
4. Power on and test – Restore power and check if the thermostat correctly controls the boiler.
Ensure compliance with wiring regulations and, if unsure, consult a qualified electrician or heating engineer.
This answer is automatically generated