
Related Manuals for Makita GSH05


Summary of Contents for Makita GSH05
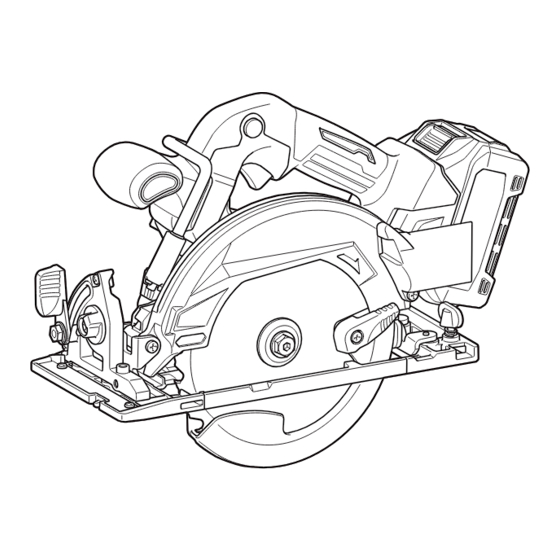
- Page 1 INSTRUCTION MANUAL MANUAL DE INSTRUCCIONES Cordless Circular Saw Sierra Circular Inalámbrica GSH05 IMPORTANT: Read Before Using. IMPORTANTE: Lea antes de usar.
-
Page 2: Specifications
ENGLISH (Original instructions) SPECIFICATIONS Model: GSH05 Blade diameter 165mm (6-1/2") Max. Cutting depth at 0° 57mm (2-1/4") at 45° bevel 41mm (1-5/8") at 50° bevel 37 mm (1-7/16″) No load speed 5,200 /min Rated voltage D.C. 36 V - 40 V max Overall length (with BL4025) 352 mm (13-7/8″) - Page 3 Power tools can produce electromagnetic fields Store idle power tools out of the reach of chil- (EMF) that are not harmful to the user. However, dren and do not allow persons unfamiliar with the power tool or these instructions to operate users of pacemakers and other similar medical the power tool.
- Page 4 Service Never use damaged or incorrect blade wash- ers or bolt. The blade washers and bolt were Have your power tool serviced by a qualified specially designed for your saw, for optimum repair person using only identical replacement performance and safety of operation. parts.
- Page 5 Always observe that the lower guard is cover- ing the blade before placing the saw down on bench or floor. An unprotected, coasting blade will cause the saw to walk backwards, cutting whatever is in its path. Be aware of the time it takes for the blade to stop after switch is released.
-
Page 6: Fcc Statement
(gained from repeated use) replace user’s authority to operate the equipment. strict adherence to safety rules for the subject Makita U.S.A. Inc. product. MISUSE or failure to follow the safety 14930 Northam Street, La Mirada, CA 90638-5753, rules stated in this instruction manual may cause serious personal injury. - Page 7 It will nails, coins, etc. also void the Makita warranty for the Makita tool and Do not expose battery cartridge to water charger. or rain.
-
Page 8: Functional Description
To install the battery cartridge, align the tongue on the battery cartridge with the groove in the housing and slip 26. Do not insert any devices other than Makita it into place. Insert it all the way until it locks in place wireless unit into the slot on the tool. -
Page 9: Overload Protection
A switch in need of repair may result in unintentional operation and serious Indicating the remaining battery personal injury. Return tool to a Makita service center capacity for proper repairs BEFORE further usage. To prevent the switch trigger from being accidentally Press the check button on the battery cartridge to indi- pulled, a lock-off button is provided. -
Page 10: Bevel Cutting
Bevel cutting NOTICE: Do not pull the switch trigger hard without pressing in the lock-off button. This can cause switch breakage. CAUTION: After adjusting the bevel angle, always tighten the lever securely. CAUTION: The tool starts to brake the cir- cular saw blade rotation immediately after you Loosen the lever and set for the desired angle by tilting release the switch trigger. -
Page 11: Electric Brake
Be careful not to scratch the lens of lamp, or blade after switch lever release, have tool serviced at a it may lower the illumination. Makita service center. NOTE: When the tool is overheated, the lamp blinks for one minute. In this case, cool down the tool before... -
Page 12: Electronic Function
Soft start feature CAUTION: Use only the Makita wrench to Soft start because of suppressed starting shock. install or remove the circular saw blade. Constant speed control Electronic speed control for obtaining constant speed. - Page 13 For tool with the ring For tool with the ring 15.88 Fig.22 ► 1. Mounting shaft 2. Inner flange 3. Circular saw blade 4. Outer flange 5. Hex bolt 6. Ring WARNING: BE SURE TO TIGHTEN THE HEX BOLT SECURELY. Also be careful not to tighten the bolt forcibly.
-
Page 14: Cutting Operation
OPERATION This tool is intended to cut wood products only. Refer to our website or contact your local Makita dealer for the correct circular saw blades to be used for the material to be cut. Checking blade guard function Fig.26... - Page 15 To get clean cuts, keep your sawing line straight and your speed of advance uniform. If the cut fails to prop- erly follow your intended cut line, do not attempt to turn or force the tool back to the cut line. Doing so may bind the circular saw blade and lead to dangerous kickback and possible serious injury.
- Page 16 When inserting the wireless unit, align the projections with the recessed portions on the slot. NOTE: A Makita vacuum cleaner supporting the wireless activation function is required for the tool registration. NOTE: Finish installing the wireless unit to the tool before starting the tool registration.
- Page 17 Press the wireless activation button on the vac- Connect the hose of the vacuum cleaner with the uum cleaner for 3 seconds until the wireless activation tool. lamp blinks in green. And then press the wireless acti- vation button on the tool in the same way. Fig.34 Set the stand-by switch on the vacuum cleaner to "AUTO".
- Page 18 NOTE: The wireless activation lamp on the tool will stop blinking in blue when there is no operation for 2 hours. In this case, set the stand-by switch on the vacuum cleaner to "AUTO" and push the wireless activation button on the tool again. NOTE: The vacuum cleaner starts/stops with a delay.
- Page 19 If the cancellation is performed successfully, the wire- Cancelling tool registration for the less activation lamps will light up in red for 2 seconds vacuum cleaner and start blinking in blue. NOTE: The wireless activation lamps finish blinking in Perform the following procedure when cancelling the red after 20 seconds elapsed.
- Page 20 Before asking for repairs, conduct your own inspection first. If you find a problem that is not explained in the manual, do not attempt to dismantle the tool. Instead, ask Makita Authorized Service Centers, always using Makita replace- ment parts for repairs.
-
Page 21: Maintenance
To maintain product SAFETY and RELIABILITY, repairs, any other maintenance or adjustment should Fig.41 be performed by Makita Authorized or Factory Service ► 1. Screw 2. Base Centers, always using Makita replacement parts. Adjusting 0°-cut accuracy While opening the lower guard, move the rear of the base so that the distance A and B becomes equal. - Page 22 If annexed warranty sheet is not available, refer to the warranty details set forth at below website for your respective country. United States of America: www.makitatools.com Canada: www.makita.ca Other countries: www.makita.com ENGLISH...
-
Page 23: Especificaciones
ESPAÑOL (Instrucciones originales) ESPECIFICACIONES Modelo: GSH05 Diámetro del disco 165 mm (6-1/2″) Profundidad de corte máxima a 0° 57 mm (2-1/4″) bisel a 45° 41 mm (1-5/8″) bisel a 50° 37 mm (1-7/16″) Velocidad sin carga 5 200 r/min Tensión nominal 36 V - 40 V c.c. - Page 24 No exponga las herramientas eléctricas a la Si dispone de dispositivos para la conexión lluvia ni a condiciones húmedas. La entrada de de equipos de extracción y recolección de polvo, asegúrese de conectarlos y utilizarlos agua en una herramienta eléctrica aumentará el debidamente.
- Page 25 Mantenga los mangos y superficies de asi- Advertencias de seguridad para la miento secos, limpios y libres de aceite o sierra circular inalámbrica grasa. Los mangos y superficies de asimiento resbalosos no permiten una manipulación segura Procedimientos de corte ni el control de la herramienta en situaciones inesperadas.
- Page 26 Causas de los retrocesos bruscos y advertencias relacionadas — el retroceso brusco es una reacción repentina a un disco de la sierra pellizcado, atascado o desalineado, que ocasiona que una sierra des- controlada se levante y la pieza de trabajo salga disparada hacia el operador;...
- Page 27 Compruebe el funcionamiento del muelle del protector inferior. Si el protector y el muelle no funcionan correctamente, deben repararse antes de utilizar la herramienta. El protector inferior puede funcionar con lentitud debido a las piezas dañadas, depósitos pegajosos o acumula- ción de suciedad.
-
Page 28: Declaración De La Fcc
ADVERTENCIA: NO DEJE que la comodidad Makita U.S.A. Inc. o familiaridad con el producto (a base de utilizarlo 14930 Northam Street, La Mirada, CA 90638-5753, repetidamente) sustituya la estricta observancia de las normas de seguridad para dicho producto. - Page 29 No clave, corte, aplaste, lance o deje caer el lesiones personales y daños. Asimismo, esto inva- cartucho de batería, ni golpee un objeto sólido lidará la garantía de Makita para la herramienta y el contra el cartucho de batería. Dicha acción cargador Makita.
-
Page 30: Descripción Del Funcionamiento
26. No inserte ningún otro dispositivo que no sea la unidad inalámbrica de Makita en la ranura de la herramienta. Fig.7 27. No utilice la herramienta si la tapa de la ranura ►... -
Page 31: Protección Contra Sobrecarga
Cargue la(s) batería(s) o reemplácela(s) con batería(s) recargada(s). Deje que la herramienta y la(s) batería(s) se enfríen. Si no hay ninguna mejora al restaurar el sistema de protección, comuníquese con su centro local de servi- cio Makita. 31 ESPAÑOL... -
Page 32: Accionamiento Del Interruptor
El uso de un interruptor que requiere reparación puede ocasionar una operación accidental y lesiones personales graves. Lleve la herramienta a un centro de servicio Makita para las reparaciones apropiadas ANTES de continuar su uso. El botón de desbloqueo es suministrado para evitar jalar accidentalmente el gatillo interruptor. - Page 33 Tope de seguridad Encendido de la lámpara El tope de seguridad sirve de ayuda para ajustar rápi- damente el ángulo designado. Gire el tope de seguri- PRECAUCIÓN: No mire a la luz ni vea a la dad de manera que la flecha sobre éste apunte hacia fuente de luz directamente.
-
Page 34: Montaje
El disco de la sierra circular es posible que ya se haya mantenimiento a un centro de servicio Makita. instalado en el momento del envío. PRECAUCIÓN: El sistema de frenado Afloje la palanca de la guía de profundidad y... - Page 35 Instale la brida interior, el anillo (específico para el Presione el bloqueo del eje, y apriete el perno país), el disco de la sierra circular, la brida exterior y el hexagonal. perno hexagonal. En ese momento, alinee la dirección Instale la brida interior con su lado ahuecado orientado de la flecha del disco de la sierra circular con la flecha hacia afuera sobre el eje de montaje y luego coloque el de la herramienta.
-
Page 36: Operación
Consulte nuestro sitio web o póngase en contacto con Presione el bloqueo del eje por completo de su distribuidor local de Makita para información sobre forma que el eje de montaje no pueda girar y use la los discos de sierra circulares correctos para emplearse llave hexagonal para aflojar el perno hexagonal. - Page 37 El útil tope lateral de corte le permite hacer cortes rec- tos extra precisos. Simplemente deslice el tope lateral de corte para que quede ceñidamente ajustado contra el costado de la pieza de trabajo y fíjelo con el tornillo en la parte delantera de la base. Con ello también se pueden hacer cortes repetidos de anchura uniforme.
- Page 38 Inserte la unidad inalámbrica en la ranura y luego NOTA: Para el registro de la herramienta, se requiere cierre la tapa. una aspiradora Makita compatible con la función de activación inalámbrica. Cuando inserte la unidad inalámbrica, alinee las partes salientes con las partes cóncavas en la ranura.
- Page 39 Ajuste el interruptor de modo en espera en la aspi- NOTA: Las luces indicadoras de activación inalám- radora en “AUTO”. brica terminarán parpadeando en verde después de un lapso de 20 segundos. Oprima el botón de acti- vación inalámbrica en la herramienta mientras la luz indicadora de activación inalámbrica en la aspiradora esté...
- Page 40 Oprima el botón de activación inalámbrica en la Encienda la herramienta. Compruebe si la aspiradora herramienta durante un lapso breve. La luz indicadora funciona mientras la herramienta está en funcionamiento. de activación inalámbrica parpadeará en azul. Para detener la activación inalámbrica de la aspiradora, oprima el botón de activación inalámbrica en la herramienta.
- Page 41 Si la cancelación se realiza exitosamente, las luces Cancelación del registro de la indicadoras de activación inalámbrica se encenderán herramienta para la aspiradora en rojo durante 2 segundos y comenzarán a parpadear en azul. Realice el siguiente procedimiento para cancelar el NOTA: Las luces indicadoras de activación inalám- registro de la herramienta para la aspiradora.
- Page 42 Antes de solicitar alguna reparación, primero realice una inspección por su cuenta. Si detecta algún problema que no esté explicado en el manual, no intente desensamblar la herramienta. En vez de esto, solicite la reparación a un centro de servicio autorizado de Makita, usando siempre piezas de repuesto Makita. Estado de la anomalía Causa probable (avería)
-
Page 43: Mantenimiento
Para mantener la SEGURIDAD y FIABILIDAD del pro- prueba para verificar la verticalidad. ducto, las reparaciones, y cualquier otra tarea de man- tenimiento o ajuste deberán ser realizadas en centros de servicio autorizados o de fábrica Makita, empleando siempre repuestos Makita. 43 ESPAÑOL... -
Page 44: Accesorios Opcionales
Este ajuste ha sido efectuado de fábrica. Pero en caso de haberse perdido, usted puede ajustarlo siguiendo el • Batería y cargador originales de Makita procedimiento a continuación. NOTA: Algunos de los artículos en la lista pueden Coloque la herramienta a la profundidad de corte incluirse en el paquete de la herramienta como acce- máxima. - Page 48 Para reducir la exposición a estos productos químicos: trabaje en un área bien ventilada y póngase el equipo de seguridad indicado, tal como las máscaras contra polvo que están especialmente diseñadas para filtrar partículas microscópicas. Makita Corporation 3-11-8, Sumiyoshi-cho, Anjo, Aichi 446-8502 Japan 885A10-949...
Need help?
Do you have a question about the GSH05 and is the answer not in the manual?
Questions and answers