Table of Contents
Advertisement
Quick Links
Advertisement
Table of Contents

Related Manuals for HY-CLOR SWIFT


Summary of Contents for HY-CLOR SWIFT
- Page 1 SWIFT DIAPHRAGM DRIVE POOL CLEANER INSTALLATION & OPERATION MANUAL...
-
Page 2: Limited Warranty
The following are excluded from this limited warranty: 1. Damage to or malfunction of the SWIFT pool cleaner as a result of improper water chemistry including but not limited to excess chlorination. 2. Discoloration of the SWIFT pool cleaner. Exposure to ultraviolet light rays and pool chemicals can cause discolouration of the SWIFT pool cleaner. -
Page 3: Preparing Your Pool
The flow of water from the return line(s) can affect the performance of SWIFT, as it can push the cleaner away from certain areas, or cause it to stay in one section of the pool. -
Page 4: Step 1: Check Contents
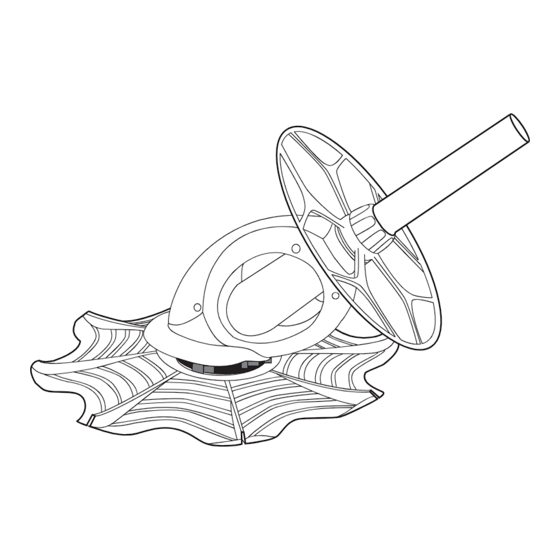
45º Elbows M/F APC 2 tone hoses F/F APC 2 tone hose STEP 2: ASSEMBLE THE SWIFT POOL CLEANER To assemble simply fit your SWIFT pool cleaner Figure 2 Skirt to the body. Simply stretch the Skirt (with SKIRT the fins pointing away from the pool, towards the cleaner) over the Footpad, as shown in Fig 2. - Page 5 Use the Deflector Wheel if your pool has tight Figure 3 corners and/or a ladder. The Deflector Wheel helps guide your SWIFT pool cleaner around these obstacles. To fit the Deflector Wheel, simply push it over the Hand nut, until it has engaged (should hear click) correctly and rotates freely.
- Page 6 (F). The hose cone Then push’s into the vacuum plate (not supplied) • Turn the pool pump ON • Your SWIFT pool cleaner will now begin automatically vacuum your pool (adjust water flow if needed) Please be aware that the vacuum plate or...
-
Page 7: Return Line Water Flow
RETURN LINE WATER FLOW IMPORTANT: The Water flow from your return Figure 8 line can push your cleaner’s hose and affect its performance. It may cause your cleaner to get stuck or push it away from areas you would like cleaned. -
Page 8: Troubleshooting
• Check balance of cleaner to make sure hose weights are in the correct position. NOTE: While the swift is able to climb walls, it is best to get the cleaner working on the floor before aiming to climb the walls. - Page 9 The diaphragm of your SWIFT pool cleaner operates at the rate of approximately 360 beats per minute. If your SWIFT operates daily for 8 hours, the diaphragm will open and close over 60 million times in a year! The design has been perfected over many years and, properly cared for, the diaphragm will provide long service.
- Page 10 Step 4 Push the INNER EXTENSION PIPE away from you, so the tabs go through the holes in the IEP LOCATOR. Step 5 Grasp the other end of the DIAPHRAGM (the end furthest away from the INNER EXTENSION PIPE) and pull it away from the Orbit BODY. The DIAPHRAGM will fall clear of the BODY.
- Page 11 (a) Fit the RETAINING RING onto the new (b) Push the DIAPHRAGM onto the INNER DIAPHRAGM. EXTENSION PIPE. Make sure it is correctly located and fully engaged. (c) Pull the INNER EXTENSION PIPE up through (d) Gently turn the INNER EXTENSION PIPE so the the BODY, positioning the tabs so they can be tabs are aligned with the recesses in the IEP pulled through the holes in the IEP LOCATOR.
Need help?
Do you have a question about the SWIFT and is the answer not in the manual?
Questions and answers