Table of Contents
Advertisement
USER MANUAL
Enjoy peace of mind.
Register your appliance today.
Stay updated on better living services, safety notices and
shop for accessories.
1. Open the camera app on your smartphone and
point at the QR code to scan
Product Registration QR code is located on the
front of your appliance or inside the door rim*.
2. Tap the notification or link to open the registration form
3. Complete your details and enjoy peace of mind
*Exact location of QR code may vary depending on oven model
Timer
Clock
Cook Time
MODE
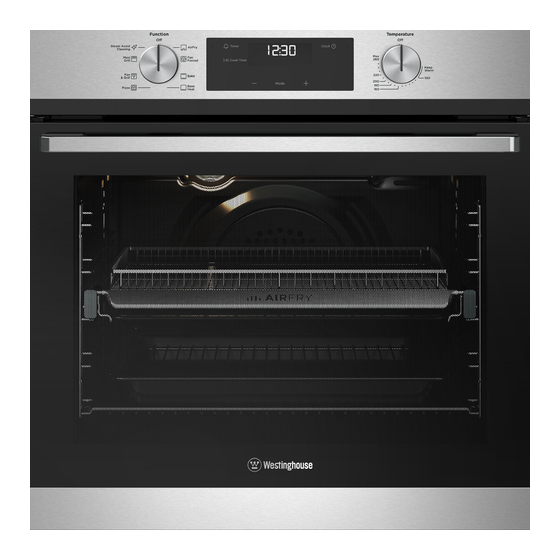
ELECTRIC BUILT-IN OVEN
WVE6516
Advertisement
Table of Contents

Related Manuals for Westinghouse WVE6516


Summary of Contents for Westinghouse WVE6516
- Page 1 2. Tap the notification or link to open the registration form 3. Complete your details and enjoy peace of mind *Exact location of QR code may vary depending on oven model Timer Clock Cook Time MODE ELECTRIC BUILT-IN OVEN WVE6516...
-
Page 2: Table Of Contents
Failure to strictly adhere to the requirements in this manual may result in personal injury, property damage and affect your ability to make a claim under the Westinghouse manufacturer’s warranty provided with your product. Products must be used, installed and operated in accordance with this manual. -
Page 3: Important Safety Instructions
IMPORTANT SAFETY INSTRUCTIONS Please read the user manual carefully and store in a handy • Switch the appliance off before removing the oven place for later reference. light glass for globe replacement. • Always keep the appliance clean. Ensure fats and oils do not accumulate around elements, burners or fans. - Page 4 IMPORTANT SAFETY INSTRUCTIONS WARNING CAUTION Read the following carefully to avoid damage to the appliance. • The grill tray must be fully inserted whilst grilling. • Do not place thick portions of food under the grill. Foods may curl, catch and ignite. •...
-
Page 5: Installing Your Appliance
MAX POWER MAX CURRENT WIRE SECTION MODEL (H X W X D) mm RATING RATING RATING (mm²) WVE6516 597 x 596 x 569 3.6kW 15.0A Note: Electrical connection is 230-240 volts AC 50Hz. Wiring minimum temperature rating 75°C. INSTALLING YOUR APPLIANCE... - Page 6 INSTALLING YOUR APPLIANCE (CONTINUED) • If a powerpoint is fitted it must be accessible with the Cabinet construction for your appliance appliance installed, as the plug must be accessible For the best integration within a kitchen, install the after installation. appliance in a standard 600mm wide cupboard that gives •...
- Page 7 Underbench ovens Your underbench oven looks best when the control panel is directly under the benchtop. An upper infill panel may have to be added if the cooktop placed above the benchtop is too Flush fit 581min deep. Proud fit 560 min Refer to cooktop installation instructions for required clearance between cooktop and oven.
-
Page 8: Product Description
PRODUCT DESCRIPTION WVE6516 Function selector Function indicator light Electronic Clock Oven/grill indicator light Oven/grill temperature selector PRODUCT DESCRIPTION... -
Page 9: Before First Use
BEFORE FIRST USE Preparing your appliance for the first time • Please remove all internal boxes and bags from the oven before operation. • Please wipe out the oven interior prior to operation with warm soapy water and polish dry with a soft clean cloth. -
Page 10: Installing Your Oven Accessories
INSTALLING YOUR OVEN ACCESSORIES Side racks Air Fry • The side racks attach to each side of your oven. The Air Fryer can be placed onto slides or into side racks There is a left hand and right hand version (see image in the same manner as an oven shelf. - Page 11 INSTALLING YOUR OVEN ACCESSORIES (CONTINUED) Fitting grill dish and insert Your oven comes with a full width grill dish and a grill insert. The grill dish insert is designed with flexibility to adjust distance between the food and the grill element. Maximum grill power Grill dish insert brings the food closer to the grill element.
-
Page 12: Using Your Oven
USING YOUR OVEN Air Fry Base Heat Air fry enables advanced convection cooking function Heat comes from the element below the food. The without having to turn the food, giving crispy great element is controlled by the thermostat and will turn on tasting results in a shorter time without all the oil. - Page 13 USING YOUR OVEN (CONTINUED) Maxi Grill glass, it will condense and produce water droplets. To reduce condensation, ensure that the oven is pre-heated “Maxi grill” directs radiant heat from 2 powerful upper before placing food in the oven cavity. It is recommended elements onto the food.
- Page 14 Operating the electronic clock To stop the beeper, press symbols or NOTE: This feature has no effect on the oven operation. With the minder operating, the time of day cannot be displayed. Setting the cooking duration Select the desired oven The oven indicator light will appear and the heating source will switch on.
- Page 15 USING YOUR OVEN (CONTINUED) the similar one. You can extend baking times by 10-15 minutes if you bake cakes on more than one shelf position. Cakes and pastries at different heights do not always brown equally at first. If this occurs, do not change the temperature setting.
- Page 16 • Do not pierce the meat, as this will allow juices to escape. • When the meat is cooked, take the roast out of the oven, wrap in aluminium foil and leave to stand for about 10 minutes. This will help retain the juices when the meat is carved.
-
Page 17: Cooking Guide
COOKING GUIDE Choosing the best oven settings The following table is intended as a guide and experience may show some variation in cooking times necessary to meet individual requirements. It may be necessary to change some cooking times and temperatures from your previous oven. - Page 18 COOKING GUIDE (CONTINUED) To set the AirFry function: AirFry cooking 1. Arrange food on to the AirFry tray. 2. Select AirFry setting and suggested temperature from the table below. 3. For best results pre-heat the oven 4. When the oven reaches the set temperature place the AirFry tray on the suggested oven shelf position.
-
Page 19: Grilling Guide
GRILLING GUIDE Grilling hints Guide to better grilling WARNING WARNING TIPS & INFORMATION IMPORTANT Always clean the grill/oven dish after every use. Excessive Definite times can not be given for grilling as it is fat build up may cause a fire. dependant on the size of the food and your own tastes. -
Page 20: Dealing With Cooking Problems
DEALING WITH COOKING PROBLEMS PROBLEM CAUSES REMEDY Uneven cooking • Incorrect shelf position • Select shelf suitable for cooking function. See cooking function tables in cooking guide • Oven tray too large • Experiment with other trays or dishes • Trays not centralised •... -
Page 21: Getting To Know The Oven
GETTING TO KNOW THE OVEN Get to know the oven with this ‘Simple Test Cake’ Although we strive for a perfect performing oven, it’s possible that there will be some variation in colour when baking. Therefore, we suggest this simple, easy and delicious to make Simple Test Cake, it can help you understand your new oven. -
Page 22: Care And Cleaning
CARE AND CLEANING WARNING WARNING WARNING WARNING Ensure the oven is electrically isolated before cleaning. The door glass on this appliance is made from a tough, This can be done by switching off the appliance via durable material that withstands heating and cooling the powerpoint or isolating switch (if available), or the without breaking. - Page 23 Releasing the grill element WARNING ARNING WARNING Make sure the appliance is turned off before you remove or replace parts, to avoid the possibility of electric shock. Removing the side racks Retaining wire models - The upper grill element is secured with a hanger clip which can be removed to help clean the oven cavity ceiling.
- Page 24 CARE AND CLEANING (CONTINUED) Stirrup in the open position Door column Retaining clips models - The upper grill elements is secured with 2 clips which can be removed to help clean the oven cavity ceiling. To disengage the lcips, push the edge of the clips towards back of the oven •...
- Page 25 Removing oven door top trim • Take hold of the grid embossed sections of the door trim at each end and press inwards to release the clips. Remove the door trim by pulling it towards you. Cleaning the door glass panels Removing the door glass panels WARNING CAUTION...
- Page 26 CARE AND CLEANING (CONTINUED) Fitting the oven door • Take hold of the oven door with a hand on each side and with the door at an angle of 45 , position the recesses at the bottom of the door onto the hinge arms of the oven.
- Page 27 Steam Assisted Cleaning function This function assists in the removal of food residue from inside the oven. This method is effective in removing light soiling only. It is not effective in removing stubborn baked-on stains. This function can only be used when the oven is cold.
-
Page 28: Troubleshooting
TROUBLESHOOTING Oven PROBLEM POSSIBLE CAUSE Oven or grill • Time of day not set. not working • Power not turned on. • Controls are incorrectly set. • Oven is in ‘Demo’ mode, refer to Using your oven section. • Household fuse has blown or power supply is off. NOTE: If the household fuse continues to blow, call the Customer Care Centre. -
Page 29: Warranty
(c) ‘ASC’ means Electrolux’s authorised serviced centres; the Appliance; (d) ‘Westinghouse’ is the brand controlled by Electrolux Home Products In addition, Electrolux is not liable under this warranty if: Pty Ltd of 163 O’Riordan Street, Mascot NSW 2020, ABN 51 004... - Page 30 0800 225 088 westinghouse.co.nz email: customercare@electrolux.co.nz web: westinghouse.co.nz and WESTINGHOUSE are trademarks of Westinghouse Electric Corporation. Used under license by Electrolux Home Products Pty Ltd. All Rights Reserved. © 2023 Electrolux Home Products Pty Ltd. ABN 51 004 762 341 WMAN_EBIC_A26335101_WVE6516_A_Mar2023...
Need help?
Do you have a question about the WVE6516 and is the answer not in the manual?
Questions and answers