Westinghouse WVE613 User Manual
Hide thumbs
Also See for WVE613:
- User manual (57 pages) ,
- Quick start manual (4 pages) ,
- User manual (29 pages)

Related Manuals for Westinghouse WVE613


Summary of Contents for Westinghouse WVE613
- Page 1 USER MANUAL ELECTRIC BUILT-IN OVENS WVE613, WVES613L/R, WVE615, WVEP615, WVE616, WVE617, WVEP618, WVE626, WVE636, WVE645, WVE655, WVE665...
-
Page 2: Table Of Contents
Dear customer, Important safety instructions ............3 Product description ................5 Congratulations and thank you for choosing our oven. WVE613 We are sure you will find it a pleasure to use. Before you WVES613 use the oven, we recommend that you read through... -
Page 3: Important Safety Instructions
IMPORTANT SAFETY INSTRUCTIONS Please read the user manual carefully and store in a handy Steam can be released. There is a risk of skin burns. place for later reference. There is a risk that steam causes moisture damage to cabinets. •... - Page 4 IMPORTANT SAFETY INSTRUCTIONS WARNING CAUTION Read the following carefully to avoid damage to the appliance. • The grill door must be left fully open whilst grilling in a separate grill wall oven and a separate grill underbench oven. • The grill tray must be fully inserted whilst grilling. •...
-
Page 5: Front Panel Of Various Models
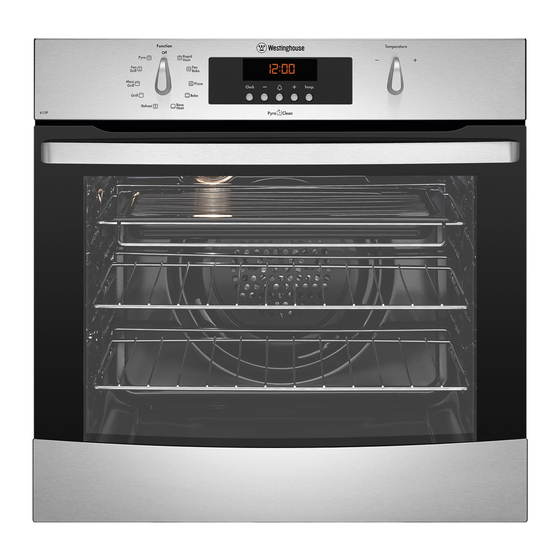
PRODUCT DESCRIPTION WVE613 & WVES613 oven/grill indicator light function oven/grill ‘auto-off’ timer selector temperature selector function indicator light oven indicator light WVE615 oven/grill function selector electronic clock temperature selector function oven indicator light indicator light WVE616 oven/grill function selector electronic clock... -
Page 6: Wvep615
PRODUCT DESCRIPTION WVEP615 temperature selector function selector upper oven lower oven WVE626 indicator light indicator light upper electronic lower upper oven/grill lower oven/grill function clock temperature function temperature selector selector selector selector upper oven lower oven WVE636 indicator light indicator light upper upper oven/grill electronic clock... -
Page 7: Before First Use
BEFORE FIRST USE Preparing your appliance for the first time WVEP615 controller • Please remove all internal boxes and bags from the • After the appliance has been electrically connected, oven before operation. “12” and the “Set Clock” symbol “ “ will flash. •... -
Page 8: Installing Your Oven Accessories
INSTALLING YOUR OVEN ACCESSORIES Catalytic liners (on selected models) Side racks The side racks that come with your oven can be attached to either side of your oven. TIPS & INFORMATION IMPORTANT • Insert the twin pegged side into the rear access holes Models which contain catalytic liners have 2 catalytic provided, ensuring that the pegs are fully inserted. - Page 9 Shelves and trays TIPS & INFORMATION IMPORTANT The shelves are designed so that they have maximum travel but cannot be accidentally pulled right out. The trays are designed the same way and fit straight into the side racks. To fit a shelf or tray to side racks: •...
- Page 10 INSTALLING YOUR OVEN ACCESSORIES Shelves and trays (WVEP615 only) Shelves and trays (WVE655 only) • To insert the grill tray in a separate grill underbench product, open the grill door and fully extend the grill TIPS & INFORMATION IMPORTANT drawer. Position the grill tray so that the slots on the Your oven comes with formed “easy clean”...
-
Page 11: Using Your Oven
USING YOUR OVEN Understanding your oven functions Steam Assisted Cooking (WVE617 model only) Your oven will have a selection of the following functions. Perfect for all kinds of meat, poultry and fish dishes. The Refer to “Description of your appliance” to confirm what hot air ensures the outside of the food is sealed whilst functions are available to you. - Page 12 USING YOUR OVEN Pizza Defrost The “Defrost” function uses low temperature air which is “Pizza” is a combination of “Base heat” and “Fan bake” circulated by the fan. You can defrost (thaw) your food and offers you the combined benefits of both functions. before you cook it.
- Page 13 Maxi Grill (grill in oven models only) Fan Assist (duo small oven only) “Maxi grill” directs radiant heat from 2 powerful upper Heat comes from two elements, one above and one elements onto the food. You can use the “Maxi grill” below the food.
- Page 14 USING YOUR OVEN (CONTINUED) WARNING TIPS & INFORMATION CAUTION IMPORTANT Once the food is cooked, turn the temperature selector Cooling/Venting fan back in an anti-clockwise direction. Do not force it right round in a clockwise direction as this will result in damage This appliance is fitted with a cooling fan.
- Page 15 Cooking with your timer (selected models only) General features The oven is equipped with an electronic clock that can be used to turn the oven on and off automatically. The WARNING CAUTION ‘Cook time’ function automatically turns the oven off after Set the timer clockwise.
- Page 16 USING YOUR OVEN (CONTINUED) Setting the cooking duration Press symbols or to stop the clock from beeping. Select the desired oven oven indicator light will appear and the heating source Switching the clock display ON and OFF will switch on. Press together symbols for 3 seconds to Press...
- Page 17 Setting the oven function After 5 seconds from last change, the symbol will stop flashing confirming the cooking end time Turn the oven selector clockwise to select is set. the desired oven function. The default temperature The “Cooking end time” will be shown on the display. for that function will be shown on the display.
- Page 18 USING YOUR OVEN (CONTINUED) Displaying the oven centre and set temperature (other DEMO mode than pyrolytic clean function) The oven can be set to operate in a demo (e.g. in a retail Press the button when the oven is operating store) mode.
- Page 19 Changing the time of day Setting the cooking end time Switch the appliance “Off” by pressing “On / Off”. Select the desired oven function and cooking temperature. Press button repeatedly until the “Set clock” symbol appears flashing with the “Timer arrow” Press button repeatedly until the symbol...
- Page 20 USING YOUR OVEN (CONTINUED) Setting the minute minder Beep on touch The minute minder can be used with the oven on or off. The “beep on touch” mode can be activated to sound anytime a button is pressed. Press button repeatedly until the “Minute minder”...
- Page 21 Oven shelf location (excluding WVEP618) The table shows temperatures and cooking times for different kinds of meat. These may vary depending on the Your oven has seven positions for shelves. These are thickness or bone content of the meat. numbered from 1 (the lowest shelf position) to 7 (the highest shelf position).
-
Page 22: Cooking Guide
COOKING GUIDE Choosing the best oven settings The following table is intended as a guide and experience may show some variation in cooking times necessary to meet individual requirements. It may be necessary to change some cooking times and temperatures from your previous oven. -
Page 23: Grilling Guide
GRILLING GUIDE Grilling hints Guide to better grilling WARNING WARNING TIPS & INFORMATION IMPORTANT Always clean the grill/oven dish after every use. Excessive Definite times can not be given for grilling as it is fat build up may cause a fire. dependant on the size of the food and your own tastes. -
Page 24: Steam Cooking Guide
STEAM COOKING GUIDE (WVE617 model only) Steam product description TIPS & INFORMATION IMPORTANT Cooking with steam is a great addition to straight ‘hot air’ cooking. Steam brings out all the natural flavours and goodness in the food, cooks evenly from surface to centre and retains more nutrients and vitamins. - Page 25 Steam operating sequence Once cooking is complete, remove the food and turn off the oven. Leave the oven door ajar to aid drying Open the water drawer in the control panel by out the oven. pressing it. Drain the water tank once the appliance is cool. (See Pour approximately 850mL of water into the “Emptying water tank”) drawer.
-
Page 26: Dealing With Cooking Problems
DEALING WITH COOKING PROBLEMS PROBLEM CAUSES REMEDY Uneven cooking • Incorrect shelf position • Select shelf suitable for cooking function. See cooking function tables in cooking guide • Oven tray too large • Experiment with other trays or dishes • Trays not centralised •... -
Page 27: Getting To Know The Oven
GETTING TO KNOW THE OVEN Get to know the oven with this ‘Simple Test Cake’ Although we strive for a perfect performing oven, it’s possible that there will be some variation in colour when baking. Therefore, we suggest this simple, easy and delicious to make Simple Test Cake, it can help you understand your new oven. -
Page 28: Care And Cleaning
CARE AND CLEANING WARNING WARNING WARNING WARNING Ensure the oven is electrically isolated before cleaning. The door glass on this appliance is made from a tough, This can be done by switching off the appliance via durable material that withstands heating and cooling the powerpoint or isolating switch (if available), or the without breaking. - Page 29 Removing catalytic liners (where fitted) TIPS & INFORMATION IMPORTANT Catalytic self-clean panels are coated with a specially formulated enamel coating over a base of regular enamel. This enamel coating has a rough and porous surface. During normal cooking, fats and other food splatter is partially absorbed into the surface and oxidised away.
- Page 30 CARE AND CLEANING (CONTINUED) Cleaning the triple glazed oven door (on selected models) WARNING CAUTION Do not lift the door by the handle. Rough handling will cause glass to break. Removing the oven door TIPS & INFORMATION IMPORTANT Your oven is equipped with a door that can be disassembled in order to clean all the panes of glass.
- Page 31 • Lay the oven door with the outer side facing downwards on something soft and flat (for example • Repeat this for the smaller clear glass panel a blanket on a kitchen table) to prevent scratches. (when fitted). Removing oven door top trim •...
- Page 32 CARE AND CLEANING (CONTINUED) Re-assembling the bottom trim (on selected models) • Push down to “snap” each side of bottom trim back into door columns. Re-assembling the top door trim • Take hold of the top door trim at each side and position it to the inside edge of the glass.
- Page 33 Fitting the oven door Cleaning the quad glazed oven door (on selected models) • Take hold of the oven door with a hand on each side and with the door at an angle of 45 , position the recesses at the bottom of the door onto the hinge WARNING CAUTION arms of the oven.
- Page 34 CARE AND CLEANING (CONTINUED) Cleaning the door glass panels • Lay the oven door with the outer side facing WARNING CAUTION downwards on something soft and flat (for example a blanket on a kitchen table) to prevent scratches. Do not to use harsh abrasives on the glass panes as the reflective surface plays a role in the function of the oven.
- Page 35 Fitting the oven door Chamfer to be located in this corner • Take hold of the oven door with a hand on each side and with the door at an angle of 30˚, position the recesses at the bottom of the door onto the hinge arms of the oven.
- Page 36 CARE AND CLEANING (CONTINUED) WARNING CAUTION Do not lift the door by the handle. Rough handling will cause glass to break. Removing the door glass panels Cleaning the door glass panels WARNING CAUTION WARNING CAUTION Rough handling, especially around the edges can cause Do not to use harsh abrasives on the glass panes as the the glass to break.
- Page 37 Before carrying out the Pyrolytic cleaning function WARNING WARNING • Clean large deposits, spills or grease from the oven cavity. • Please keep small children at a safe distance. The appliance becomes very hot. • Never clean non-stick baking trays and tins in the oven during the pyrolytic cycle.
- Page 38 CARE AND CLEANING (CONTINUED) Starting the Pyrolytic cleaning function (WVEP615 models only) WARNING CAUTION Do not turn off the mains power supply to the oven • Turn the oven “Function” selector clockwise to select during the pyrolytic cleaning cycle. This could damage the “Pyro”...
-
Page 39: Using Your Cooktop
USING YOUR COOKTOP Cleaning your ceramic hotplate WARNING CAUTION Remove all spilt food and fat with a razor blade The ceramic cooktop is made from ceramic glass,a tough scraper (supplied with the unit) while the ceramic durable material that withstands heating and cooling glass is still warm, but not hot. -
Page 40: Troubleshooting
DEALING WITH COOKING PROBLEMS Faults PROBLEM POSSIBLE CAUSE SOLUTION If there is a problem with the oven and/or grill, please: Heating • Power not • Check cooktop elements not switched on is plugged in and • Check the points listed below before calling for working power is on service. - Page 41 TROUBLESHOOTING PROBLEM POSSIBLE CAUSE Oven or grill • Time of day not set. not working • Power not turned on. • Controls are incorrectly set. • Oven is in ‘Demo’ mode, refer to Additional Functionality. • Household fuse has blown or power supply is off. NOTE: If the household fuse continues to blow, call the Customer Care Centre.
-
Page 42: Wiring Min/Max Temperature Rating
MAXIMUM MAXIMUM MODEL DIMENSIONS SECTION RATING POWER RATING CURRENT RATING (H X W X D) MM (MM²) WVE613 597 x 596 x 573 2.3kW 9.6A WVES613 597 x 596 x 573 2.3kW 9.6A WVE615 597 x 596 x 573 3.0kW 12.7A... - Page 43 Hard wiring detail Cabinet construction for your appliance Remove terminal cover plate from rear panel For the best integration within a kitchen, install the of appliance. appliance in a standard 600mm wide cupboard that gives a flush fit with the surrounding cupboard fronts as shown Fit wires through hole in cover plate and make in Fig.
-
Page 44: Installing
INSTALLING YOUR APPLIANCE Non-pyrolytic underbench ovens and side open door oven Your underbench oven looks best when the control panel is directly under the benchtop. An upper infill panel may have to be added if the cooktop placed over the oven is too deep. Refer to cooktop installation instructions for required clearance between cooktop and oven. - Page 45 Separate grill underbench oven Your underbench oven looks best when the control panel is directly under the benchtop. An upper infill panel may have to be added if the cooktop placed over the oven is too deep. Refer to cooktop installation instructions for required clearance between cooktop and oven.
- Page 46 INSTALLING YOUR APPLIANCE Double oven GAS TYPE Flush fit 1086 581min Proud fit 1078 560min use 25mm long black installation screws supplied mounting holes use 15mm long black installation screws supplied 450mm min. Combo oven – cooktop cut-out dimensions COOKTOP DIMENSIONS A minimum gap of 40mm must be maintained between Overall Cooktop Dimensions the top of the underbench oven and the bottom of the...
-
Page 47: Warranty
Warranty FOR SALES IN AUSTRALIA AND NEW ZEALAND APPLIANCE: BUILT-IN OVEN, COOKTOP AND FREESTANDING COOKERS This document sets out the terms and conditions of the product 7. You may not make a claim under this warranty unless the defect claimed warranties for Electrolux Appliances. - Page 48 Top Service encompasses the after sales service provided by The Electrolux Group to consumers including delivery, home service and spare parts. Westinghouse. We are part of the Electrolux family. Share more of our thinking at www.electrolux.com and WESTINGHOUSE are trademarks of Westinghouse Electric Corporation.
Need help?
Do you have a question about the WVE613 and is the answer not in the manual?
Questions and answers