Husqvarna 535RX Operator's Manual
Hide thumbs
Also See for 535RX:
- Operator's manual (100 pages) ,
- Operator's manual (76 pages) ,
- Operator's manual (40 pages)
Table of Contents
Advertisement
Quick Links
Advertisement
Table of Contents

Related Manuals for Husqvarna 535RX


Summary of Contents for Husqvarna 535RX
- Page 1 535RX, 535RXT Operator's manual 2-32...
-
Page 2: Table Of Contents
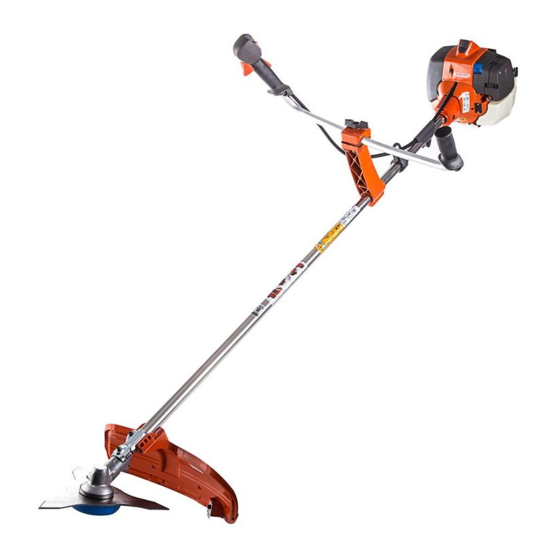
Assembly..............10 Technical data.............. 28 Operation..............14 Accessories..............29 Maintenance..............21 Warranty............... 31 Introduction Product overview 535RX 535RXT 1. Trimmer head 16. Air filter cover 2. Grease filler cap, bevel gear 17. Handle adjustment 3. Bevel gear 18. Locknut 4. Cutting attachment guard 19. - Page 3 31. Throttle wire adjustment Maximum speed of the output shaft. 32. Spark plug wrench 33. Guard extension Keep a minimum distance of 15 m/50 ft to Product description persons and animals during operation of the product. This product is a brushcutter with a combustion engine. Work is constantly in progress to increase your safety Risk of blade thrust if the cutting and efficiency during operation.
-
Page 4: Safety
EMISSION CONTROL LABEL ABBREVIATIONS General California EVAP Evaporative REGS Regulations DISPL Displacement EXH/EVP Exhaust and Evapora- SORE Small off road engines tive Emission control system HRS Hours US EPA United States Environ- mental Protection Agen- Exhaust emission control systems Engine control module (Autotune) Oxidizing Catalyst Engine modification Three way catalyst... - Page 5 • Do not operate the product in bad weather, such • Listen for warning signals and loud voices when you as dense fog, heavy rain, strong wind and intense use hearing protection. Always remove your hearing cold. To operate the product in bad weather can protection when the engine stops.
- Page 6 Do a check of and do maintenance on the safety devices regularly. If the safety devices are damaged, • Always use approved personal protective equipment speak to your Husqvarna service agent. when you use the product. Personal protective equipment cannot fully prevent injury but it •...
- Page 7 Cutting attachment 3. Make sure that the throttle trigger is locked at the idle position when the throttle trigger lockout is WARNING: released. The cutting attachment must not rotate when you do work on it. Make sure that the engine has stopped. Remove the spark plug cap before you do work on the cutting attachment.
- Page 8 The cutting attachment guard prevents injuries from 3. Make sure that the vibration damping units are correctly attached. objects that eject in the direction of the operator. It also prevents injuries that occur if you touch the cutting attachment. 1. Do a visual check for damages, for example cracks. To do a check of the quick-release mechanism WARNING: Do not use a harness with...
- Page 9 2. Do a visual check for damage and deformation. Note: The inner surfaces of the muffler contain chemicals that can cause cancer. Be careful not to touch these elements if the muffler is damaged. 3. Make sure that the muffler is correctly attached to the product.
-
Page 10: Assembly
• Let an approved Husqvarna service agent do come into contact with the skin. For this reason, servicing on the product regularly. observe caution when handling fuel and make sure •... - Page 11 2. Move the throttle handle to the right side of the 4. Adjust the handlebar to put the product in a good handlebar. operation position. 3. Align the hole behind the throttle handle with the hole in the handlebar. 4. Put the screw through the holes. Tighten the screw. To assemble the handlebar 1.
- Page 12 To attach the grass blade and the grass blade 3. Turn the output shaft to align one of the holes in the drive disc with the related hole in the gear housing. guard/combination guard 4. Put the locking pin (C) in the hole to lock the shaft. 1.
- Page 13 8. Tighten the nut with the socket wrench. Hold the a) Make sure that you operate the socket wrench in shaft of the socket wrench near the blade guard. the identified area when you loosen or tighten the Tighten in the opposite direction to how the cutting saw blade nut.
-
Page 14: Operation
To adjust the harness 6. Adjust the height of the suspension point. For forestry clearing, the correct height of the 1. Put on the harness of the product. suspension is approximately 10 cm below your hip. Correct balance of the product on page 16 . Refer to 2. - Page 15 We recommend a higher octane rating when you do work at continuous high speed. Husqvarna alkylate fuel We recommend you to use Husqvarna alkylate fuel for best performance. The fuel contains less dangerous material compared to regular fuel, which decreases dangerous exhaust fumes.
- Page 16 This 3. Add the remaining quantity of gasoline. extends the life of the engine. Husqvarna alkylate fuel is 4. Carefully mix (shake) the fuel mixture and fill the fuel not available in all markets.
- Page 17 point. With correct balance, the risk of hitting stones if 2. Move the choke control up into choke position. you release the handlebar is decreased. WARNING: The cutting attachment will start to rotate immediately when you start the engine with the choke. For grass clearing, the product is correctly balanced when the blade is at cutting height near the ground.
- Page 18 Note: If the engine stops, do the procedure again. To start with a throttle handle with a start throttle lock 1. Push the throttle lockout and the throttle trigger to set the throttle to the start position. Then push the start throttle button (A).
- Page 19 Forestry clearing with a saw blade 3. Pull the saw blade forward with a fast movement. To fell a tree to the left To fell to the left, push the bottom of the tree to the right. 1. Apply full throttle. 2.
- Page 20 Brush cutting with a saw blade • Keep the support cup with a light pressure against the ground to make sure that the grass blade does To fell to the left, push the bottom of the tree to the right. not hit the ground.
-
Page 21: Maintenance
3. Use a sideway movement from right to left for a clear 2. Do not push the trimmer head to the ground. This stroke. Use the left side of the blade (between 8 and can cause damage to the product. 12 o'clock) to cut. - Page 22 Maintenance Daily Weekly Monthly Examine the harness for damages. Examine the suspension ring for damages. Do a check of the handle and the handlebar to make sure that they are attached correctly and not damaged. Make sure that the throttle trigger lock and the throttle works correctly. Do a check of the stop switch to make sure that it operates correctly.
- Page 23 To clean the cooling system 2. Make sure that the muffler is correctly attached to the product. CAUTION: A dirty or blocked cooling system can make the product too hot, which can cause damage to the product. The parts of the cooling system are the air intake on the starter (A), the cooling fins on the cylinder (B) and the cylinder cover (C).
- Page 24 5. If the grease level is too low fill the bevel gear with 1. Put the foam air filter in a plastic bag. Husqvarna bevel gear grease. Fill slowly and turn the drive shaft as you apply the bevel gear grease, 2.
- Page 25 5 again 3 times. hand. Replace the nut if the nylon lining does not have 7. Let your Husqvarna dealer adjust/repair the product a resistance of a minimum of 1.5 Nm. The locknut must if the engine does not operate correctly after you be replaced after it has been put on approximately 10 have done all these steps.
- Page 26 (A) counterclockwise until the cutting attachment stops. Turn the adjuster screw (A) clockwise 1/2 turn more. To adjust the idle speed Your Husqvarna product is designed and made to specifications that decrease harmful emissions. WARNING: Always discard a blade •...
-
Page 27: Troubleshooting
• Use a 5.5 mm round file with a file holder. Note: Sharpen the edges of the teeth with a flat file if the blade is heavily worn. Continue to sharpen with a round file. • Sharpen all edges equally to keep the blade balanced. -
Page 28: Transportation, Storage And Disposal
• When the product is no longer in use, send it to • Ensure that the product is cleaned and that a a Husqvarna dealer or discard it at a recycling complete service is carried out before long-term location. storage. -
Page 29: Accessories
Equipped with trimmer head (original), left/right 3.0/3.4 2.4/3.1 Equipped with grass blade (original), left/right 3.4/4.1 2.5/2.7 Accessories Accessories 535RX Approved accessories Accessory type Cutting attachment guard, art. no. Center hole in blades/knives, Ø 25.4 Output shaft thread M12 Multi 255-3 (Ø 255 3 teeth) 537 33 16 Grass 255-4 (Ø... - Page 30 Approved accessories Accessory type Cutting attachment guard, art. no. T35, T35 (Ø 2.4 - 3.0 mm cord) 537 33 16-01 / 537 34 94-01 S35 (Ø 2.4 - 3.0 mm cord) 537 33 16-01 / 537 34 94-01 Trimmer head T45x (Ø...
-
Page 31: Warranty
Husqvarna is not liable to cover failures maintenance. As the small nonroad engine owner, you of warranted parts caused by the use of add-on or should, however, be aware that Husqvarna may deny modified parts. - Page 32 2. Intake pipe, airfilter holder and carburetor bolts. 3. Airfilter and fuelfilter covered up to maintenance schedule. 4. Ignition system. a. Spark Plug, covered up to maintenance schedule. b. Ignition Module. 5. Muffler with catalytic converter. MAINTENANCE STATEMENT The owner is responsible for the performance of all required maintenance, as defined in the operator’s manual.
- Page 33 1069 - 009 - 13.06.2023...
- Page 34 1069 - 009 - 13.06.2023...
- Page 35 1069 - 009 - 13.06.2023...
- Page 36 Original instructions 1143279-95 2023-06-16...
Need help?
Do you have a question about the 535RX and is the answer not in the manual?
Questions and answers