Husqvarna 535RJ Operator's Manual
Hide thumbs
Also See for 535RJ:
- Operator's manual (40 pages) ,
- Operator's manual (36 pages) ,
- Operator's manual (62 pages)
Table of Contents
Advertisement
Available languages
Available languages
Quick Links
Manuel d'utilisation
Operator's manual
535RJ
Lire attentivement et bien assimiler le manuel d'utilisation avant d'utiliser la machine.
Please read the operator's manual carefully and make sure you understand the instructions before using the machine.
C C C C A A A A ( ( ( ( 2 2 2 2 - - - - 2 2 2 2 8 8 8 8 ) ) ) )
U U U U S S S S ( ( ( ( 2 2 2 2 9 9 9 9 - - - - 5 5 5 5 5 5 5 5 ) ) ) )
Advertisement
Chapters
Table of Contents

Related Manuals for Husqvarna 535RJ


Summary of Contents for Husqvarna 535RJ
- Page 1 Manuel d’utilisation Operator’s manual 535RJ Lire attentivement et bien assimiler le manuel d’utilisation avant d’utiliser la machine. Please read the operator’s manual carefully and make sure you understand the instructions before using the machine. C C C C A A A A ( ( ( ( 2 2 2 2 - - - - 2 2 2 2 8 8 8 8 ) ) ) )
-
Page 2: Explication Des Symboles
EXPLICATION DES SYMBOLES Symboles Destiné uniquement à des AVERTISSEMENT! Les équipements de coupe flexibles et débroussailleuses et les coupe- non métalliques, c’est-à-dire les herbes peuvent être dangereux! têtes de désherbage avec fil. Une utilisation erronée ou négligente peut occasionner des blessures graves, voire mortelles pour l’utilisateur ou d’autres Instruction de démarrage... -
Page 3: Table Of Contents
SOMMAIRE Sommaire Contrôler les points suivants avant la mise en marche: EXPLICATION DES SYMBOLES Symboles .............. 2 Lire attentivement le manuel d’utilisation. SOMMAIRE L’entretien, le remplacement ou la réparation des Sommaire ............. 3 dispositifs et des systèmes antipollution peuvent être Contrôler les points suivants avant la mise en effectués par tout établissement ou personne qui répare marche: .............. -
Page 4: Introduction
Cher client, Félicitations pour ce choix d’un produit Husqvarna. Husqvarna a vu le jour en 1689 lorsque le roi Karl XI décida de construire un arsenal pour la fabrication des mousquets au bord de la rivière Huskvarna. Le choix de l’emplacement était logique puisque la rivière Huskvarna servait à... -
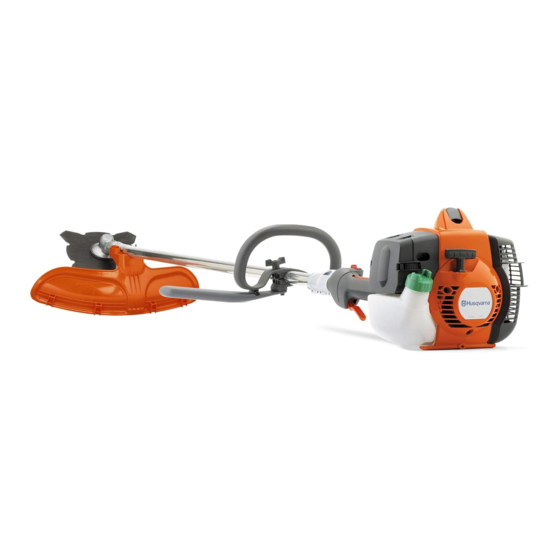
Page 5: Quels Sont Les Composants
QUELS SONT LES COMPOSANTS? Quels sont les composants de la débroussailleuse? Tête de désherbage 17 Commande de starter Ravitaillement en lubrifiant, renvoi d’angle 18 Pompe à carburant Renvoi d’angle 19 Contre-écrou Protection pour l’équipement de coupe 20 Bride de support Tube de transmission 21 Bol de garde au sol Réglage de poignée... -
Page 6: Instructions Générales De Sécurité
INSTRUCTIONS GÉNÉRALES DE SÉCURITÉ Important! AVERTISSEMENT! Ne jamais laisser des enfants utiliser la machine ou se tenir à IMPORTANT! proximité. La machine est équipée d'un interrupteur d'arrêt à détente et peut être La machine est conçue uniquement pour le démarrée par une activation à faible désherbage. -
Page 7: Équipement De Sécurité De La Machine
INSTRUCTIONS GÉNÉRALES DE SÉCURITÉ PROTÈGE-YEUX IMPORTANT! L’entretien et la réparation de la machine Toujours porter des protège-yeux homologués. L’usage exigent une formation spéciale. Ceci concerne d’une visière doit toujours s’accompagner du port de particulièrement l’équipement de sécurité de la lunettes de protection homologuées. Par lunettes de machine. - Page 8 INSTRUCTIONS GÉNÉRALES DE SÉCURITÉ Appuyer sur le blocage de l’accélération et vérifier qu’il Protection pour l’équipement de coupe revient de lui-même en position initiale quand il est relâché. Cette protection a pour but d’empêcher que des objets ne soient projetés en direction de l’utilisateur. La protection prévient aussi le contact entre l’utilisateur et l’équipement de coupe.
- Page 9 INSTRUCTIONS GÉNÉRALES DE SÉCURITÉ Vérifier régulièrement l’état des éléments afin de détecter silencieux de grilles antiflamme. Vérifier si le silencieux de fissures et déformations. la machine est muni d’un tel dispositif. Vérifier que les éléments anti-vibrations sont entiers et solidement fixés. AVERTISSEMENT! Une exposition excessive aux vibrations peut entraîner des troubles circulatoires ou nerveux...
-
Page 10: Équipement De Coupe
INSTRUCTIONS GÉNÉRALES DE SÉCURITÉ échauffement du moteur pouvant donner lieu à de graves (NOTA! L’écrou est fileté à gauche.) Serrer l’écrou à l’aide avaries du moteur. de la clé pour l’écrou de lame. L’usure du verrouillage nylon du contre-écrou ne doit pas AVERTISSEMENT! Un silencieux muni être telle qu’il peut se visser à... - Page 11 INSTRUCTIONS GÉNÉRALES DE SÉCURITÉ Équipement de coupe • Limer les tranchants de manière égale afin de préserver l’équilibre. Les lame et couteau à herbe sont destinés à la coupe de l’herbe épaisse. AVERTISSEMENT! Toujours jeter une La tête de désherbage est destinée au désherbage. lame pliée, faussée, fissurée, cassée ou abîmée de toute autre façon.
-
Page 12: Montage
MONTAGE Montage de la poignée en J Montage de l’équipement de coupe • Placer la poignée anneau sur le tube de transmission. Noter que la poignée anneau doit être montée entre les flèches indicatrices situées sur le tube de AVERTISSEMENT! transmission. -
Page 13: Montage Du Protège-Lame, De La Lame À Herbe Et Du Couteau À Herbe
MONTAGE La dépose du bouclier de protection s’effectue le plus Montage des autres protections simplement à l’aide de la clé à bougie, voir la figure. et équipements de coupe • Monter le carter de protection/la protection combinée (A) destiné(e) au travail avec la tête de désherbage/ les couteaux en plastique. -
Page 14: Manipulation Du Carburant
Ne jamais utiliser d’huile deux temps pour moteurs hors-bord refroidis par eau, appelée huile outboard (désignation TCW). • Ne jamais utiliser d’huile pour moteurs à quatre temps. • Rapport de mélange 1:50 (2%) avec huile deux temps HUSQVARNA. 14 – French... -
Page 15: Remplissage De Carburant
MANIPULATION DU CARBURANT Remplissage de carburant Essence, litres Huile deux temps, litres 2% (1:50) 0,10 0,20 AVERTISSEMENT! Les mesures de 0,30 sécurité ci-dessous réduisent le risque d’incendie: 0,40 US gallon US fl. oz. Ne jamais fumer ni placer d’objet chaud à proximité... -
Page 16: Démarrage Et Arrêt
DÉMARRAGE ET ARRÊT Contrôles avant la mise en carter de protection si l’un ou l’autre a subi des dommages ou présente des fissures. marche • Contrôler la lame afin de détecter d’éventuelles fissures au niveau des dents et du trou central. Les raisons les plus fréquentes de la présence de fissures sont la formation de coins pointus lors de l’affûtage et l’utilisation d’une lame aux dents émoussées. - Page 17 DÉMARRAGE ET ARRÊT jusqu’à ce que le carburant commence à remplir la poche. Arrêt Il n’est pas nécessaire de remplir la poche complètement. Pour arrêter le moteur, couper l’allumage. AVERTISSEMENT! Lorsque le moteur est démarré avec la commande de starter en position starter/accélérateur, l’équipement de coupe commence à...
-
Page 18: Techniques De Travail
TECHNIQUES DE TRAVAIL Méthodes de travail fondrières, etc. Observer la plus grande prudence lors de travail sur des terrains en pente. IMPORTANT! Ce chapitre traite des consignes de sécurité de base lors du travail avec une débroussailleuse ou un coupe- herbe. - Page 19 TECHNIQUES DE TRAVAIL Débroussaillage avec une lame à herbe AVERTISSEMENT! Attention aux objets projetés. Toujours utiliser des protections homologuées pour les yeux. Ne jamais se pencher au-dessus de la protection de l'équipement de coupe. • Ne pas utiliser les lames et les couteaux à herbe pour Des cailloux, débris, etc.
- Page 20 TECHNIQUES DE TRAVAIL • Le fil facilite l’enlèvement d’herbe et de mauvaises au-dessus des surfaces à balayer, puis balader l’outil herbes au pied des murs, clôtures, arbres et massifs suivant un mouvement de balancier. fleuris, mais il peut aussi endommager l’écorce des arbres et des broussailles ainsi que les poteaux des clôtures.
-
Page 21: Entretien
Les caractéristiques techniques de cette machine l’usine. Le réglage de base est plus riche que le Husqvarna assurent des émissions de gaz nocifs réduites mélange optimal et doit être maintenu pendant les au minimum. Après 8-10 pleins, le moteur est rodé. Pour premières heures de service de la machine. -
Page 22: Système De Refroidissement
3/4 à l’utilisation qu’après arrêt. Ceci est rempli de graisse. Utiliser une graisse HUSQVARNA également vrai pour le régime au ralenti. spéciale. Tout contact peut causer des brûlures à... -
Page 23: Bougie
Huilage du filtre à air Remarque: N’utiliser que les pièces de rechange HUSQVARNA. L’utilisation de pièces d’autres marques pourrait endommager votre machine ou encore causer des blessures à l’opérateur ou à d’autres personnes. Votre garantie ne couvre ni les dommages ni la Toujours utiliser une huile spéciale pour filtre. -
Page 24: Schéma D'entretien
ENTRETIEN Schéma d’entretien La liste ci-dessous indique l’entretien à effectuer sur la machine. La plupart des points sont décrits à la section Entretien. L’utilisateur ne peut effectuer que les travaux d’entretien et de révision décrits dans ce manuel d’utilisation. Les mesures plus importantes doivent être effectuées dans un atelier d’entretien agréé. -
Page 25: Caractéristiques Techniques Caractéristiques Techniques
CARACTÉRISTIQUES TECHNIQUES Caractéristiques techniques Caractéristiques techniques 535RJ Moteur Cylindrée, po 2,11/34,6 Alésage, po/mm 1,50/38,0 Course, po/mm 1,20/30,5 Régime de ralenti, tr/min 2900 Régime d'emballement maximal recommandé, tr/min 11500 Régime de l’axe sortant, tr/min 8220 Puissance moteur maxi selon ISO 8893, kW/ tr/min... - Page 26 CARACTÉRISTIQUES TECHNIQUES Protection pour équipement de Accessoires homologués Type coupe, réf. Trou central des lames/couteaux Ø 25,4 Axe de lame fileté M12 Multi 255-3 (Ø 255 3 dents) 537 33 16-03 Lame/couteau à herbe Grass 255-4 (Ø 255 4 dents) 537 33 16-03 Multi 275-4 (Ø...
- Page 27 DATE D’ENTRÉE EN VIGUEUR DE LA (California Air Resources Board), Environment Canada et GARANTIE Husqvarna Forest & Garden ont le plaisir d’expliquer la garantie relative au système de contrôle des émissions La période de garantie commence à la date à laquelle le des petits moteurs fabriqués en 2009 et ultérieurement.
- Page 28 DEMANDE D’INDEMNITÉ Si vous avez des questions concernant vos droits et charges en garantie, contactez votre revendeur autorisé le plus proche ou téléphonez à Husqvarna Forest & Garden, au numéro suivant: +1-800-487-5951 ou visitez www.usa.husqvarna.com. SERVICE APRÈS-VENTE Les révisions ou réparations sous garantie sont disponibles auprès de tous les revendeurs agréés...
-
Page 29: Key To Symbols Symbols
KEY TO SYMBOLS Symbols Only use non-metallic, flexible WARNING! Clearing saws, cutting attachments, i.e. trimmer brushcutters and trimmers can be heads with trimmer cord. dangerous! Careless or incorrect use can result in serious or fatal injury to the operator or others. Please read the operator’s manual Starting instructions carefully and make sure you... -
Page 30: Contents
CONTENTS Contents Note the following before starting: KEY TO SYMBOLS Symbols ..............29 Please read the operator’s manual carefully. CONTENTS Maintenance, replacement, or repair of the emission Contents ............... 30 control devices and system may be performed by any Note the following before starting: ......30 nonroad engine repair establishment or individual. -
Page 31: Introduction
Dear customer! Congratulations on your choice to buy a Husqvarna product! Husqvarna is based on a tradition that dates back to 1689, when the Swedish King Karl XI ordered the construction of a factory on the banks of the Huskvarna River, for production of muskets. -
Page 32: What Is What
WHAT IS WHAT? What is what on the brush cutter? Trimmer head 17 Choke control Grease filler cap, bevel gear 18 Air purge Bevel gear 19 Locking nut Cutting attachment guard 20 Support flange Shaft 21 Support cup Handle adjustment 22 Blade Loop handle 23 Drive disc... -
Page 33: General Safety Precautions
GENERAL SAFETY PRECAUTIONS Important Personal protective equipment IMPORTANT! IMPORTANT! The machine is only designed for trimming grass. A clearing saw, brushcutter or trimmer can be dangerous if used incorrectly or carelessly, and can The only accessories you can operate with this engine cause serious or fatal injury to the operator or others. -
Page 34: Machine's Safety Equipment
GENERAL SAFETY PRECAUTIONS BOOTS the throttle control is automatically locked at the idle setting. Wear boots with steel toe-caps and non-slip sole. CLOTHING Make sure the throttle control is locked at the idle setting Wear clothes made of a strong fabric and avoid loose when the throttle lockout is released. - Page 35 GENERAL SAFETY PRECAUTIONS Stop switch Vibration damping system Use the stop switch to switch off the engine. Your machine is equipped with a vibration damping system that is designed to reduce vibration and make operation easier. Start the engine and make sure the engine stops when you move the stop switch to the stop setting.
- Page 36 GENERAL SAFETY PRECAUTIONS fitted with a catalytic converter is also designed to reduce screen will cause the engine to overheat and may lead to harmful exhaust gases. serious damage. In countries that have a warm and dry climate there is a significant risk of fire.
-
Page 37: Cutting Equipment
GENERAL SAFETY PRECAUTIONS attachment rotates. (CAUTION! The nut has a left-hand A trimmer head is intended for trimming grass. thread.) Tighten the nut using the socket spanner. General rules Only use cutting attachments with the guards we recommend! See the chapter on Technical data. The nylon lining inside the locking nut must not be so worn that you can turn it by hand. - Page 38 GENERAL SAFETY PRECAUTIONS • Sharpen all edges equally to maintain the balance of the blade. WARNING! Always discard a blade that is bent, twisted, cracked, broken or damaged in any other way. Never attempt to straighten a twisted blade so that it can be reused.
-
Page 39: Assembly
ASSEMBLY Fitting the J-handle Assembling the cutting equipment • Clip the loop handle onto the shaft. Note that the loop handle must be fitted between the arrows on the shaft. WARNING! When fitting the cutting attachment it is extremely important that the raised section on the drive disc/support flange engages correctly in the centre hole of the cutting attachment. -
Page 40: Fitting A Blade Guard, Grass Blade And Grass Cutter
ASSEMBLY The guard extension is removed easily using the spark the spanner in the opposite direction to the direction plug spanner, see illustration. of rotation (Caution! left-hand thread). Fitting a blade guard, grass blade and grass cutter Fitting other guards and cutting attachments •... - Page 41 ASSEMBLY • Screw on the trimmer head/plastic blades (H) in the opposite direction to the direction of rotation. • To dismantle, follow the instructions in the reverse order. – English...
-
Page 42: Fuel Handling
Two-stroke oil long-term storage, if the machine is not under close supervision and when performing all service • For best results and performance use HUSQVARNA measures. two-stroke engine oil, which is specially formulated for our air-cooled two stroke-engines. WARNING! Take care when handling fuel. -
Page 43: Fueling
FUEL HANDLING Mixing Fueling • Always mix the gasoline and oil in a clean container intended for fuel. • Always start by filling half the amount of the gasoline to be used. Then add the entire amount of oil. Mix WARNING! Taking the following (shake) the fuel mixture. -
Page 44: Starting And Stopping
STARTING AND STOPPING Check before starting trimmer guard if they have been exposed to impact or are cracked. • Check the blade to ensure that no cracks have formed at the bottom of the teeth or by the centre hole. The most common reason why cracks are formed is that sharp corners have been formed at the bottom of the teeth while sharpening or that the blade has been... - Page 45 STARTING AND STOPPING Primer bulb: Press the air purge repeatedly until fuel Stopping begins to fill the bulb. The bulb need not be completely filled. Stop the engine by switching off the ignition. WARNING! When the engine is started with the choke in either the choke or start throttle positions the cutting CAUTION! The stop switch automatically returns to the attachment will start to rotate...
-
Page 46: Working Techniques
WORKING TECHNIQUES General working instructions Always hold the machine with both hands. Hold the machine on the right side of your body. IMPORTANT! This section describes the basic safety precautions for working with brush cutters and trimmers. If you encounter a situation where you are uncertain how to proceed you should ask an expert. - Page 47 WORKING TECHNIQUES Basic working techniques • Let the support cup rest lightly against the ground. It is used to protect the blade from hitting the ground. Always slow the engine to idle speed after each working • Reduce the risk of material wrapping around the blade operation.
- Page 48 WORKING TECHNIQUES Cutting • The trimmer is ideal for cutting grass that is difficult to reach using a normal lawn mower. Keep the cord parallel to the ground when cutting. Avoid pressing the trimmer head against the ground as this can ruin the lawn and damage the tool.
-
Page 49: Maintenance
Carburetor CAUTION! If the cutting attachment rotates when the engine is idling the idle adjustment screw T should be Your Husqvarna product has been designed and turned anti-clockwise until the cutting attachment stops. manufactured to specifications that reduce harmful Adjustment of the idle speed emissions. -
Page 50: Cooling System
However, before using the machine you should check that the bevel gear is filled three-quarters WARNING! Mufflers fitted with catalytic full with grease. Use HUSQVARNA special grease. converters get very hot during use and remain so for some time after stopping. -
Page 51: Spark Plug
If the machine is used in dusty conditions the air filter should be soaked in oil. See instructions under the Note: Use only HUSQVARNA replacement parts. Use of heading Oiling the air filter. other brands of replacement parts can cause damage to your unit or injury to the operator or others. -
Page 52: Maintenance Schedule
MAINTENANCE Maintenance schedule The following is a list of the maintenance that must be performed on the machine. Most of the items are described in the Maintenance section. The user must only carry out the maintenance and service work described in this manual. More extensive work must be carried out by an authorized service workshop. -
Page 53: Technical Data Technical Data
TECHNICAL DATA Technical data Technical data 535RJ Motor Cylinder displacement, cu.in/cm 2,11/34,6 Cylinder bore, inch/mm 1,50/38,0 Stroke, inch/mm 1,20/30,5 Idle speed, rpm 2900 Recommended max. speed, rpm 11500 Speed of output shaft, rpm 8220 Max. engine output, acc. to ISO 8893, kW/ rpm 1,6/8400 Catalytic converter muffler... - Page 54 TECHNICAL DATA Approved accessories Type Cutting attachment guard, Art. no. Centre hole in blades/cutters, Ø 25,4 Output shaft thread M12 Multi 255-3 (Ø 255 3 teeth) 537 33 16-03 Grass blade/grass cutter Grass 255-4 (Ø 255 4 teeth) 537 33 16-03 Multi 275-4 (Ø...
-
Page 55: Federal And California Emissions Control Warranty Statement
If the part fails prior to the first scheduled replacement, Husqvarna Forest & Garden. the part will be repaired or replaced by Husqvarna Forest & Garden at no cost. Any such part repaired or replaced OWNER′S WARRANTY... - Page 56 EPA may not be used. The use of any non-exempted add-on or modified parts will be grounds for disallowing a warranty claim. Husqvarna Forest & Garden will not be liable to warrant failures of warranted parts caused by the use of a non-exempted add-on or modified part.
- Page 58 8,5 m 10 cm 4" 4,2 m "Clic" 15 cm 6"...
- Page 59 4,25 m 4,25 m 15 cm 6" 15 cm 6"...
- Page 60 T35, T35x 8,5 m 10 cm 4" 4,3 m "Clic" 15 cm 6"...
- Page 61 T45, T45x 10 m 10 cm 4" 4,3 m 15 cm "Clic" 6"...
- Page 68 Instructions d’origine Original instructions 1154107-32 ´®z+V*i¶2+¨ ´®z+V*i¶2+¨ 2010-11-22...
Need help?
Do you have a question about the 535RJ and is the answer not in the manual?
Questions and answers