NUTRICHEF PKAIRFR46 - Oven Air-Fryer & Infrared Convection Cooker Manual
- Instructions manual (10 pages)
Advertisement
IMPORTANT SAFETY INFORMATION AND INSTRUCTIONS
In order to make the best use of this product and use it safely, please read the instruction manual carefully and keep it for future reference.
- This appliance is intended for domestic use only. It is designed to handle normal household usage and is not suitable for continuous or commercial use.
- Do not use the appliance other than for its intended use.
- Connect the appliance to an earthed socket which complies with electrical safety regulations.
- Place the appliance on a stable, flat surface and away from overhanging kitchen cupboards.
- Do not let the cord hang over the edge of a table, or touch hot surfaces. Position the cord so it does not touch the bowl.
- Do not place on or near a hot gas, electric hob or in a heated oven.
- Ensure to provide proper ventilation when using the appliance. Never use near any flammable items, such as curtains, towels, paper, plastic, etc.
- Do not use outdoors. Do not allow this appliance to be exposed to rain or moisture.
- Surfaces become very hot during operation and remain hot for some time after the appliance is switched off. Do not touch the lid or the sides of the appliance without protective oven gloves.
- Wear oven gloves and use the handle when lifting the lid from the bowl.
- Always lift the lid away from you so the escaping heat is channeled away from your face.
- Take care when lifting the lid for possible drips or splashes and disposing of hot liquids.
- All metal items in the oven, such as racks and cylindrical basket, will get very hot during cooking. Take extra care when removing these items from the appliance after cooking. Always use oven gloves or tongs.
- Do not use any accessories that are not recommended by the manufacturer. They could constitute a danger to user and damage to the appliance.
- Always check that the controls are in the OFF position when you finish using the appliance.
- Never attempt to repair the appliance yourself in the event of a technical fault. All repairs must be carried out by an authorized service agent.
![shock hazard]() To protect against risk of electrical shock, do not immerse cord, plug or lid in water or any other liquid.
To protect against risk of electrical shock, do not immerse cord, plug or lid in water or any other liquid.- Do not disassemble the appliance or attempt to modify the plug in any way.
- Do not move the oven during operation.
- Allow the appliance to completely cool before moving, cleaning or storing.
- Do not clean with abrasive scouring pads.
- Never use the cord to carry the appliance. Regularly check the cable and plug for any sign of damage.
- Due to high surface temperature reached during operation, keep children and pets away from the appliance.
- This appliance is not intended for use by persons (including children) with reduced physical, sensory or mental capabilities, or lack of experience and knowledge, unless they have been given supervision or instructions concerning use of the appliance by a person responsible for their safety.
- Keep the appliance out of reach of children.
- To remove the plug from the wall outlet, do not pull the electrical cord. Hold firmly on the plug to pull out.
- The length and type of power cord used for this appliance are designed for suitable power consumption and safety precautions to avoid pulling, tripping or entanglement.
- The use of an extension cord is not recommended.
- If the appliance is passed on to a new owner, please ensure the manual is kept with the appliance, so that the new owner benefits from the advice contained within it.
 To protect against risk of electrical shock, do not immerse cord, plug or lid in water or any other liquid.
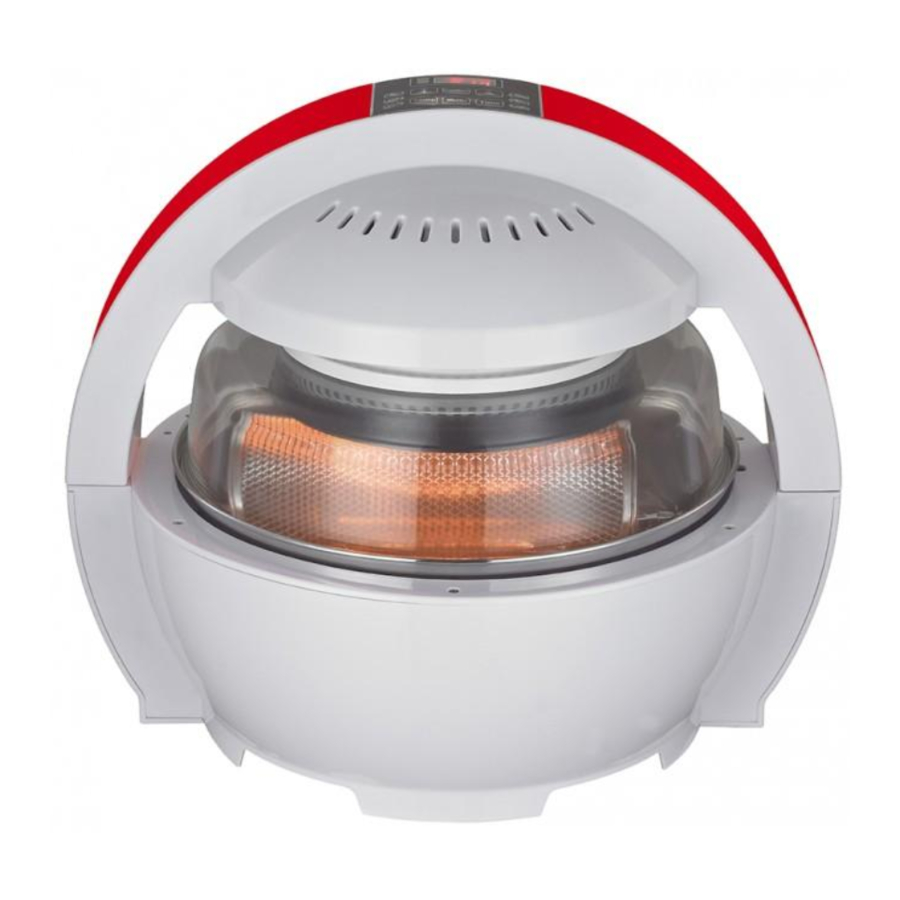
Device Layout and Controls

ACCESSORY LIST

FIRST USE STERILIZATION
- Remove the appliance and all accessories from the packaging materials.
- Check that all parts of your new appliance have been included before discarding any packaging materials.
- Peel off any adhesive label or sticker from your appliance, where necessary.
- We recommend you keep the box and packaging for storage and shipping purposes.
Please follow the below steps for first use sterilization before cooking with food:
- Select a stable, heat-resistant, non-flammable surface to safely operate the appliance.
- Wash the stainless steel bowl and accessories in warm soapy water. Dry thoroughly before use. Wipe the exterior of the appliance with a damp cloth. Never submerge the lid and the base of the appliance in water or any other liquid.
- Assemble the air fryer with the stainless steel bowl in place. Connect the power cord to a suitable wall outlet.
- Set the temperature to 100°C and the time to 10mins, then press CONFIRM to start.
- When completed, the appliance will automatically power OFF.
- Allow the appliance to cool before re-washing the stainless steel bowl in warm soapy water. Dry thoroughly before use.
Now your air fryer is ready to cook your first meal!
NOTE: A slight burning odor may be emitted during the first few uses. This is normal because the appliance is burning off the excess lubricants and will not cause any harm to you, your food or the appliance.
OPERATING INSTRUCTIONS
USING THE APPLIANCE
- Ensure to place the appliance onto a stable and heat resistant surface before operation.
- Assemble the air fryer with the stainless steel bowl in place.
- Select a suitable accessory according to your cooking requirements and place inside the bowl.
- Place food in the appliance and place the lid on the appliance. Ensure the lid is fitted correctly by matching the 2 arrow sides together.
NOTE: Ensure there is adequate space and the food does not touch the heating element. - Connect the power cord to a suitable wall outlet.
- To start the appliance, press the CONFIRM button once, the display screen will flash. Then press the MENU button, followed by any of the 6 pre-programmed buttons. The display screen will show the remaining time of the selected program. Press the CONFIRM button again to start the selected program. At the start of every program, a long beep will be heard if the lid is placed on top of the base properly. When the appliance starts to operate, the fan will run and the heating element will illuminate.
NOTE: To check the temperature display, press the TEMP button and the screen will display the temperature. To revert back to time display, press the TIME button. - When the program is completed, 10 beeps will be heard before the appliance automatically powers OFF. Remove the lid and serve the food on your plate.
SPECIAL OPERATION NOTES
- When set time elapses, the appliance will automatically stop, However, the fan may still run for a while until the heat reduces to a lower temperature. This is to prolong the life of the circuit board and other components within the appliance.
- If you are required to pause the cooking, simply lift off the lid. The appliance will pause. If you place the lid back on top of the base within 3 minutes, the appliance will continue to operate the same program without pressing the CONFIRM button. If you place the lid back after 3 minutes, you will need to re-program.
- You can set the time and temperature manually by pressing the CONFIRM button once, followed by the TEMP button, the display screen will show 60°C as default. Press the increase or decrease button to adjust the temperature as desired. Then to set the time, press the TIME button, the diplay screen will now show 00:30 as default. Likewise, press the increase or decrease button to adjust the time as desired.
NOTE- Both TEMP & TIME must be selected before you can press CONFIRM again to start the appliance.
- The temperature range is between 60 to 250°C and the maximum cooking time is 30mins.
- When in the TEMP mode, for every press of the increase or decrease button, the temperature will adjust by 10°C increments.
- When in the TIME mode, for every press of the increase or decrease button, the time will adjust by 1 minute increment.
- To press and hold down the increase or decrease button will allow a continuous increment of the temperature or time.
- At any time during the cooking process, you can cancel the program by pressing the CONFIRM button once. To select another program, press CONFIRM again, then press MENU, then followed by any of the 6 pre-programmed buttons, then press CONFIRM button again.
- If using the cylindrical basket, it will rotate whenever the appliance is in operation.
- The fiber carbon heating element will switch ON and OFF during operation for temperature regulation. This is quite normal.
- Do not add any oil or water inside the bowl during cooking.
CLEANING

- Always allow the appliance to cool completely before cleaning.
- Never immerse the top and base into liquid.
- Always unplug the power cord before cleaning.
- It is important that the appliance be washed thoroughly after each use.
- Do not use any abrasive materials for cleaning.
- Disconnect the power cord and allow the appliance to cool completely before cleaning.
- Wipe the lid and base clean using a damp cloth rinsed in warm soapy water.
- Wash the bowl and any other used accessory in warm soapy water.
- You can also clean the appliance with its automatical cleaning process. Add approx 5cm of cold tap water into the bowl with a squirt of dishwashing liquid. Set the temperature to 80°C and the time to 10mins, then press CONFIRM to start the cleaning process to soften any stuck on deposits. Accessories can be left in the bowl during this process to soften any deposit.
STORAGE
Ensure all parts are thoroughly cleaned and dried before storage.
We recommend to put the appliance back in the original box and store in a dry and clean area.
TROUBLESHOOTING
Please check the following guide for the possible causes and solutions for problems encountered before contacting the Service Centre.
| Problems | Possible causes | Solutions |
My appliance won't turn on |
|
|
Heating element switches on and off | Temperature is being regulated by the thermostat. | This is normal - it does this to regulate the temperature inside and therefore evenly cook your food. |
What can I cook in the unit | Whatever you cook in a conventional oven can be cooked in this air fryer. | Cooking time will be less than traditional wall mounted oven. |
QUICK REFERENCE COOKING GUIDE
For your convenience, this appliance is fitted with a range of default settings found on the digital control panel. The preset buttons have programmed cooking time and temperature.
All preset settings can be adjusted once started by selecting the TEMP or TIME button, followed by the increase and decrease buttons.
NOTE:
- Leave frozen food to thaw before cooking it.
- The times and temperatures listed in the table below are guidelines only and may need to be adjusted for various food sizes, quantity, food manufacturer instructions or individual taste.
| Food | Cooking time (min) | Temperature (°C) | Rack |
| Poultry | |||
| Chicken (whole) | 15 | 250 | Rotisseries |
| Chicken (part) | 10 | 200 | Dual rack (high) |
| Turkey | 30 | 250 | Dual rack (low) |
| Duck | 30 | 250 | Dual rack (low) |
| Meat | |||
| Beef roast | 25 | 250 | Dual rack (low) |
| Medium | 20 | 250 | Dual rack (low) |
| Well | 25 | 250 | Dual rack (low) |
| Steak (medium rare) | 10 | 250 | Dual rack (high) |
| Vegetables | |||
| Pepper halved | 15 | 200 | Dual rack (low) |
| Onions (whole, small) | 15 | 200 | Dual rack (low) |
| Potato (roasted, cut in 2) | 15 | 200 | Dual rack (low) |
| Potato (baked, medium size) | 10 | 200 | Dual rack (low) |
| Whole jacket potato / sweet potato | 45-70 (adjusted for food sizes ) | 250 | Dual rack (high) |
| Various | |||
| Fish | 15 | 200 | Dual rack (low) |
| Sausage | 10 | 120 | Dual rack (low) |
| Bread | 5 | 150 | Dual rack (high) |
| Chips | 18 | 250 | Dual rack (high) |
| Pizza | 14 | 220 | Dual rack (high) |
| Vegetables | 15 | 200 | Dual rack (high) |
| Dessert/pastries | 15 | 180 | Dual rack (low) |
| Cake | 10 | 230 | Dual rack (high) |

Documents / ResourcesDownload manual
Here you can download full pdf version of manual, it may contain additional safety instructions, warranty information, FCC rules, etc.
Download NUTRICHEF PKAIRFR46 - Oven Air-Fryer & Infrared Convection Cooker Manual
Advertisement


Need help?
Do you have a question about the PKAIRFR46 and is the answer not in the manual?
Questions and answers