Table of Contents
Advertisement
Quick Links
USER'S MANUAL
LCD PROJECTOR
LPF-7200/LPF-7200E
Important Information .......................................... En-3
Important Safeguards ......................................... En-3
Features .............................................................. En-6
Checking the Accessories ................................... En-7
Points to Note ...................................................... En-8
Names of Parts ................................................. En-11
Setting Up ......................................................... En-15
(To a Video/Laser Disk/DVD) .......................... En-19
Mouse Functions ............................................... En-20
CONTENTS
Connecting the Power Source ........................... En-20
Basic Operation ................................................. En-21
Operating the Menu Screens ............................ En-25
Adjusting the IMAGE ......................................... En-27
Adjusting the POSITION ................................... En-29
Adjusting the SOUND ....................................... En-30
Setting the DISPLAY ......................................... En-30
Setting the INSTALLATION ............................... En-32
Maintenance and Care ...................................... En-33
Changing the Lamp ........................................... En-34
Troubleshooting ................................................. En-36
Specifications .................................................... En-37
En-1
Advertisement
Table of Contents

Related Manuals for Fujitsu LPF-7200E


Summary of Contents for Fujitsu LPF-7200E
-
Page 1: Table Of Contents
USER’S MANUAL LCD PROJECTOR LPF-7200/LPF-7200E CONTENTS Important Information .......... En-3 Connecting the Power Source ......En-20 Important Safeguards ......... En-3 Basic Operation ..........En-21 Features .............. En-6 Operating the Menu Screens ......En-25 Checking the Accessories ........En-7 Adjusting the IMAGE ......... En-27 Points to Note ............ - Page 2 Signature : H.Hirosaki, Managing Director Fujitsu General (Euro) GmbH Declaration Reference : Fujitsu General (Euro) GmbH Werftstraße 20, D-40549 Düsseldorf, F. R. Germany Tel: 0211-50098-0 Fax: 0221-50098-50 This equipment has been tested and found to comply with the limits for a Class A digital device, pursuant to Part 15 of the FCC Rules.
-
Page 3: Important Information
Dear Customer: We have prepared this USER’S MANUAL to assist you in the operation of your new LCD Projector. We thank you for your purchase and hope you will be satisfied with the quality and performance of this projector. Please read the instructions carefully, and keep them available for future reference. Important Information WARNING: THIS UNIT HAS AN EXTREMELY BRIGHT LIGHT SOURCE. - Page 4 Important Safeguards (continued) –– Do not insert metallic objects, flammable objects or water in the ventilation holes. If a foreign object enters the unit, always pull out the electrical plug from the wall outlet and contact your sales office. This condition may cause fire or electrical shock.
- Page 5 –– Be careful not to expose the projector to any steam, oily smoke, heat or humidity. Never place the projector in a location subject to steam, oily smoke heat or humidity. This may cause fire or electrical shock. –– Never place flammable objects such as a cigarette lighter, matches, gas canisters, spray cans, fireworks or plastic materials close to the lamp ventilation holes.
-
Page 6: Features
Features The LPF-7200/7200E projector enlarges PC or video images and projects them onto a 30 – 300-inch screen (available on the market). High luminance and high resolution • High luminance enables use of the projector even in a bright room. •... -
Page 7: Checking The Accessories
Checking the Accessories Wireless remote control unit x 1 Power cable x 1 PS/2 mouse connection cable x 1 POWER MUTE LASER VIDEO MOUSE MENU ENTER/R-MOUSE ZOOM-PAN SOURCE VOLUME CANCEL Size AA batteries x 2 RGB cable x 1 Lens cap (to protect the lens) x 1 Instruction manual x 1 AV cable x 1 Air filter x 1... -
Page 8: Points To Note
Points to Note Transporting the projector Put the projector in the box in which it was purchased when transporting it. Excessive pressure on the lens may result in damage. About the lamp • The lamp is an expendable item. It should be changed when (Warning message) the “Approaching Recommended Lamp Life!”... - Page 9 Monitor Display • Normal or abnormal operation of the internal parts is indicated by the 3 (Monitor Display) monitors on the front of the projector. (See illustration on right) • When the power cable is plugged into the socket, the POWER-ON monitor lights red and the projector is in standby status.
- Page 10 Points to Note (continued) Illumination around projector The projector has two wireless remote control unit light receivers, on the front and rear. If the receivers are subjected to strong light such as from fluorescent lights, the remote control unit may not function properly. In this case, move the projector away from the fluorescent light or other light source, or position it so that light from the light source does not shine directly on the receivers.
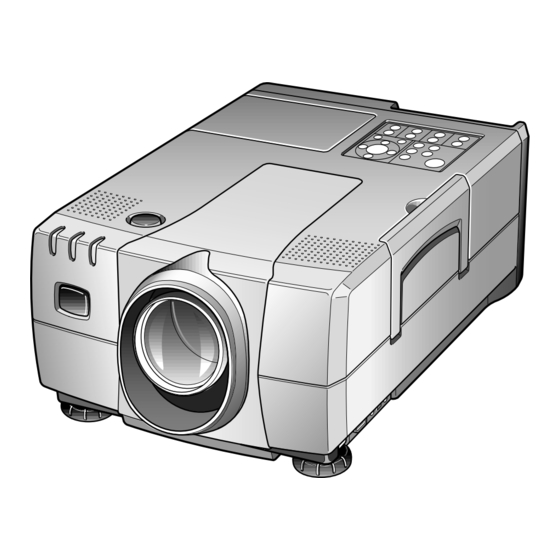
- Page 11 Names of Parts The figures in brackets refer to the relevant page number. Front Temperature monitor Lamp monitor (LAMP) [8, 9] (TEMP) [8, 9] Power monitor (STAND-BY/ POWER-ON) [8, 9, 21] STAND-BY TEMP LAMP POWER-ON Wireless remote control Projection lens [15] unit light receiver [10, 13] Adjustment lever [15] Adjuster [15]...
-
Page 12: Names Of Parts
Names of Parts (continued) The figures in brackets refer to the relevant page number. Operation Panel (Top) DOWN MUTE button VIDEO button PUSH [23] [22] Lens shift STATUS button knob [16] [24] POWER Adjustment buttons MUTE POWER button ( , , , ) [25 –... -
Page 13: Handling The Wireless Remote Control Unit
Handling the Wireless Remote Control Unit Loading the Batteries (2 size AA batteries) Open the battery cover on the back Insert two size AA batteries, Close the battery cover in the of wireless remote control unit in the making sure that the positive and direction shown. - Page 14 Handling the Wireless Remote Control Unit (continued) Wired Connection When the wireless remote control unit is used at a distance from the projector or there is an obstacle between them, the infrared signal from the remote control unit may not reach the projector. In this case, connect the wireless remote control unit to the projector using the wired cable (optional).
-
Page 15: Setting Up
Setting Up • There are 2 ways of setting the projector up: for regular projection and rear projection. • By adjusting the zoom lens, you can choose the screen size as shown below. Offset (O) Projection distance (L) Screen Size Projection Offset O (cm) distance L (m) - Page 16 Setting Up (continued) Lens Shift Function By shifting the lens, the position of the image on the screen can be moved up and down. Press the lens shift knob to extract Turn the lens shift knob to adjust the After adjustment, press the lens shift the knob so that it protrudes from the position of the image.
-
Page 17: External Connection (To A Pc
External Connection (To a PC) • This projector can be connected to a PC, TV, video deck, laser disk player, video camera, etc. • Before making any connections or disconnections, make sure that the projector and the equipment to which it is connected are turned off. - Page 18 External Connection (To a PC) (continued) Macintosh DIGITAL RGB DIGITAL RGB PUT 1 AUDIO AUDIO PUT 2 PUT 1 AUDIO Cr Pr Cb Pb PUT 3 AUDIO AUDIO AUDIO INPUT 4 AUDIO S-VIDEO VIDEO PUT 2 Cr Pr Cb Pb PUT 3 [Projector Rear] AUDIO...
-
Page 19: (To A Video/Laser Disk/Dvd
External Connection (To a Video/Laser Disk/DVD) DIGITAL RGB DIGITAL RGB PUT 1 AUDIO AUDIO PUT 2 PUT 1 AUDIO Cr Pr Cb Pb PUT 3 AUDIO AUDIO AUDIO INPUT 4 AUDIO S-VIDEO VIDEO PUT 2 Cr Pr Cb Pb PUT 3 [Projector Rear] AUDIO AUDIO... -
Page 20: Mouse Functions
Mouse Functions By connecting the PC mouse terminal and projector mouse terminal, the projector remote control unit can be used instead of the PC mouse. Connecting the Mouse [Projector right side] Connecting to AT interchangeable equipment MOUSE WIRED PS-232C REMOTE PS/2 Connect a PS/2 mouse or USB mouse. -
Page 21: Basic Operation
Basic Operation POWER MUTE LASER POWER button VIDEO POWER MOUSE MUTE POWER button VIDEO AUTO STATUS MENU ENTER MENU ENTER/R-MOUSE ZOOM FOCUS KEY STONE VOLUME ZOOM-PAN SOURCE VOLUME CANCEL AUTO STATUS ZOOM FOCUS KEYSTONE Turning the Projector On and Off Turning On Turning Off •... - Page 22 Basic Operation (continued) POWER MUTE LASER VIDEO RGB button VIDEO button POWER MOUSE MUTE VIDEO RGB button VIDEO button AUTO STATUS MENU ENTER MENU ENTER/R-MOUSE ZOOM FOCUS KEY STONE VOLUME ZOOM-PAN SOURCE VOLUME CANCEL ZOOM buttons AUTO STATUS ZOOM FOCUS KEYSTONE FOCUS buttons ZOOM buttons...
- Page 23 POWER MUTE MUTE button LASER MUTE button VIDEO POWER MOUSE MUTE Mouse pointer VIDEO buttons AUTO STATUS MENU ENTER MENU ENTER/R-MOUSE ZOOM FOCUS KEY STONE VOLUME ZOOM-PAN SOURCE VOLUME ZOOM-PAN buttons VOLUME buttons CANCEL VOLUME buttons CANCEL button AUTO STATUS ZOOM FOCUS KEYSTONE...
- Page 24 Basic Operation (continued) POWER MUTE LASER VIDEO POWER MOUSE MUTE VIDEO SOURCE button AUTO STATUS MENU ENTER AUTO button MENU ENTER/R-MOUSE STATUS button ZOOM FOCUS KEY STONE VOLUME ZOOM-PAN SOURCE VOLUME CANCEL AUTO STATUS AUTO button STATUS button ZOOM FOCUS KEYSTONE KEYSTONE buttons KEYSTONE buttons...
-
Page 25: Operating The Menu Screens
Operating the Menu Screens POWER MUTE LASER VIDEO POWER MOUSE MUTE Slide switch Adjustment buttons Adjustment buttons VIDEO AUTO STATUS MENU ENTER MENU ENTER/R-MOUSE MENU button ENTER button MENU button ENTER button ZOOM FOCUS KEY STONE VOLUME ZOOM-PAN SOURCE VOLUME CANCEL AUTO STATUS... - Page 26 Operating the Menu Screens (continued) 5-3 When selecting the SOUND Making the Desired Adjust/Set menu in Step 3 and adjusting the Volume/Treble/Bass 5-1 When selecting the item you SOUND Volume wish to adjust ([OK/Cancel], Treble Bass [Normal/Low], etc.) Factory Default •...
-
Page 27: Adjusting The Image
Adjusting the IMAGE You can adjust, select and set up the following items on the IMAGE Menu. IMAGE IMAGE IMAGE Luminance Mode Normal Luminance Mode Normal Before Page Brightness Color Temp. Brightness Contrast Gain : Red Contrast Factory Default Gain : Green Sharpness Next Page Gain : Blue... - Page 28 Adjusting the Image (continued) Color Temp. You can adjust the color temperature. Press the adjustment button for a reddish tinge, and the button for a Color Temp. : Adjust MENU : Return blueish tinge. Gain: Red You can adjust the strength of the red color. Press the adjustment button to make it stronger, and the button to make...
-
Page 29: Adjusting The Position
Adjusting the POSITION You can adjust, select and set up the following items from the POSITION Menu. POSITION POSITION Horiz. Position Horiz. Position Vert. Position Vert. Position Pixel Tracking Pixel Phase : Select ENTER : Next : Select ENTER : Next (RGB POSITION Menu) (VIDEO POSITION Menu) Important... -
Page 30: Adjusting The Sound
Adjusting the SOUND You can adjust and set up the following items from the SOUND Menu. SOUND Volume Treble Bass Factory Default : Adjust : Select Volume You can adjust the volume. Press the adjustment button to increase the volume, and the button to decrease the volume. - Page 31 Setting the DISPLAY INPUT 1 Mode (RGB only) You can select the DIGITAL RGB terminal or RGB (analog) terminal for the INPUT 1 input terminal. Select by pressing the adjustment buttons. The factory default setting is [Analog]. Component Input (VIDEO only) Language You can select HD (High Definition: 720P, 1080I) or SD (Standard: 480P, En g lish...
-
Page 32: Setting The Installation
Setting the INSTALLATION You can adjust and select the following items from the INSTALLATION Menu. INSTALLATION Auto Power Up Auto Manual Auto Lamp Off Remote Control Rear & Front Reverse Mode Normal : Select ENTER : Next Auto Power Up You can set whether or not the lamp comes on automatically when the power plug is inserted in the socket. -
Page 33: Maintenance And Care
Maintenance and Care About the Air Filter • If the air filter becomes blocked, the temperature inside the projector rises and the lamp fails to light, etc. Clean the air filter about once every 6 months. Cleaning will be required more frequently if used in a particularly dusty environment. •... -
Page 34: Changing The Lamp
Maintenance and Care (continued) Care of the cabinet Wipe lightly with a soft, dry cloth. If the cabinet is very dirty, wipe with a cloth that has been soaked in neutral detergent diluted with water and wrung out well. Finish with a dry cloth. Care of the lens Clean the lens with a commercially available blower or cleaning paper. - Page 35 Changing the Lamp Loosen the two screws ( mark) Replace the lamp unit and lamp and lift out the lamp unit. cover following the disassembly procedures in reverse order. Change the lamp unit. Insert the power connector into the power terminal. Do not touch the glass inside the unit.
-
Page 36: Troubleshooting
Troubleshooting Symptom Cause Reference Page No image or sound Power cable not plugged in properly. Wires not connected correctly. 17 – 19 Incorrect setting of input selector. Brightness adjustment is set on minus (–). Incorrect arrangement of pins on cable used. No sound without image input. - Page 37 Specifications Name LCD projector Model LPF-7200, LPF-7200E Type 3-plate LCD type LCD size 1.3 inch LCD drive system P-Si TFT active matrix No. of pixels 2,359,296 (1024 x 768 pixels x 3) Lens Electric powered zoom lens F=1.8 – 2.15 f=48.4 –...
-
Page 38: Specifications
Specifications (continued) RGB Input Terminal HD-15 (mini D-sub) Pin No. Signal Pin No. Signal Pin No. Signal Green earth Horizontal synchro- Green Blue earth nized signal / component (TTL) Blue Earth Vertical synchronized signal (TTL) Red earth DVI-D Pin No. Signal Pin No. - Page 39 Table of RGB Compatible Frequencies Resolution Frequency Picture mode Horizontal (dot) Vertical (line) Horizontal (kHz) Vertical (Hz) PCAT VGAEGA 31.5 70.0 PCAT 31.5 70.0 PCAT 31.5 59.9 PCAT 37.5 75.0 PCAT 37.9 72.8 PCAT 42.3 85.0 PCAT SVGA 35.2 56.3 PCAT SVGA 37.9...
- Page 40 En-40...
Need help?
Do you have a question about the LPF-7200E and is the answer not in the manual?
Questions and answers