Table of Contents
Advertisement
Quick Links
PACKAGE CONTENTS
HARDWARE CONTENTS Note: Hardware not shown actual size.
AA
Mounting Screw
X2
BB
Cross Bar
X1
Questions, problems, missing parts?
Before returning to your retailer, call our customer service at 1-800-887-6326
Monday – Friday 9:00 a.m. – 5:00 p.m. CST
D
A
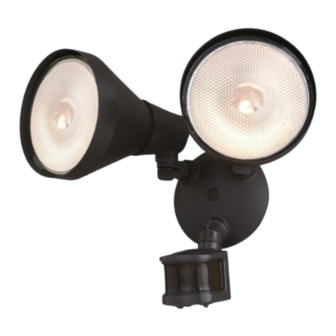
OUTDOOR SENSOR LIGHT
C
CC
Decorative cover
X1
DD
Fixture Mounting Screw
X1
Sku Number: 356-9235
Model Number: ow9235w
ow9236bz
B
EE
Wire Connector
X3
FF
Gasket
X1
356-9236
Page 1 of 6
Advertisement
Table of Contents

Related Manuals for Patriot Lighting ow9235w


Summary of Contents for Patriot Lighting ow9235w
- Page 1 Sku Number: 356-9235 356-9236 OUTDOOR SENSOR LIGHT Model Number: ow9235w ow9236bz Questions, problems, missing parts? Before returning to your retailer, call our customer service at 1-800-887-6326 Monday – Friday 9:00 a.m. – 5:00 p.m. CST PACKAGE CONTENTS HARDWARE CONTENTS Note: Hardware not shown actual size.
- Page 2 SAFETY INFORMATION Please read and understand this entire manual before attempting to assemble, operate or install the product. WARNING • Turn off electricity at main fuse box (or circuit breaker box) before beginning installation by removing fuse (or switching off circuit breaker). •...
- Page 3 ASSEMBLY INSTRUCTIONS (continued) Before installing the light fixture under an eave, the sensor head must be rotated as shown in the next two steps for proper operation and to avoid the risk of electrical shock. For eave mounted only: Rotate the sensor head (C) clockwise 180˚ so the controls face Rotate the sensor head (C) towards the back plate (A).
- Page 4 ASSEMBLY INSTRUCTIONS (continued) ASSEMBLY INSTRUCTIONS (continued) ASSEMBLY INSTRUCTIONS (continued) Adjusting the Sensor Head (C): 1. Aim sensor head (C) toward desired detection area, maintaining a 5° - 40° downward angle to allow moisture to drain. Note: Make sure sensor head (C) is positioned with controls facing toward the ground.
- Page 5 ASSEMBLY INSTRUCTIONS (continued) FUNCTION AND OPERATION (continued) ASSEMBLY INSTRUCTIONS (continued) 2. AUTO MODE (nighttime operation only) ● To shift to the “AUTO” mode, rotate “TIME” knob arrow to the desired time setting (between 5 seconds and 3 minutes). At dusk, the light turns on when motion is detected, and stays on as long as motion continues. When the motion is no longer detected, the light remains on for the predetermined time you set (5s ~ 3min), and then turns off automatically.
- Page 6 If unable to fix any of the above issues, please consult a certified electrician. FIVE-YEAR LIMITED WARRANTY: If, during normal use, this PATRIOT LIGHTING lighting fixture breaks or fails due to a defect in material workmanship within five (5) years from the date of original purchase, simply bring this lighting fixture with the original sales receipt back to your nearest MENARDS retail store.
Need help?
Do you have a question about the ow9235w and is the answer not in the manual?
Questions and answers