
Related Manuals for Leica DISTO X3


Summary of Contents for Leica DISTO X3
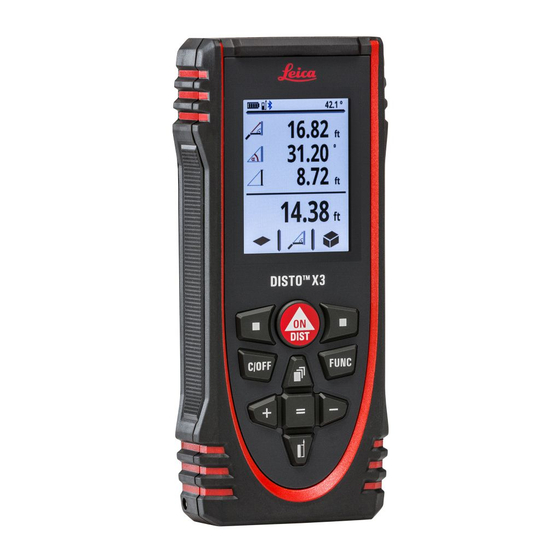
- Page 1 DISTO X3 Connecting to an iPad via Bluetooth for the Mobile Selling App Step 1. Turn on DISTO X3 by pressing the red button in the center of the DISTO X3.
- Page 2 DISTO X3 Connecting to an iPad via Bluetooth for the Mobile Selling App Step 2. Press the Function key and that will take you to the first menu screen.
- Page 3 DISTO X3 Connecting to an iPad via Bluetooth for the Mobile Selling App Step 3. Press the Settings key and that will take you to the second menu screen.
- Page 4 DISTO X3 Connecting to an iPad via Bluetooth for the Mobile Selling App Step 4. Press the Equal key and that will turn on the Bluetooth Navigation.
- Page 5 DISTO X3 Connecting to an iPad via Bluetooth for the Mobile Selling App Step 5. From your home page of your iPad tap on the Settings icon.
- Page 6 DISTO X3 Connecting to an iPad via Bluetooth for the Mobile Selling App Step 6. From your Settings page of your iPad slide on the Bluetooth option.
- Page 7 DISTO X3 Connecting to an iPad via Bluetooth for the Mobile Selling App Step 7. Your DISTO X3 should appear, highlight your DISTO X3 with a tap under Devices.
- Page 8 DISTO X3 Connecting to an iPad via Bluetooth for the Mobile Selling App Step 8. When the Bluetooth Pairing Request appears tap on Pair.
- Page 9 DISTO X3 Connecting to an iPad via Bluetooth for the Mobile Selling App Step 9. The Bluetooth send arrow will appear on your DISTO X3.
- Page 11 DISTO X3 Firmware update for the Mobile Selling App Step 1. Turn on DISTO X3 by pressing the red button in the center of the DISTO X3. The DISTO X3 will connect to your iPad via Bluetooth indicated by the Bluetooth arrow in the right hand side of the screen.
- Page 12 DISTO X3 Firmware update for the Mobile Selling App Step 2. Download the DISTO X3 Plan App from www.DISTO X3.com Tap on the DISTO X3 Plan icon opening up the DISTO X3 App.
- Page 13 DISTO X3 Firmware update for the Mobile Selling App Step 3. The opening page/ menu will appear. Tap on the Menu bars in the upper left hand corner.
- Page 14 DISTO X3 Firmware update for the Mobile Selling App Step 4. Tap on My Devices button.
- Page 15 DISTO X3 Firmware update for the Mobile Selling App The Show and Hide Keyboard is the main reason we are updating the DISTO X3. This update will give you a button press to hide and show your keyboard.
- Page 16 DISTO X3 Firmware update for the Mobile Selling App This page asks you to extend your warranty by signing on to www.DISTO X3.com, this is a good idea.
- Page 17 DISTO X3 Firmware update for the Mobile Selling App Step 5. If an update is available for your DISTO X3 this page will appear. Tap on Update.
- Page 18 DISTO X3 Firmware update for the Mobile Selling App Step 6. Installing the update, the update will take approximately 3 minutes. Do not turn off the DISTO X3 Update interrupting the update. The progress bar will estimate time remaining.
- Page 19 DISTO X3 Firmware update for the Mobile Selling App Step 6. Installing the update, the update will take approximately 3 minutes. Do not turn off the DISTO X3 interrupting the update. The progress bar will estimate time remaining.
- Page 20 DISTO X3 Firmware update for the Mobile Selling App Step 7. The Update success screen will appear once the update is complete. Tap on Finish.
- Page 22 DISTO X3 Unit of Measure Settings for the Mobile Selling App Step 1. Turn on DISTO X3 by pressing the red button in the center of the DISTO X3.
- Page 23 DISTO X3 Unit of Measure Settings for the Mobile Selling App Step 2. Press the Function key and that will take you to the first menu screen.
- Page 24 DISTO X3 Unit of Measure Settings for the Mobile Selling App Step 3. Press the Settings key and that will take you to the second menu screen.
- Page 25 DISTO X3 Unit of Measure Settings for the Mobile Selling App Step 4. Press the up key to highlight the Unit of Measure Icon.
- Page 26 DISTO X3 Unit of Measure Settings for the Mobile Selling App Step 5. Press the Equal key and that will take you to the Unit of Measure options screen. Tap Up, Down or Right, Left to highlight the 0.00 radio button.
- Page 27 DISTO X3 Unit of Measure Settings for the Mobile Selling App Step 6. Press the Check key and then C/OFF three times that will take you to the Start screen. The new setting will be saved.
- Page 29 DISTO X3 Settings for the Mobile Selling Step 1. Turn on DISTO X3 by pressing the red button in the center of the DISTO X3.
- Page 30 DISTO X3 Settings for the Mobile Selling Step 2. Press the Function key and that will take you to the first menu screen.
- Page 31 DISTO X3 Settings for the Mobile Selling Step 3. Press the Settings key and that will take you to the second menu screen.
- Page 32 DISTO X3 Settings for the Mobile Selling Step 4. Press the Minus key and that will take you to the Bluetooth settings icon.
- Page 33 DISTO X3 Settings for the Mobile Selling Step 5. Press the Equal key and that will take you to the Bluetooth Navigation screen. Tab up or down to highlight the ON radio button.
- Page 34 DISTO X3 Settings for the Mobile Selling Step 6. Press the Check key and that will take you to the Decimal Point screen. Tab up or down to highlight the 0.00 radio button.
- Page 35 DISTO X3 Settings for the Mobile Selling Step 7. Press the Check key and that will take you to the Unit screen. Tab up or down to highlight the OFF radio button.
- Page 36 DISTO X3 Settings for the Mobile Selling Step 8. Press the Check key and that will take you to the Termination screen. Tab up or down to highlight the TAB radio button.
- Page 37 DISTO X3 Settings for the Mobile Selling Step 9. Press the Check key and that will take you to the Autosend screen. Tab up or down to highlight the OFF radio button.
- Page 38 DISTO X3 Settings for the Mobile Selling Step 10. Press the Check key and then C/OFF three times that will take you to the Start screen. The new setting will be saved.
Need help?
Do you have a question about the DISTO X3 and is the answer not in the manual?
Questions and answers