Leica DISTO S910 Instruction Manual
Hide thumbs
Also See for DISTO S910:
- Manual (50 pages) ,
- Quick start (2 pages) ,
- Frequently asked questions manual (9 pages)

Related Manuals for Leica DISTO S910


Summary of Contents for Leica DISTO S910
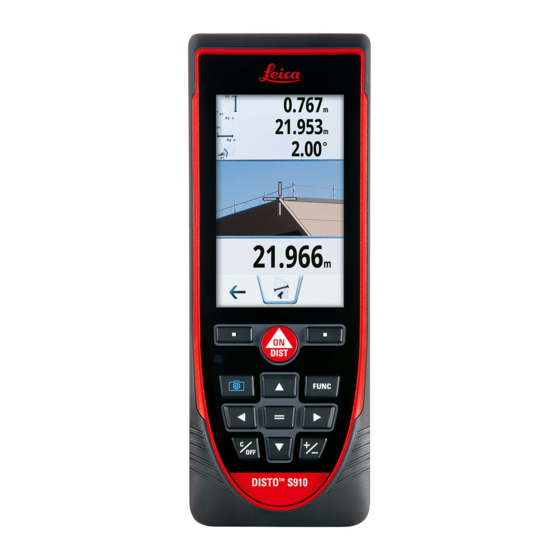
- Page 1 Leica DISTO S910 Leica DISTO S910 The original laser distance meter The original laser distance meter...
-
Page 2: Table Of Contents
- - - - - - - - - - - - - - - - - - - - - - - - - - - - - - - - - - - - - - - 23 Timer - - - - - - - - - - - - - - - - - - - - - - - - - - - - 24 Pointdata transmission Leica DISTO S910 808167... -
Page 3: Instrument Set-Up
Important paragraphs which must be adhered to in practice as they enable the product to be used in a technically correct and efficient manner. Pointfinder Selection keys (Viewscreen) linked to symbols above Navigation Function screen Enter / Equal Add / Subtract Clear / Off Leica DISTO S910 808167... -
Page 4: Basic Measuring Screen
Instrument Set-up Basic measuring screen Selection screen Status bar FUNC Function / Settings Main line Active function Tap here to start ON/DIST in a dis- tance function Settings Help function Favorites Leica DISTO S910 808167... -
Page 5: Pointfinder (Viewscreen)
Active function DISTO™ WLAN hotspot activated Other device connected to DISTO™ WLAN hotspot WLAN client mode activated Favorites DISTO™ connected as client to WLAN Zoom Measuring reference Spread 2 fingers apart to zoom on the touch screen Leica DISTO S910 808167... -
Page 6: Charging The Li-Ion Battery Via Usb
Connecting the charger improperly may cause serious damage to the device. Any damage caused by misuse is not covered by the warranty. Use only Leica-approved chargers, batteries, and cables. Unapproved chargers or cables can cause the battery to explode or damage the device. -
Page 7: Using The Smart Base
Using the Smart Base Extension The Smart Base Extension allows for stable targeting without unintentionally tilt- ing the device.. Do not move or tilt the Smartbase during measuring. We recommend the use of a tripod with the Leica FTA360-S adapter. Leica DISTO S910 808167... -
Page 8: Operations
Drag on the display to move to previous or to next screen in the galerie function. Pinching Instead of using the touch screen, the nor- mal keypad but- tons can be used also. Spread 2 fingers apart to zoom pointfinder is activated Leica DISTO S910 808167... -
Page 9: Switching On/Off
The next meas- The next meas- 7.332 m urement is added urement is sub- 20.179 m 7.332 m to the previous tracted from the 12.847 m one. previous one. Leica DISTO S910 808167... -
Page 10: Pointfinder (Viewscreen)
In this case the error is automatically corrected with a shift of the crosshair. * OV = Overview Screenshot 2 sec 0.00 Screenshot photo is saved in gallery. Leica DISTO S910 808167... -
Page 11: Memory
Delete memory. Use Up/Down Use Left/Right navigation keys to navigation keys to 8.449 m 8.449 m show more detailed switch between Take over value for results of the speci- measurements. further actions. fic measurement. Leica DISTO S910 808167... -
Page 12: Settings
Compass adjustment Touch screen Date and Time Distance units Offset Reset Information/Software Update Beep Tilt units Switch between the following units: Exit settings. Confirm setting. 360.0° 0.00 % ± 180.0° 0.0 mm/m ± 90.0° 0.00 in/ft Leica DISTO S910 808167... -
Page 13: Move Alert Of Levelling
FINE means, that the levelling of the device is sensitive to any small vibrations. Choose ROUGH when working in harsh construction environment with many shocks and vibrations. In this case the accuracy is decreased in correlation with the movements. Exit settings. Confirm setting. Leica DISTO S910 808167... -
Page 14: Distance Units
0 ' 00 " 1/8 Switch between 0.00 ft 0 in 1/4 the following 0.00 in 0 ' 00 " 1/4 units: 0 in 1/32 0.000 yd 0 ' 00 " 1/32 Confirm setting. Exit settings. Leica DISTO S910 808167... -
Page 15: Beep On/Off
To switch ON, Exit settings. repeat procedure. De-/Activate keylock Switch on with keylock To deactivate, repeat procedure. The keylock is active if device is switched off. within Exit settings. 2 sec Leica DISTO S910 808167... -
Page 16: Bluetooth ® /Wlan
App Mode: Use this mode to transfer the data using an App. Special properties: ENCRYPTED is the default setting. In case of trou- ble with data transfer, select mode UNENCRYPTED. Leica DISTO S910 808167... - Page 17 A wide range of commercial software can be found on our ® homepage. Apps for Android or Mac iOS can be found in special internet shops. For more details, see our homepage. Leica DISTO S910 808167...
-
Page 18: Calibration Of Tilt Sensor (Tilt Calibration)
Place device on absolutely flat surface. and place it again on absolutely flat surface. After 2 sec the device 180° goes back to the basic mode. 180° Turn the device horizontally by 180° and place it again on absolutely flat surface. Leica DISTO S910 808167... -
Page 19: Personalized Favorites
Illumination To save power re- duce bright- ness if not necessary. Exit settings. Confirm setting. Select brightness. Touch Screen ON/OFF To deactivate, repeat procedure. Exit settings. Leica DISTO S910 808167... -
Page 20: Date And Time
For best results, select the nearest geographic reference point using the steps below. Back Confirm Select the nearest loca- CH-Zürich tion and the device ad- Exit settings. justs the declination accordingly. Leica DISTO S910 808167... -
Page 21: Offset
Second confirmation with selection Reset returns the instrument to keys: the factory settings. All custom- ized settings and memories are Refuse: Confirm: lost. A HARDWARE-RESET is Exit settings. done by pressing 15 sec on ON/DIST key. Leica DISTO S910 808167... -
Page 22: Information/Software Update
Settings Information/Software Update Connect the To update the device with software fol- USB to your low the instruc- computer. tions on the device. Make sure that you use always the newest soft- ware version. Leica DISTO S910 808167... -
Page 23: Functions
Point to point function / distance Stake out Level Calculator Area Gallery Smart Area measuring function Width Diameter Photo DXF Folder Height-profile Measurement Data capture in DXF-file Trapezium Adjusting measuring reference Pythagoras (3-point) Area from Photo Triangle Area Leica DISTO S910 808167... -
Page 24: Timer
Functions Timer The self release starts if ON/Measure key is pressed. 30 sec Confirm setting. 10 sec Select release 5 sec time. 2 sec Leica DISTO S910 808167... -
Page 25: Pointdata Transmission
This function sends the x, y z coordinates of the measured point. If WLAN is switched off, the device Aim at additional requests to switch on WLAN. points. Data transfer works only with WLAN. Leave actual function, go to default operation mode. Leica DISTO S910 808167... -
Page 26: Smart Angle Measuring Function
Functions Smart Angle measuring function Aim laser at point Aim laser at cor- ner. on first wall. 1.246 5.269 89.56° Aim laser at point on second wall. Leica DISTO S910 808167... -
Page 27: Compass
Rotate the device slowly in a figure 8 motion until OK icon appears on the display. Leica DISTO S910 808167... -
Page 28: Measuring Single Distance
Measuring errors can occur when measuring to colourless liquids, glass, styrofoam or semi-permea- ble surfaces or when aiming at high gloss surfaces. Against dark 8.532 m surfaces the measuring time in- Aim active laser at target. creases. Leica DISTO S910 808167... -
Page 29: Point To Point Function / Distance
Do not move indicates proper levelling nation range of ling is finished when device after +/-5°. OK icon appears levelling. indicates insufficient level- on the display. ling 90° indicates that smart base was moved after levelling Leica DISTO S910 808167... -
Page 30: Level
Partial Measurements / Painter function: 3.9I0 m Second distance Press + or - before starting the first measure- ment. Measure and add or subtract distanc- 20.276 m Circumference es. Finish with =. Measure 2nd length. 24.3 52 m Area Leica DISTO S910 808167... -
Page 31: Smart Area Measuring
Functions Smart Area measuring 5.873 Aim at first point. Point to Point distance between the last two measured points 2.075 84.6 75 Aim at additional points (max. 20) Leica DISTO S910 808167... -
Page 32: Photo
Functions Photo Take photo. Exit. Tap on the camera icon in the mid- dle of the bottom line to take a pho- For screenshots, press camera key for 2 sec. * OV = Overview Leica DISTO S910 808167... -
Page 33: Data Capture In Dxf File
If pointfinder is switched on, the corresponding Stops DXF photos are saved with a resolution of 300 x 400 dpi. Leave actual capture and function, go to saves data. Do not forget to save your data! default opera- tion mode. Leica DISTO S910 808167... -
Page 34: Adjusting Measuring Reference
Distance is measured from the front of the de- vice (lock symbol = per- manently). If device is switched off, reference goes back to standard set- Confirm setting. ting (rear of the device). Leica DISTO S910 808167... -
Page 35: Triangular Area
Use Up/Down Angle between first 4.248 m First distance navigation keys to and second show more re- measurement 33.60° 4.129 m Second distance sults. 10.802 m 2.425 m Third distance Circumference 4.85 5 m Triangular area Leica DISTO S910 808167... -
Page 36: Height Tracking
- which needs a re- sults. flective laser target. The upper point 7.160 m can be targeted with the pointfinder / crosshair and does not need a reflec- tive laser target as only the inclination is measured. Leica DISTO S910 808167... -
Page 37: Smart Horizontal Mode
Functions Smart Horizontal Mode 40.8 ° 5.204 m 0.032 m 4.82 7 m Aim laser at (up to 360° and a transverse target. tilt of ±10°) Leica DISTO S910 808167... -
Page 38: Sloped Objects
2 measured points. The plane is defined of the line between the 2 points. This means, that the device on the tripod is only moved vertically and not turned horizontally to reach both points. Leica DISTO S910 808167... -
Page 39: Pythagoras (2-Point)
Minimum or Maximum measure- ment. 21.383 m We recommend to use the pythagoras only for indirect 13.2 07 m horizontal measuring. For height measuring (vertical) it is more precise to use a function with the inclination measuring. Leica DISTO S910 808167... -
Page 40: Volume
Use Up/Down 5.744 m 13.430 m First distance Ceiling/floor area navigation keys to show more re- 2.338 m 39.300 m Second distance Wall areas sults. 2.431 m 16.164 m Third distance Circumference 32.6 53 m Volume Leica DISTO S910 808167... -
Page 41: Stake Out
The distance to The function can be stopped the next stake out 0.625 m by pressing the CLEAR/OFF point is displayed. button. 0.24 0 m Approve value "b" and start meas- urement. Leica DISTO S910 808167... -
Page 42: Calculator
0 3 - 07 - 03_13: 2013 - 07 - 03_13:25 If the device is connected to the computer via USB cable, you can download or delete the gallery. It is not possible to upload any data. Leica DISTO S910 808167... -
Page 43: Width
If necessary, use the on the display and adjust Zoom for precise with softkeys. Corre- Confirm aiming. sponding width is calcu- measuremtent. lated. 16.42 m * OV = Overview Distance to object 27.539 Exit. 16.42 Leica DISTO S910 808167... -
Page 44: Diameter
Zoom for precise with softkeys. Corre- aiming. sponding diameter is cal- culated. 0.237 m * OV = Overview 0.744 m More results are Circumference displayed. 0.044 m Circular area Exit. Confirm meas- 0.237 m urement. Leica DISTO S910 808167... -
Page 45: Height-Profile Measurement
After meas- uring the reference point, the horizontal Horizontal distance to distance and height is displayed for each fol- 2.042 m device lowing point. Exit function. 0.05 4 m Height difference to reference point (REF). Leica DISTO S910 808167... -
Page 46: Trapezium
Functions Trapezium Aim laser at upper point. Aim laser at 2nd point. 13.459 m 16.440 m 70.80° 5.79 0 m Use Up/Down navigation keys to show more re- 78.383 m Trapezium area sults. 20.9 ° Leica DISTO S910 808167... -
Page 47: Pythagoras (3-Point)
Minimum or Maximum meas- urement. 23.018 m We recommend to use the pythagoras only for indi- 20.5 71 m rect horizontal measuring. For height measuring (vertical) it is more precise to use a function with inclination measurement. Leica DISTO S910 808167... -
Page 48: Area From Photo
If necessary, use the on the display and adjust Zoom for precise with softkeys. Corre- aiming. Confirm sponding area is calculat- measurement. 9.232m * OV = Overview 4.581 Width 2.015 Length 13.192 Circumference Exit. 9.232m Leica DISTO S910 808167... -
Page 49: Technical Data
Capacity 2.6 Ah avoided. Measurements per battery Approx. 4000 Device levelling charge Levelling range +/- 5° Charging time Approx. 4 h Levelling accuracy +/- 0.05° Output voltage 5.0 V Charging current Leica DISTO S910 808167... -
Page 50: Message Codes
Received signal too Change target surface (e.g. Photo/Screenshot high white paper). Compass Gallery with USB download Diameter Width Area from Photo Smart Base Pointdata transmission Point to point function /distance Smart Angle Smart Area DXF Data capture Leica DISTO S910 808167... -
Page 51: Warranty
Responsibilities of the manufacturer Prohibited use of the product under PROTECT according of the original equipment: to Leica Geosystems International Limited • Using the product without instruction Leica Geosystems AG Warranty and PROTECT General Terms & • Using outside the stated limits Heinrich-Wild-Strasse Conditions set out under www.leica-geosys-... -
Page 52: Limits Of Use
• Connect the equipment into an outlet on a regulations. circuit different from that to which the Yet, the possibility of causing interference in receiver is connected. other devices cannot be totally excluded. • Consult the dealer or an experienced radio/TV technician for help. Leica DISTO S910 808167... -
Page 53: Déclaration Fcc, Applicable Aux Etats-Unis
• Réorienter ou repositionner l'antenne de réception. • Augmenter la distance entre l'instrument et le récepteur. • Connecter l'instrument à un autre circuit que celui du récepteur. • Consulter le revendeur ou un technicien expérimenté dans le domaine radio/TV. Leica DISTO S910 808167... -
Page 54: Use Of The Product With Bluetooth
• Do not use the product near your body for Description Value extended periods. Wavelength 620 - 690 nm Laser classification Maximum radiant output power for classification 0.95 mW Pulse repetition frequency 320 MHz Pulse duration > 400 ps Beam divergence 0.16 x 0.6 mrad Leica DISTO S910 808167... - Page 55 Leica Geosystems AG, Heerbrugg, Switzerland has been certified as being equipped with a quality system which meets the International Standards of Quality Management and Quality Systems (ISO standard 9001) and Environ- mental Management Systems (ISO standard 14001). Copyright Leica Geosystems AG, Heerbrugg,...
Need help?
Do you have a question about the DISTO S910 and is the answer not in the manual?
Questions and answers
How long does a fully charged Disto s910 battery last