Table of Contents
Advertisement
Quick Links
Advertisement
Chapters
Table of Contents

Related Manuals for TownSteel XTRX-L-2000


Summary of Contents for TownSteel XTRX-L-2000
- Page 1 YW1838...
-
Page 2: Table Of Contents
Index Definitions······································································2 Factory Default Settings··················································· 3 Important Notes ···························································· 3 Change Master Code······················································ Add Codes·····································································4 Add a User Code Add Multiple User Codes Add Service Code Delete Codes ································································ 5 Delete User Code Delete Service Code Delete All Service Codes Disable Codes ·······························································... -
Page 3: Definitions
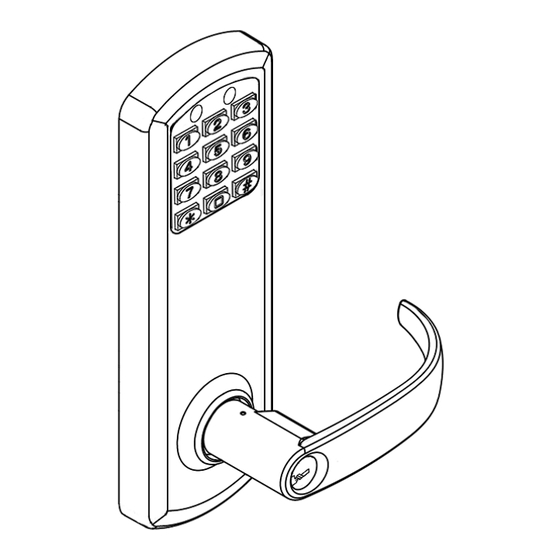
Definitions Code Length: Length of Master Code defines the length of all other codes. Length of codes can be 4, 5, or 6 digits. Master Code and User Codes must be the same length. LED Indicator: LED indicators are located at the top outside of the lock. Lock flashes green LED and/or red LED dependent on inputs. -
Page 4: Factory Default Settings
Factory Default Settings Master Code: 12345 Passage Mode: Disabled Pass Time: 5 seconds Sound: Enabled Lock Status Indicator: Disabled Penalty Time (Keypad Anti-Tamper Lockout Time): 60 seconds after 3 Invalid Code Entries Important Notes Factory Default Settings Master Code must be changed before programming any other codes. ... -
Page 5: Change Master Code
Change Master Code Key Sequence [#] [Master Code] ● [01] ● [1-digit Code length] ● [New Master Code] ● [New Master Code] ●● For example, to change Master Code to “5555”, Press: [#] [12345] ● [01] ● [4] ● [5555] ● [5555] ●● ... -
Page 6: Delete Codes
Delete Codes Delete a Code Key Sequence [#] [Master Code] ● [03] ● [2-digit User ID] ●● For example, to delete User Code “2040” with User ID “04”, Press: [#] [5555] ● [03] ● [04] ●● Delete a Service Code Key Sequence [#] [Master Code] ●... -
Page 7: Disable All Codes
Disable all User Codes Disable all User Codes Key Sequence [#] [Master Code] ● [06] ●● For example, to disable all User Codes, Press [#] [5555] ● [06] ●● All User Codes are disabled, and Service Codes are deleted. Enable all User Codes Key Sequence [#] [Master Code] ●... -
Page 8: Pass Time
Pass Time Key Sequence [#] [Master Code] ● [42] ● [2-digit XX seconds] ●● Pass Time changes to XX seconds and XX is programmable from 2 seconds to 20 seconds. Sound Disable Keypad Sound – Sound Off Key Sequence [#] [Master Code] ●... -
Page 9: Penalty Time
Penalty Time (Keypad Anti-Tamper Lockout Time) Adjust Penalty Time Key Sequence [#] [Master Code] ● [92] ● [1-digit invalid codes entry] ● [1-digit X0 seconds] ●● For example, to adjust Penalty Time for 70 seconds after 5 invalid entries, press [#] [5555] ●... -
Page 10: Next Free User Id
Next Free User ID Key Sequence [#] [Master Code] ● [10] ●● If a free user ID is recognized, the following sequence will occur: At the start of the Next Free User Location function, the lock will flash both the green and red LEDs and will emit 2 beeps. ... -
Page 11: Low Battery
Low Battery Warning When the battery voltage is low, the red LED will flash 5 times before the green LED flashes to signal acceptance of the code. Batteries should be changed as soon as this happens. Only 200 operations are allowed under low battery condition. After 200 operations, User Codes will be disabled under low battery condition. - Page 12 YW1838...
- Page 14 Index Definitions······································································2 Factory Default Settings··················································· 2 Important Notes ····························································· 3 Change Master Code······················································· 4 Add Credentials······························································ 4 Add a User Code Add Multiple User Codes Add User Keycards Delete Credentials··························································· 6 Delete User Code Delete User Keycard Reset to Factory Default Settings System Settings ·····························································...
-
Page 15: Definitions
Definitions Credential: The lock requires a valid credential to operate. A credential can be a Master Code, User Code, or Keycard/Fob. LED Indicator: The LED indicators are located around the keypad of the lock. Lock flashes green LED and/or dependent on inputs. -
Page 16: Important Notes
Important Notes To wake up the touch keypad from idle mode, gently swipe or tap the keypad. While in Factory Default Settings any credential will open the lock until a Master Code is programmed into the lock. When any credential is presented the lock will flash and then green... -
Page 17: Change Master Code
Change Master Code Key Sequence For example, to change Master Code to “555555”, press: Notes Factory Default Setting’s Master Code is 123456. It must be changed with the user’s own Master Code immediately. Manufacturer assumes no liability, direct or indirect, due to failure to change Master Code. ... -
Page 18: Add Multiple User Codes
Add Multiple User Codes Key Sequence User Code Key Sequence Additional User Codes Key Sequence: For example, to add User Codes “202020”, “303030”, and “404040”, press: Notes The input of additional credentials must start before lock goes into Idle Mode (12 seconds). If the lock goes into Idle Mode, start the key sequence from the beginning. -
Page 19: Delete Credentials
Delete Credentials Delete User Codes Key Sequence For example, to delete User Code “202020”, assuming the Master Code is “555555”, press: Delete User Key Cards Key Sequence Notes The Master Code cannot be deleted. Multiple Keycards/Fobs can be deleted during the same programming sequence (like Additional User Codes Key Sequence). ... -
Page 20: System Settings
System Settings Passage Mode Key Sequence Notes After creating a Passage Code, entering it will activate the Passage Mode function. The lock will remain actively unlocked until the Passage Code or Master Code is entered to deactivate (or Disable) the function. ... -
Page 21: Reset To Factory Default Settings W/O Master Code
Reset Lock to Factory Default Settings without a Master Code Steps 1. Unscrew the back cover. 2. Locate the reset button on the battery holder. 3. Press and hold the reset button. After approximately 4 seconds, the lock will beep 2 times, and you can release the reset button. 4. - Page 22 YW1838...
Need help?
Do you have a question about the XTRX-L-2000 and is the answer not in the manual?
Questions and answers