LogTag TRED30-16R Quick Start Manual
Hide thumbs
Also See for TRED30-16R:
- Manual (69 pages) ,
- Product user manual (55 pages) ,
- Quick start manual (2 pages)
Table of Contents
Advertisement
Quick Links
Advertisement
Table of Contents

Related Manuals for LogTag TRED30-16R


Summary of Contents for LogTag TRED30-16R
- Page 1 UICK TART UIDE TRED30-16R L OGGERS 23-0713...
- Page 2 Unpacking the Loggers Each kit has been checked by our staff to ensure it is complete and includes the following items: • TRED30-16R Data Logger • External Probe w/60ml Glycol Bottle • Fridge and Freezer Label Stickers • Wall Mount Bracket (LTI-MOUNT) •...
- Page 3 Install the Vial and Probe Cable • Place the Glycol Bottle in center of fridge/freezer unit Secure the bottle with tape or the Velcro Place the bottle in a tray if used with wire rack • Run the probe cable through hinge side of door •...
-
Page 4: Install Software
• Once software is installed plug the docking station (LTI-HID) into your PC by inserting the USB plug into an available USB port • Locate the LogTag Analyzer (LTA) icon on your desktop and double click it to launch the software... -
Page 5: Configuring The Logger
The settings shown in the following slides are for example only – the settings for your state may vary. • Open LogTag Analyzer Software (If not already open) • Place the Logger into docking station – Push down until you hear logger click into place. - Page 6 Configuring the Logger • Description: Give each logger a unique name for easy identification • We do not recommend selecting the password options, leave the check boxes blank • Make sure “Push button start” appears below Logging Parameters • “Record readings so that” should be selected •...
- Page 7 Configuring the Logger Confirm the following settings – Values listed below are for example purposes only – Please confirm settings with your local DOH Representative • Place a check in the box enabling the Audible alarm • Make sure Logger display temperature unit is set correctly for you •...
- Page 8 Configuring the Logger Click “Advanced Settings” tab and select the following options* • Box is checked for “Alarm remains on even if readings return to non-violation range” • Box is checked for “Show total summary days collected” • Box is checked for “Allow logging to stop with STOP button” •...
- Page 9 Configuring the Logger • When you have three green checkmarks, and the status bar shows “Configured” logger can be removed from docking station • If you don’t have any other loggers to set up, click “Close” or if you have another logger to configure insert it in the docking station and click “Restart Wizard”...
- Page 10 Attach Probe to Logger You can now bring the logger back to its proper location, place it into the wall mount bracket, and carefully reattach the probe • Important! - Make sure serial number on Logger matches serial number on Probe.
- Page 11 Starting the Logger It is recommended that you read through the next few slides before attempting to start your logger. Once done please go through them again while you follow along with your logger. Confirm that “Ready” is displayed on the LCD Screen Press and hold the start button and observe that the “STARTING”...
-
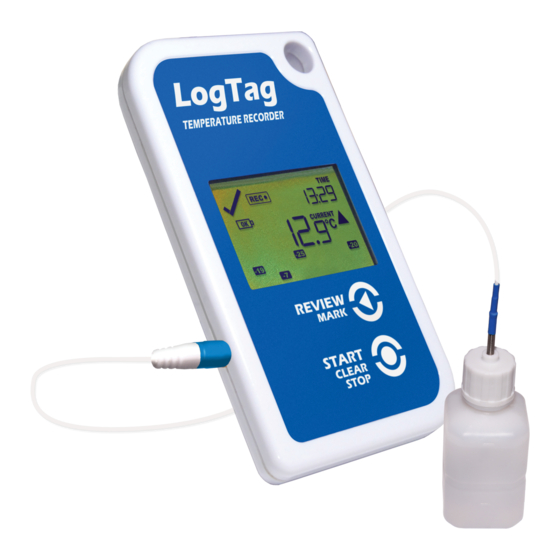
Page 12: During Recording
During Recording During normal operation, the display shows the most recently recorded temperature. This temperature is updated at the same rate as the logging interval. The current time is also ✓ displayed (in 24-hour format). A tick symbol is shown as long as no alarm event has occurred. - Page 13 Take care to return each logger to its original location • Take the logger to your computer that has the software and docking station • Open LogTag Analyzer Software • Insert Logger into docking station – Be sure Logger “clicks” into place •...
- Page 14 View/Save Logger Data Additional views and report options can be chosen from the tabs at the bottom of the window Once graph is visible the data has been saved and the logger can be re-launched. To re-launch the logger click on the Wizard button. Follow the same procedure described in the “Configuring the Logger”...
-
Page 15: Changing The Battery
Changing The Battery The battery life on your LogTag Logger is up to approximately 1-year. If you see the low battery indicator on the LCD screen, or get a pop-up warning when downloading the logger, you will need to replace the battery. Your logger kit included a spare CR2032 coin cell battery which is to be used when a replacement is needed. - Page 16 Changing The Battery Step 4 Remove battery cover: On the back of the device at the top you will notice a square sticker. Carefully remove this sticker that is covering the battery compartment with a small, flat-head screwdriver (fig 1) Use a coin to turn the battery cover in counter-clockwise direction to open the compartment (fig 2) Remove the battery using a small, flat-head screwdriver (fig 3)
-
Page 17: Troubleshooting
Detailed instructions on using the logger and Analyzer Software can be found in the LogTag Analyzer manual. The user manual can be downloaded from the MicroDAQ website or by clicking on the “help” option from inside the LTA software.
Need help?
Do you have a question about the TRED30-16R and is the answer not in the manual?
Questions and answers