Sign In
Upload
Download
Table of Contents
Contents
Add to my manuals
Delete from my manuals
Share
URL of this page:
HTML Link:
Bookmark this page
Add
Manual will be automatically added to "My Manuals"
Print this page
×
Bookmark added
×
Added to my manuals
Manuals
Brands
OZtrail Manuals
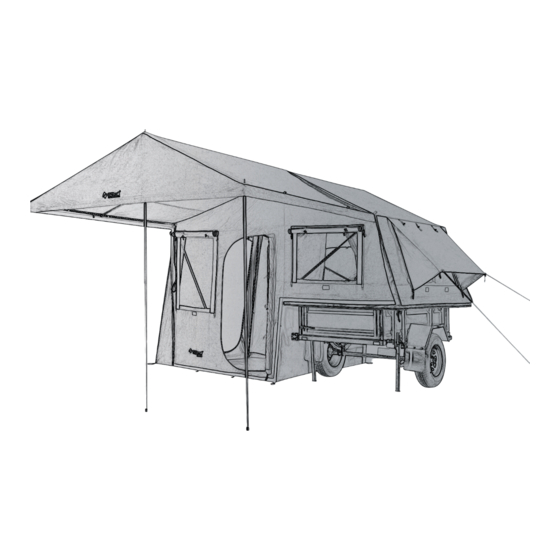
Tent
CAMPER TRAILER 6
Owner's manual
OZtrail Camper 6 Owner's Manual
Camper trailer
Hide thumbs
Also See for Camper 6
:
Owner's manual
(9 pages)
1
2
3
4
5
6
7
8
9
10
11
12
13
14
15
16
17
18
19
20
21
22
23
24
25
26
27
28
29
30
31
32
Table Of Contents
33
page
of
33
Go
/
33
Contents
Table of Contents
Bookmarks
Table of Contents
Table of Contents
Features
Silver Coated Satproof 800+
Product Code
Parts Description
Fitting Parts Description
Products and Parts
Helpful Hint
Fasteners Included
Fastener Identification and Names
Tools You will Need
Camper Trailer Tent Placement on Trailer
Tent to Trailer Instructions
Attaching the Camper Trailer
Identity All Parts
Internal Poles
Awning Poles
Attaching the Hinges
Preparing to Attach the Timber Base Board to the Trailer
Attaching the Two Large Gas Struts
Attaching the Latches
Attaching the Single Small Gas Struts
Choose a Level Site
Set up and Assembly Instructions
Remove the Dust Cover
Standing up the Camper Trailer Tent
Peg out the Camper Trailer Tent
Set up Instructions for the
Identify the Poles
Assembling the Centre Ridge and Upright Poles
Assembling the Side Ridge Upright Poles
Installing Gusseted Bedroom Window Awning Poles
Attaching the Optional Sunroom and Optional Sunroom Floor
Set up Instructions for the Camper Trailer Tent Awning
Attaching the Optional Rear Room with Frame, Roof, Walls and Floor
Disassembly and Folding Instructions
Warranty
Prolonging the Life of Your Camper Trailer Tent
Camp Safe - Safety Habits
To Prevent Injury Caused by Fire
Important Safety and Care Information
To Prevent Injury Caused by Your Camping Environment
Know Your Camper Trailer Tent
Structural Integrity
Condensation
Understanding Waterproofness and Seasoning Your Canvas
Reducing the Risk of Jamming Fabric in the Zip
Crimping Instructions for a Zip Slider
What to Do if the Zipper Gets Caught
Zips Care and Maintenance
Advertisement
Quick Links
1
Table of Contents
2
Products and Parts
3
Attaching to Trailer Instructions
4
Set up and Assembly Instructions
5
Disassembly and Folding Instructions
Download this manual
Table of
Contents
Previous
Page
Next
Page
1
2
3
4
5
Advertisement
Table of Contents
Need help?
Do you have a question about the Camper 6 and is the answer not in the manual?
Ask a question
Questions and answers
Related Manuals for OZtrail Camper 6
Camping Equipment OZtrail CAMPER TRAILER 6 Owner's Manual
(9 pages)
Tent OZtrail Camper Trailer CCT-06-D Owner's Manual
Camper trailer (32 pages)
Tent OZtrail Camper 7 Owner's Manual
Camper trailer (33 pages)
Tent OZtrail Outer Ridge Quest Owner's Manual
Camper trailer (33 pages)
Tent OZtrail Ridgeline Latitude Owner's Manual
Camper trailer (33 pages)
Tent OZtrail Outer Ridge Venturer Owner's Manual
Camper trailer (33 pages)
Tent OZtrail Ridgeline Zenith Owner's Manual
Camper trailer (33 pages)
Tent OZtrail CTC-CH10-B Owner's Manual
(17 pages)
Tent OZtrail Highlander Owner's Manual
Dome tent (16 pages)
Tent OZtrail Villa Dome Owner's Manual
Dome tent (16 pages)
Tent OZtrail PEAK TWIN DOME Owner's Manual
(16 pages)
Tent OZtrail DTF-C300T-D Owner's Manual
(16 pages)
Tent OZtrail Blitz 3 Pop Up Owner's Manual
(16 pages)
Tent OZtrail DTC-BU6-B Owner's Manual
Classic bungalow 6 dome (16 pages)
Tent OZtrail Switch Back 2 Camo Owner's Manual
(12 pages)
Tent OZtrail PopUp Beach Dome Owner's Manual
(10 pages)
This manual is also suitable for:
Camper 7
Outer ridge quest
Ridgeline latitude
Outer ridge venturer
Ridgeline zenith
Table of Contents
Save PDF
Print
Rename the bookmark
Delete bookmark?
Delete from my manuals?
Login
Sign In
OR
Sign in with Facebook
Sign in with Google
Upload manual
Upload from disk
Upload from URL


Need help?
Do you have a question about the Camper 6 and is the answer not in the manual?
Questions and answers