Electrolux EUX2245AOX User Manual
Hide thumbs
Also See for EUX2245AOX:
- User manual (64 pages) ,
- User manual (48 pages) ,
- User manual (20 pages)
Table of Contents
Advertisement
Quick Links
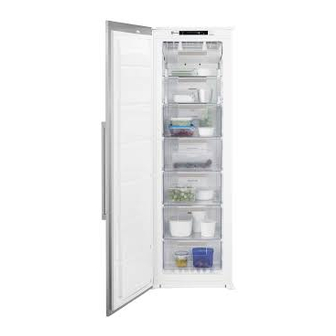
EUX2245AOX
Questo manuale d'istruzione è fornito da trovaprezzi.it. Scopri tutte le offerte per
EUX2245AOX
o cerca il tuo prodotto tra le
................................................ .............................................
EN UPRIGHT FREEZER
migliori offerte di Frigoriferi e Congelatori
USER MANUAL
Electrolux
Advertisement
Table of Contents

Related Manuals for Electrolux EUX2245AOX


Summary of Contents for Electrolux EUX2245AOX
- Page 1 Questo manuale d’istruzione è fornito da trovaprezzi.it. Scopri tutte le offerte per Electrolux EUX2245AOX o cerca il tuo prodotto tra le migliori offerte di Frigoriferi e Congelatori ..................... EUX2245AOX EN UPRIGHT FREEZER USER MANUAL...
-
Page 2: Table Of Contents
9. TECHNICAL DATA ............16 WE’RE THINKING OF YOU Thank you for purchasing an Electrolux appliance. You’ve chosen a product that brings with it decades of professional experience and innovation. Ingenious and stylish, it has been designed with you in mind. -
Page 3: Safety Instructions
ENGLISH SAFETY INSTRUCTIONS In the interest of your safety and to ensure Keep ventilation openings, in the appli- the correct use, before installing and first ance enclosure or in the built-in structure, using the appliance, read this user manual clear of obstruction. carefully, including its hints and warnings. - Page 4 Power cord must not be length- • Ice lollies can cause frost burns if con- ened. sumed straight from the appliance. Make sure that the power plug is not squashed or damaged by the 1.4 Care and cleaning back of the appliance. A squashed •...
-
Page 5: Control Panel
ENGLISH • This product must be serviced by an together with the urban refuse and authorized Service Centre, and only rubbish. The insulation foam con- genuine spare parts must be used. tains flammable gases: the appli- ance shall be disposed according to the applicable regulations to 1.7 Environment Protection obtain from your local authorities. - Page 6 Connect the mains plug to the power Press the Mode button to select an- socket. other function or nothing. Press the ON/OFF button if the dis- The function switches off by se- play is off. lecting a different set temperature.
-
Page 7: Daily Use
ENGLISH ing the Temperature colder button and The alarm indicator appears until the the Temperature warmer button. normal conditions are restored. When the alarm has returned the alarm in- dicator goes off. 2.8 High temperature alarm An increase in the temperature in the 2.9 Door open alarm freezer compartment (for example due to an earlier power failure) is indicated by:... -
Page 8: Helpful Hints And Tips
Small pieces may even be cooked still fro- Do not use metallic instruments to zen, directly from the freezer: in this case, remove the trays from the freezer. cooking will take longer. 3.6 Cold accumulators 3.5 Ice-cube production The freezer contains at least one cold ac-... -
Page 9: What To Do If
ENGLISH • clean the inside and accessories with After cleaning, reconnect the equipment lukewarm water and some neutral to the mains supply. soap. • regularly check the door seals and wipe 5.2 Defrosting of the freezer clean to ensure they are clean and free The freezer compartment of this model, from debris. - Page 10 10 www.electrolux.com Problem Possible cause Solution The appliance has no Connect a different electri- power. There is no voltage cal appliance to the mains in the mains socket. socket. Contact a qualified electri- cian. The buzzer sounds. The temperature in the Refer to "Excessive Tem-...
-
Page 11: Installation
ENGLISH Problem Possible cause Solution DEMO appears on The appliance is in dem- Keep pressed approximate- the Display. onstration mode (DEMO). ly 10sec the Mode button since a long sound of buz- zer is heard and the Display shut off for a short while: appliance start works regu- larly. - Page 12 12 www.electrolux.com 7.3 Ventilation requirements The airflow behind the appliance must be min. 5 cm sufficient. 200 cm min. 200 cm Do the following steps: 7.4 Installing the appliance CAUTION! Make sure that the mains cable can move freely. Apply the adhesive sealing strip to the ap-...
- Page 13 ENGLISH Install the appliance in the niche. Attach the appliance to the niche with 4 screws. Fix the covers on the screws. Do a final check to make sure that: • All screws are tightened.
- Page 14 14 www.electrolux.com • The sealing strip is attached tightly to • The door opens and closes correctly. the cabinet. 7.5 Assembly instructions for the compensator lower part of the door With the door open, loosen the two screws situated in the lower part with- out unscrewing them completely.
-
Page 15: Noises
ENGLISH 8. NOISES There are some sounds during normal running (compressor, refrigerant circula- tion). HISSS! BRRR SSSRRR! SSSRRR! HISSS! HISSS! -
Page 16: Technical Data
16 www.electrolux.com CRACK! CRACK! BLUBB! BLUBB! 9. TECHNICAL DATA Dimension of the recess Height 1780 mm Width 560 mm Depth 550 mm Rising Time 24 h Voltage 230-240 V Frequency 50 Hz The technical information are situated in the rating plate on the internal left side of the appliance and in the energy label. - Page 17 ENGLISH...
- Page 18 18 www.electrolux.com...
- Page 19 ENGLISH...
- Page 20 www.electrolux.com/shop...
Need help?
Do you have a question about the EUX2245AOX and is the answer not in the manual?
Questions and answers