
Related Manuals for Gaggia Milano BESANA


Summary of Contents for Gaggia Milano BESANA
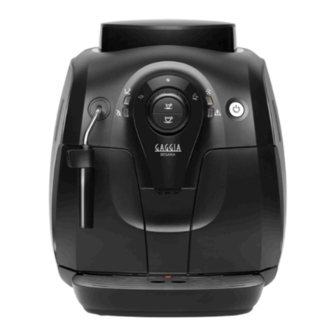
- Page 1 ENGLISH ESPAÑOL PORTUGUÊS GAGGIA BESANA RI8180 (HD8651) User manual Manual de instrucciones Manual de instruções...
-
Page 3: Table Of Contents
ENGLISH Table of contents Introduction General description Before first use Installing the machine Preparing for use Filling the water tank Filling the coffee bean container Heating up the machine Manual rinsing cycle Installing the Intenza+ water filter Using the machine Brewing 1 or 2 cups of espresso or regular coffee Frothing milk Hot water... -
Page 4: Introduction
ENGLISH Introduction Congratulations on your purchase of a Gaggia Besana coffee machine! The machine is suitable for preparing espresso coffee using whole coffee beans. It can also dispense steam and hot water. In this user manual you find all the information you need to install, use and maintain your machine. -
Page 5: Before First Use
ENGLISH Before first use Installing the machine Remove all packaging material from the machine. Place the machine on a table or worktop away from the tap, the sink and heat sources. Leave at least 15cm of free space above, behind and on both sides of the machine. -
Page 6: Preparing For Use
ENGLISH Preparing for use Filling the water tank Remove the water tank from the machine. Rinse the water tank under the tap. Fill the water tank with cold tap water up to the MAX indication. Warning: Never fill the water tank with warm, hot or sparkling water, as this may cause damage to the water tank and the machine. -
Page 7: Heating Up The Machine
ENGLISH Heating up the machine During the initial heat-up process, fresh water flows through the internal circuit to heat up the machine. This takes a few seconds. Place a bowl under the hot water/steam wand or classic milk frother and the coffee spout. -
Page 8: Manual Rinsing Cycle
ENGLISH Manual rinsing cycle During the manual rinsing cycle, the machine brews one cup of coffee to prepare the inner circuit for use. Place a bowl under the coffee spout. Make sure the on/off button lights up continuously. Press the regular coffee button. The machine starts to brew a cup of coffee to prepare the inner circuit for use. -
Page 9: Installing The Intenza+ Water Filter
ENGLISH Fill the water tank with fresh water up to the MAX indication. The machine is ready for use. Note: The first cups of coffee may be a bit watery, this is normal. The machine needs to complete a few brewing cycles to optimise its settings. Installing the Intenza+ water filter We advise you to install the Intenza+ water filter as this prevents scale build-up in your machine. -
Page 10: Using The Machine
ENGLISH Place the filter in the empty water tank. Press it down until it cannot move any further. Fill the water tank with fresh water up to the MAX indication and slide it into the machine. Let the machine brew hot water until the water tank is empty (see chapter ‘Using the machine’, section ‘Hot water’). -
Page 11: Frothing Milk
ENGLISH Press the espresso button or regular coffee button once to brew 1 cup of coffee. The machine grinds the required amount of coffee beans for one cup and then brews one cup of coffee. Press the espresso button or regular coffee button twice to brew 2 cups of coffee. -
Page 12: Hot Water
ENGLISH Fill a jug up to 1/3 with cold milk. Note: Use cold milk (at a temperature of approximately 5°C/41°F) with a protein content of at least 3% to ensure an optimal frothing result. You can use whole milk or semi-skimmed milk, depending on your preference. Immerse the hot water/steam wand or classic milk frother in the milk and turn the control dial to the steam icon. -
Page 13: Adjusting The Machine
ENGLISH Turn the control dial to the hot water icon. Water comes out of the hot water/steam wand or classic milk frother. Turn the control dial back to the coffee bean icon when the cup contains the preferred amount of hot water. Adjusting the machine You can adjust the grinding degree and coffee volume to obtain coffee that is perfectly customised to your taste. -
Page 14: Adjusting The Coffee Volume
ENGLISH Adjusting the coffee volume You can adjust the coffee volume to your taste and the size of your cups. Both the regular coffee button and espresso button can be programmed. Place a cup on the drip tray grid. Press and hold the button of the coffee type you want to adjust. Release the button when the machine starts to grind coffee beans. -
Page 15: Cleaning The Hot Water/Steam Wand Or Classic Milk Frother
ENGLISH Cleaning the hot water/steam wand or classic milk frother Clean the hot water/steam wand or classic milk frother with a wet cloth after each use. Clean the hot water/steam wand or classic milk frother thoroughly once a week. Remove the protective handle from the hot water/steam wand by pulling it downwards. - Page 16 ENGLISH Remove the coffee grounds container from the machine. Open the maintenance door. Press the PUSH button (1) and pull at the grip of the brewing unit (2) to remove it from the machine. Clean the coffee exit duct thoroughly with a spoon handle or another round- tipped kitchen utensil.
- Page 17 ENGLISH Before you slide the brewing unit back into the machine, make sure the two reference signs on the side match. If they do not match, perform the following step: Make sure the lever is in contact with the base of the brewing unit Make sure the locking hook of the brewing unit is in the correct position.
-
Page 18: Lubrication
ENGLISH Slide the coffee grounds container back into the machine. Lubrication For optimal performance of the machine, lubricate the brewing unit after it has brewed 500 cups of coffee or once every 3 months. Switch off the machine and unplug it. Follow steps 2 to 4 in section ‘Cleaning the brewing unit’... -
Page 19: Descaling The Machine
ENGLISH Descaling the machine Scale builds up inside the machine during use. It is essential to descale the machine when the orange descaling light lights up continuously. Only use the special Gaggia descaling solution to descale the machine. The Gaggia descaling solution is designed to ensure optimal performance of the machine. -
Page 20: Descaling Cycle
ENGLISH Descaling cycle Press the espresso button and regular coffee button simultaneously for approximately 5 seconds. The orange descaling light flashes slowly during the entire descaling cycle. Turn the control dial to the hot water icon and brew hot water. Let hot water flow out of the hot water/steam wand for 10 seconds. -
Page 21: If You Are Unable To Finish The Descaling Procedure
ENGLISH Fill the water tank with fresh tap water up to the MAX indication and slide the water tank back into the machine. Empty the bowl and place it back onto the drip tray under the hot water/steam wand. Press the espresso button and brew a cup of espresso. Repeat this twice. Turn the control dial to the hot water icon. -
Page 22: Meaning Of Light Signals
ENGLISH Press the espresso button and regular coffee button simultaneously for approximately 5 seconds. Remove the drip tray, rinse it and place it back. Remove the water tank and rinse it. Fill the water tank with fresh tap water up to the MAX indication and slide the water tank back into the machine. - Page 23 ENGLISH The on/off button flashes slowly. The machine is warming up or performing a procedure. The on/off button flashes quickly. The machine is overheated. Brew a cup of hot water to cool down the machine. The descaling light and the on/off button light up continuously. You have to descale the machine.
- Page 24 ENGLISH The ‘water tank empty’ light lights up continuously. The water level is low. Fill the water tank with fresh water up to the MAX indication. The warning light lights up continuously and the on/off button goes out. The coffee grounds container is full. Empty the coffee grounds container while the machine is on.
-
Page 25: Troubleshooting
ENGLISH The lights flash slowly and simultaneously. The machine is out of order. Switch off the machine for 30 seconds, then switch it back on. Try this two or three times. If the machine does not reset, contact the Gaggia Consumer Care Centre in your country. - Page 26 ENGLISH Problem Solution The brewing unit cannot be Remove the coffee grounds container before you open the maintenance door. removed. If you still cannot remove the brewing unit follow the next steps. Reinsert the coffee grounds container, close the maintenance door, switch on the machine. The machine prepares for use.
-
Page 27: Technical Specifications
ENGLISH Technical specifications Feature Value / location Nominal voltage Inside of maintenance door Power rating Inside of maintenance door Size (w x h x d) 295mm x 325mm x 420mm Weight 6.9 kg Material Plastic Cord length 0.8m -1.2m Water tank capacity 1000ml Cup size Up to 95mm... - Page 28 GAGGIA S.p.A. reserves the right to make any necessary modification. GAGGIA S.p.a. se reserva el derecho a realizar todas las modificaciones que considere necesarias. GAGGIA S.p.a. reserva-se o direito de efectuar todas as modificações consideradas necessárias. GAGGIA S.p.A. Società soggetta a direzione e coordinamento di Philips Innovations S.p.A.
Need help?
Do you have a question about the BESANA and is the answer not in the manual?
Questions and answers