Advertisement
Table of Contents
Contents
Franklin DELUXE, 2719 -Throwing & Pitching Set Step by Step Assembly Manual
Appearance

Note: Do not extend "Infinite Angle" adjustment system beyond red indicator mark on tube.

Replacement Parts

| Part | Amount | Description | Replacement Part # |
| 1 | 3 pcs | 44" U-Shaped Tubes | 2770Z9 |
| 2 | 2 pcs | Adjustable Tube | 2770Z11 |
| 3 | 2 pcs | 26" Straight Tubes | 2770Z3 |
| 4 | 2 pcs | 26" Straight Tubes | 2770Z4 |
| 5 | 2 pcs | 34" L Shaped Tube | 2770Z5 |
| 6 | 2 pcs | 3.5" Straight Tubes | 2770Z6 |
| 7 | 4 pcs | 2" Butterfly Screws | 2770Z7 |
| 8 | 2 pcs | 2 3/8" Butterfly Screws | 2770Z8 |
| 9 | 8 pcs | Hooks | 2770Z1 |
| 10 | 4 pcs | Ground Stakes | |
| 11 | 1 pc | Net | 2770Z2 |
| 12 | 1 pc | Target Ribbon | |
| 13 | 1 pc | Pitch Target | |
| 14 | 1 pc | Collection Bag | |
| 15 | 22 pcs | Bungees | 2770Z13 |
Assembly
- Make net frame side by placing part (3) into part (4) and snapping push pins into place.

- To make the frame for the net, use one of the "U" shaped tubes, part (1), and slide four of part (9) onto part (1). Then place a side pole from step 1 into the open end of part (1). Take the second side pole and place into the other open end. Next, use the second "U" shaped tube, part (1), and attach two ends of the side poles. You should now have a rectangle shape.

- First place 4 hooks part (9) on part (1) as indicated in photo. To make the base, use the third "U" shaped tube, part (1), and place part (5) into one of the open ends. Slide 4 ground stakes, part (10), onto assembly. Position ground stakes as shown. Repeat on other side. Next, attach side supports part (6) to base on outside of the "U" shaped tubing where the pre-drilled holes are. Make sure the pre-drilled holes are lined up on the "U" shaped tubing and part (5) before attaching part (6). Attach by using bolt and wing nut part (7). Repeat on other side.

- To attach net frame to base assembly, take the net frame and place between the open end of base. Line up the pre-drilled holes on the net frame to part (5) on the base assembly and attach by using bolt and wing nut part (8) on both sides. Next, use part (2) and attach to the top outside of the net frame where pre-drilled holes are. Make sure the pre-drilled holes are lined up on the "U" shaped tubing and you attach the narrower end of part (2) to the top of the net frame using part (7).


- Attach the bottom of part (2) to the back of the base by inserting part (6) into part (2) by lining the pushpin up with the pre-drilled hole.
![]()
- Before putting the net on the frame, secure part (2), "Infinite Adjustment" system by screwing onto pole counter clockwise. To attach net part (11) to frame, spread out net and find red tabs attached to net. The red tabs indicate the corners of the net. To attach net, start with one corner and attach with one bungee, then attach the other three corners. Next, start at the top of the frame and attach the bungees across the top spreading them evenly. Attach the bungees on one side spreading them evenly. Repeat on bottom and then on final side.

![]()
Use extreme caution when assembling the net to the frame. The bungees will be under extreme tension and must be attached carefully. Adult assembly is strongly recommended.
Note: To fold flat for easy storage, depress push pins on part (6) and release support arm. Unit will now fold flat. - To attach bungees to net hold plastic ball in place and wrap free end around net and side tube. Loop free bungee around plastic ball.
![]()
- Attach target ribbon part (12) by weaving through net and tying off at ends.
![]()
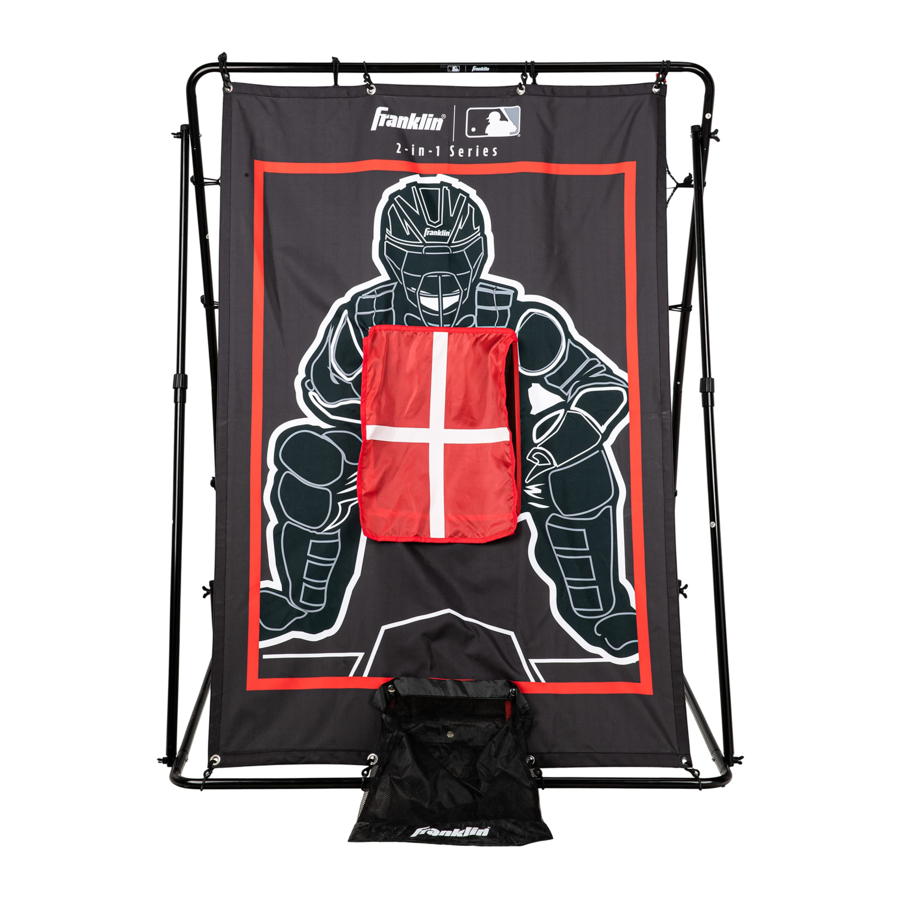
- Attach catcher target, part (13), to bunees on other side of return. Place bungee hooks into metal holes around the outside of target screen.
![]()
- Attach collection bag, part (14), to clips on front of catcher target.
![]()
- To draw back target, attach back straps to the back brace pole.
![]()


For Replacement Parts Call 1-800-225-8649
MA Residents Call 1-781-341-5178
FRANKLIN SPORTS INC.
Stoughton, MA 02072
www.franklinsports.com

Documents / Resources
References
Download manual
Here you can download full pdf version of manual, it may contain additional safety instructions, warranty information, FCC rules, etc.
Download Franklin DELUXE, 2719 -Throwing & Pitching Set Step by Step Assembly Manual
Advertisement


Need help?
Do you have a question about the DELUXE and is the answer not in the manual?
Questions and answers