Advertisement
Quick Links
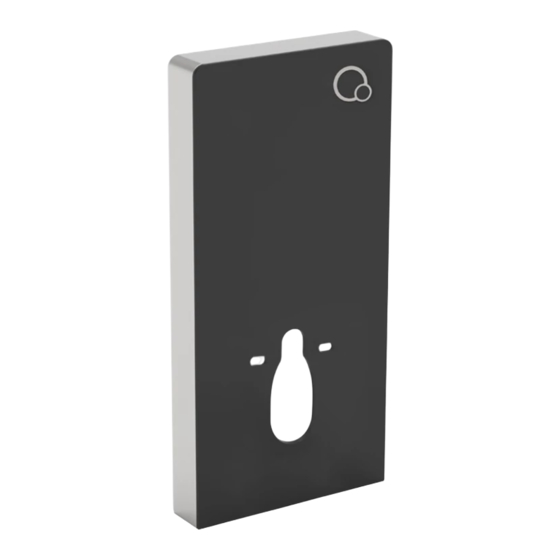
Corsica Black Floor Standind Toilet Tank
EN
For wall-mounted toilet - INSTRUCTION GUIDE
Corsica Black bodenständiger spülkasten
DE
für wandmontierte Toiletten - BEDIENUNGSANLEITUNG
Réservoir de toilette posée au sol de Corsica Black
FR
Pour les toilettes posées au sol - MODE D´EMPLOI
Corsica Black álló wc-tartály falraszerelt wc-hez
HU
SZERELÉSI ÚTMUTATÓ
WF00073
Advertisement
Chapters

Related Manuals for Wellis CORSICA BLACK WF00073


Summary of Contents for Wellis CORSICA BLACK WF00073
- Page 1 Corsica Black Floor Standind Toilet Tank For wall-mounted toilet - INSTRUCTION GUIDE Corsica Black bodenständiger spülkasten für wandmontierte Toiletten - BEDIENUNGSANLEITUNG Réservoir de toilette posée au sol de Corsica Black Pour les toilettes posées au sol - MODE D´EMPLOI Corsica Black álló wc-tartály falraszerelt wc-hez SZERELÉSI ÚTMUTATÓ...
-
Page 2: Table Of Contents
Content Accessories List ................Technical Specifications ................Technical drawing, inlet valve & flush valve connection ............Cistern installation ..................Maintenance & daily care ................. -
Page 3: Accessories List
Accessories List Quantity Quantity Specifications Names Specification Item List Accessories list Names expansion nut rubber seal Ø110 SX10 Ø6-8 straight flush screw ST6.8*67 pipe pipe small Ø22*2.0 connection washer M12 bolt eccentric pipe rubber seal decorative cap white air white M12 nut hose blue air hose... - Page 4 Accessories list Alumunium frame Glass panel Inlet valve Flush valve Lever Push button Screw set Drainage eccentric pipe Cistern Half height frame...
-
Page 5: Technical Specifications
Technical Specitication Pneumatic cabinet cistern for wall-hung WC Name CJ805W+J518 Model 3~40°C Ambient temperature Water supply pressure 0.07~0.75MPa 4~35°C Water supply temperature Dimension 1003.5mm X 483mm X 108mm... -
Page 6: Technical Drawing, Inlet Valve & Flush Valve Connection
Technical drawing, inlet valve & flush valve connection 98.5... -
Page 7: Cistern Installation
Cistern installation Hook on the back plate Open the cistern top cover, pull and separate the hose from the hook. Insert the drainage pipe into the drainage hole on the wall Lean the whole cstern to the wall and align the flush pipe position with the buckle... - Page 8 Ø 8 Ø 10 Drill the holes according to the marked poin ts (the holes' depth must be deeper than the length of the expansion nut, the diameter shown as in the picture) As indicated by the arrows mark and press the corresponding expansion nut into the the 4 points on the wall and 2 hole.
- Page 9 13mm Open the stop valve on the hose to see whether it works and water runs into cistern tank 23mm Buckle the hose onto the hanger again, and connect the hose to the stop valve on the wall.
- Page 10 Push button frame Push button Hang hook on the panel Install the push button frame and (4pcs) button onto the glass Install the panel, make sure the glass panel close to the alumunium frame, Insert the two plugs into the then push down the panel until the positions as shown hung hook totaly into the fasteners...
- Page 11 Blue air hose White air hose Half flush mark Full flush mark Connect air hoses to the correct positions Top cover Align Hook and fastener should be totaly locked. Hook on the cover Fastener Assemble the top cover back to the cistern frame Install the cistern top cover.
- Page 12 Mark on the straight flush pipe and drainage pipe Cut the flush pipe and drainage pipe...
- Page 13 Install the straight flush pipe into the cistern Screw the bolts into the cistern frame Install the flush pipe into the toilet Install toilet mat Install toilet...
- Page 14 Cut off extra part of the toilet mat Test half & full flush functions...
-
Page 15: Maintenance & Daily Care
Maintenance & daily care 1.1 Inlet valve removal 23mm Separate the hose from the stop valve Remove the top cover Take out the inlet valve upwards Turn off the stop valve on the flexible hose... - Page 16 1.2 Inlet valve adjustment & clean 1.3 Inlet valve installation Adjust the float upwards to increase the inlet volume; or downwards to reduce the volume 23mm Remove the water-stopping part Wash this removed part...
- Page 17 2.1 Flush valve removal blue air hose white air hose Remove the air hoses from the air hose holes Remove the lever...
- Page 18 Buckles on the cistern hunging plate Opening the buckles on the cistern hunging plate and lift upwards the flush valve...
- Page 19 2.2 Flush valve adjustment & clean Float Adjust the float upwards to reduce the flush volume; or downwards to increase the volume Cover Rubber seal Washer Cover Remove the cover, washer and rubber seal by rotating counterclockwisely the cover around 90° Clean the washer...
- Page 20 2.3 Fush valve installation “click” Press the flush valve until it clicks in the correct position. Re-install the lever Flush valve base Install the flush valve downwards into the cistern body(Remark make sure the flush valve bottom is aligned with flush valve base. And please make sure flush valve is installed in the shown direction during Install the top glass cover installation.
- Page 21 Corsica bodenständiger spülkasten für wandmontierte Toiletten - BEDIENUNG- SANLEITUNG...
- Page 22 Content Accessories List ................Inhalt Technical Specifications ................Zubehöliste ................................................2 Technische Spezifikationen ......................................4 Technical drawing, inlet valve & flush valve connection ............Technische Zeichnung, Einlassventil &. Spülventilanschluss ................... 5 Cistern installation ..................Spülkasten Installation ........................................6 Maintenance & daily care .................
- Page 23 Accessories List Zubehörliste Quantity Zubehörliste Namen Spezifikation Quantity Produkt Liste Namen Spezification Specifications Names Specification Item List Accessories list Anzahl Names Anzahl expansion nut Gummidich- rubber seal Ø110 SX10 Ø6-8 Dehnmutter tung straight flush gerades screw ST6.8*67 Schraube pipe Spülrohr Rohrverbin- pipe small...
- Page 24 Accessories list Zubehörliste Alumunium frame Aluminiumrahmen Glasscheibe Glass panel Spülungsventil Einlassventil Inlet valve Flush valve Lever Hebel Druckknopf Push button Schraubenset Screw set Drainage eccentric pipe Cistern Half height frame Spülkasten Halbe Höhe Rahmen Abwasser Exzenterrohr...
-
Page 25: Technical Specifications
Technical Specitication Technische Spezifikation Name Pneumatik-Spülkasten für Wand-WC Pneumatic cabinet cistern for wall-hung WC Name CJ805W+J518 Model CJ805W+J518 Model Umgebungstemperatur 3~40°C 3~40°C Ambient temperature Wasserversorgungsdruck Water supply pressure 0.07~0.75MPa 0.07~0.75MPa 4~35°C Water supply temperature Wasserversorgungstemperatur 4~35°C Dimension 1003.5mm X 483mm X 108mm Dimension 1003.5mm X 483mm X 108mm... -
Page 26: Technical Drawing, Inlet Valve & Flush Valve Connection
Technical drawing, inlet valve & flush valve Technische Zeichnung, Einlassventil & Spülventilanschluss connection 98.5... -
Page 27: Cistern Installation
Cistern installation Spülkasten Installation Hook on the back Hacken auf plate der Rückplatte Öffnen Sie das Open the cistern top Spülkasten Verdeck, cover, pull and ziehen Sie und separate the hose trennen den Schlauch from the hook. vom Haken. Insert the drainage pipe into the Setzen Sie das Abwasserrohr in das Abwasserloch in der Wand drainage hole on the wall... - Page 28 Ø 8 Ø 10 Drill the holes according to the marked poin ts (the Bohren Sie die Löcher entsprechend den holes' depth must be deeper than the length of the markierten Punkten (Die Lochtiefe muss tiefer sein expansion nut, the diameter shown as in the picture) als die Länge der Dehnmutter, der Diameter wie As indicated by the arrows mark and press the corresponding expansion nut into the...
- Page 29 13mm Dre- hen Sie die entsprechende Schrau- bengröße in die Dehnmutter in der Wand und Stahldehnbolzen in Boden Open the stop valve on the hose Öffnen Sie das Absperrventil am Schlauch, um to see whether it works and water zu sehen, ob es funktioniert und Wasser in den runs into cistern tank Behälter läuft 23mm...
- Page 30 Push button Druckknopf Rahmen frame Push button Druckknopf Haken ans Hang hook on Paneel hängen the panel Install the push button frame and (4pcs) Installieren Sie den Druckknopfrahmen und Knopf (4Stk) button onto the glass an das Glas. Install the panel, make sure the glass Installieren Sie die Platte, stellen Sie panel close to the alumunium frame, sicher, dass die Glasplatte in der Nähe des...
- Page 31 Blue air hose Blaues Luftrohr White air hose Weißes Luftrohr Halbspülung Half flush mark Volle Spülung Full flush mark Connect air hoses to the correct positions Verbinden Sie Luftrohre an die richtige Position Top cover Oberdeckel Align Ausrichten Hook and Haken und Schloß...
- Page 32 Mark Markieren Sie auf dem geraden Spülrohr und dem on the straight flush pipe and Drainagerohr drainage pipe Cut the flush pipe and drainage pipe Schneiden Sie das Spülrohr und Drainagerohr Machen Sie Fasen auf dem Spül- und Silikonöl auftragen Abflussrohr...
- Page 33 Install the straight flush pipe into Stecken Sie das geradlinige Spülrohr in den Spülkasten the cistern Drehen Sie die Bolzen in den Screw the bolts into the cistern Spülkastenrahmen frame Installieren Sie das Spülrohr in die Toilette Install the flush pipe into the toilet Install toilet mat Installieren Sie die Toilettenmatte Installieren Sie die Toilette...
- Page 34 Cut off extra part of the toilet mat Schneiden Sie einen Teil der Toilettenmatte ab Test half & full flush functions Testen Sie Halb- und Vollspülung...
-
Page 35: Wartung Und Tägliche Pflege
Maintenance & daily care Wartung und tägliche Pflege 1.1 Inlet valve removal 1.1 Einlassventil entfernen 23mm Separate the hose from the stop Trennen Sie den Schlauch vom Absperrventil valve Remove the top cover Oberverdeck entfernen Take out the inlet valve upwards Entfernen Sie das Einlassventil nach oben Turn off the stop valve on the Schließen Sie das Absperrventil am flexiblen Rohr... - Page 36 1.2 Einlassventil anpassen und reinigen 1.3 Einlassventil Installation 1.2 Inlet valve adjustment & clean 1.3 Inlet valve installation Stellen Sie den Schwimmer nach oben ein, um das Adjust the float upwards to increase the inlet Einlassvolumen zu erhöhen; oder nach unten um es volume;...
- Page 37 2.1 Spülventil entfernen 2.1 Flush valve removal blue air hose Blaues Luftrohr white air hose Weißes Luftrohr Entfernen Sie die Luftrohre aus den Remove the air hoses from the Löchern air hose holes Remove the lever Hebel entfernen...
- Page 38 Buckles on the cistern hunging Schnallen an der Spülkasten Hängeplatte plate Öffnen Sie die Schnallen an der Spülkasten Hängeplatte und heben Sie das Opening the buckles on the cistern hunging plate and lift upwards the Spülventil nach oben flush valve...
- Page 39 2.2 Flush valve adjustment & clean 2.2 Spülventil einstellen und reinigen Float Schwimmer Adjust the float upwards to reduce the flush volume; Stellen Sie den Schwimmer nach oben um die Spülmenge zu reduzieren; oder nach unten um sie zu erhöhen or downwards to increase the volume Cover Verdeck...
- Page 40 2.3 Fush valve installation 2.3 Spülventil Installation “click” “klick” Press the flush valve until it Drücken Sie das Spülventil bis es in die richtige Position klickt. clicks in the correct position. Re-install the lever Hebel wieder einbauen Flush valve base Spülventil Basis Install the flush valve downwards into the cistern Installieren Sie das Spülventil nach unten in den...
- Page 41 Réservoir de toilette posée au sol de corsica Pour les toilettes posées au sol - MODE D´EMPLOI...
- Page 42 Content Contenu Accessories List ................Technical Specifications ................Liste des accessoires..........................................2 Technical drawing, inlet valve & flush valve connection ............Spécifications Techniques......................................4 Dessin technique, vanne d’entrée & branchement du robinet de chasse............5 Cistern installation ..................Installation de la citerne ........................................6 Maintenance &...
-
Page 43: Liste Des Accessoires
Accessories List Liste des accessoires Quantity Liste des accessoires Noms Spécification Quantity Liste des éléments Noms Spécifications Specifications Names Specification Item List Accessories list Quantité Names Quantité expansion nut joint en écrou rubber seal Ø110 SX10 Ø6-8 caoutchouc d’expansion straight flush Tuyau droit screw ST6.8*67... - Page 44 Accessories list Liste des accessoires Armature en Alumunium frame Panneau en verre Glass panel Vanne de chasse Vanne d’entrée Inlet valve Flush valve aluminium Lever Levier Bouton-poussoir Push button Ensemble de vis Screw set Drainage eccentric pipe Tuyau excentrique de Cistern Half height frame Citerne...
-
Page 45: Spécifications Techniques
Technical Specitication Spécifications Techniques Cabine de Citerne pneumatique pour WC posée au sol Pneumatic cabinet cistern for wall-hung WC Name CJ805W+J518 Modèle CJ805W+J518 Model Température ambiante 3~40°C 3~40°C Ambient temperature Pression d’alimentation en eau Water supply pressure 0.07~0.75MPa 0.07~0.75MPa 4~35°C Water supply temperature Température d’alimentation en eau 4~35°C... -
Page 46: Technical Drawing, Inlet Valve & Flush Valve Connection
Technical drawing, inlet valve & flush valve Dessin technique, vanne d’entrée & branchement de la vanne de chasse connection 98.5... -
Page 47: Cistern Installation
Cistern installation Installation de citerne Hook on the back Crochet sur la plaque plate arrière Ouvrez le capot Open the cistern top supérieur de la cover, pull and citerne, tirez et separate the hose séparez le tuyau du from the hook. crochet. - Page 48 Ø 8 Ø 10 Drill the holes according to the marked poin ts (the Percez des trous sur les points marqués. (La holes' depth must be deeper than the length of the profondeur des trous doit être supérieure à la expansion nut, the diameter shown as in the picture) longueur des écrous d’expansion et les diamètres As indicated by the arrows mark...
- Page 49 13mm Vissez les vis de bonne taille dans l’écrou d’expansion dans le mur et le boulon d’expansion en acier sur le sol Open the stop valve on the hose Ouvrez la vanne d’arrêt sur le tuyau pour voir si to see whether it works and water cela fonctionne et l’eau coule dans le réservoir de runs into cistern tank la citerne...
- Page 50 Push button Armature du bouton-poussoir frame Push button Boutton-poussoir Crochet Hang hook on accroché sur le the panel panneau (4pcs) Install the push button frame and (4pcs) Installez l’armature du bouton-poussoir et le button onto the glass bouton sur le verre Install the panel, make sure the glass Installez le panneau, assurez-vous que le panel close to the alumunium frame,...
- Page 51 Blue air hose Tuyau d’air bleu White air hose Tuyau d’air blanc Symbole simple chasse d’eau Half flush mark Symbole double chasse d’eau Full flush mark Connect air hoses to the correct positions Branchez les tuyaux d’air dans les positions correctes Top cover Capot supérieur Align...
- Page 52 Mark Marquez sur le tuyau de chasse et le tuyau de on the straight flush pipe and drainage. drainage pipe Cut the flush pipe and drainage pipe Coupez le tuyau de chasse et le tuyau de drainage chasse et le tuyau de drainage Faîtes le chanfrein sur le tuyau de chasse et Appliquez l’huile de silicone le tuyau de drainage...
- Page 53 Install the straight flush pipe into Installez le tuyau de chasse dans la citerne the cistern Vissez les boulons dans l’armature de la Screw the bolts into the cistern citerne frame Installez le tuyau de chasse dans la toilette Install the flush pipe into the toilet Install toilet mat Installez la natte de la toilette Installez la toilette...
- Page 54 Coupez la partie supplémentaire de la natte Cut off extra part of the toilet mat de toilette Test half & full flush functions Testez les fonctions chasse simple et double...
-
Page 55: Maintenance & Daily Care
Maintenance & daily care Entretien & Soins quotidiens 1.1 Inlet valve removal 1.1 L’enlèvement de la vanne d’entrée 23mm Separate the hose from the stop Séparez le tuyau de la vanne d’arrêt. valve Remove the top cover Retirez le capot supérieur Take out the inlet valve upwards Faîtes sortir la vanne d’entrée vers le haut. - Page 56 1.2 Nettoyage et réglage de la vanne d’entrée 1.3 Installation de la vanne d’entrée 1.2 Inlet valve adjustment & clean 1.3 Inlet valve installation Réglez le flotteur vers le haut pour augmenter le Adjust the float upwards to increase the inlet volume d’entrée ;...
- Page 57 2.1 L’enlèvement de la vanne de chasse 2.1 Flush valve removal blue air hose Tuyau d’air bleu white air hose Tuyau d’air blanc Retirez les tuyaux d’air des trous des Remove the air hoses from the tuyaux d’air. air hose holes Remove the lever Retirez le levier...
- Page 58 Buckles on the cistern hunging Boucles sur la plaque fixée de la citerne plate Opening the buckles on the cistern hunging plate and lift upwards the Ouvrez les boucles sur la plaque fixée de la citerne et levez la vanne de chasse flush valve...
- Page 59 2.2 Flush valve adjustment & clean 2.2 Réglage & nettoyage de la vanne de chasse Float Flotteur Adjust the float upwards to reduce the flush volume; Réglez le flotteur vers le haut pour réduire le volume de chasse ; ou vers le bas pour augmenter le volume.
- Page 60 2.3 Fush valve installation 2.3 installation de la vanne de chasse “click” “Cliquez” Appuyez sur la vanne de chasse Press the flush valve until it jusqu’à ce qu’elle s’enclenche clicks in the correct position. dans la position correcte. Re-install the lever Ré-installez le levier Flush valve base Base de la vanne de chasse...
- Page 61 Corsica álló wc-tartály falraszerelt wc-hez SZERELÉSI ÚTMUTATÓ...
- Page 62 Content Tartalomjegyzék Accessories List ................Alkatrészlista ..............................................2 Technical Specifications ................Műszaki specifikáció ...........................................4 Technical drawing, inlet valve & flush valve connection ............Műszaki rajz, bemeneti szelep és öblítőszelep csatlakozás ....................5 Cistern installation ..................WC-tartály szerelése ..........................................6 Karbantartás és napi gondozás .....................................14 Maintenance &...
-
Page 63: Alkatrészlista
Accessories List Alkatrészlista Quantity Alkatrészlista Név Specifikáció Quantity Terméklista Név Specifikáció Specifications Names Specification Item List Accessories list Mennyiség Names Mennyiség expansion nut Hosszabbító rubber seal Ø110 SX10 Ø6-8 Gumitömítés csavar straight flush Egyenes screw ST6.8*67 csavar pipe öblítőcső Cső- pipe small Ø22*2.0... - Page 64 Accessories list Alkatrészlista Alumunium frame Alumíniumváz Glass panel Üvegpanel Öblítőszelep Bemeneti szelep Inlet valve Flush valve Lever Nyomógomb Push button Csavarkészlet Screw set Drainage eccentric pipe Cistern Half height frame WC tartály Félmagasságú keret Lefolyó excentrikus cső...
-
Page 65: Technical Specifications
Technical Specitication Műszaki Specifikáció Név Pneumatikus üzemű WC tartály falon függő WC-hez Pneumatic cabinet cistern for wall-hung WC Name CJ805W+J518 Modell CJ805W+J518 Model Környező hőmérséklet 3~40°C 3~40°C Ambient temperature Water supply pressure Vízvezetéknyomás 0.07~0.75MPa 0.07~0.75MPa 4~35°C Water supply temperature Vízvezeték hőmérséklet 4~35°C Dimension 1003.5mm X 483mm X 108mm... -
Page 66: Technical Drawing, Inlet Valve & Flush Valve Connection
Technical drawing, inlet valve & flush valve Műszaki rajz, bemeneti szelep és öblítőszelep csatlakozás connection 98.5... -
Page 67: Wc-Tartály Szerelése
Cistern installation WC tartály szerelése Hook on the back Akassza be a lemezre! plate Open the cistern top Nyissa ki a WC tartály cover, pull and fedelét húzza fel és separate the hose válassza el a csövet a horogtól! from the hook. Insert the drainage pipe into the Illessze be a lefolyócsövet a falon lévő... - Page 68 Ø 8 Ø 10 Drill the holes according to the marked poin ts (the Fúrjon lyukakat a kijelölt pontokra! A lyukak holes' depth must be deeper than the length of the mélysége nagyobb kell, hogy legyen, mint a expansion nut, the diameter shown as in the picture) hosszabbító...
- Page 69 13mm Rögzítse a falhoz a szerkezetet a megfelelő méretű csavaranyával és hosszabbító csavarral, valamint acél hosszabbító csavarral a padlóhoz! Open the stop valve on the hose Nyissa meg az elzárószelepet a csövön, hogy to see whether it works and water ellenőrizze, hogy működik-e és a víz a WC tartályba runs into cistern tank folyik-e!
- Page 70 Push button Nyomógomb tartó frame Push button Nyomógomb Függessze fel Hang hook on a horgokat az the panel Install the push button frame and (4pcs) Szerelje fel a nyomógomb tartót és gombot az üveglapra (4 db) button onto the glass üveglapra! Install the panel, make sure the glass Szerelje be az üveglapot, győződjön...
- Page 71 Blue air hose Kék levegőcső White air hose Fehér levegőcső Félöblítés jel Half flush mark Teljesöblítés jel Full flush mark Connect air hoses to the correct positions Csatlakoztassa a levegőcsövet a megfelelő pozícióba! Top cover Fedőlap Align Beállítás A horognak és a Hook and rögzítőelemnek fastener should...
- Page 72 Mark Jelölje meg az egyenes öblítőcsövet on the straight flush pipe and és a lefolyócsövet! drainage pipe Cut the flush pipe and drainage pipe Vágja méretre az öblítő- és a lefolyócsövet! Sarkítsa le az öblítő- és a lefolyócsövet! Használjon szilikonolajt!
- Page 73 Install the straight flush pipe into Illessze be az egyenes öblítőcsövet a WC tartályba! the cistern Csavarozza be a csavarokat Screw the bolts into the cistern a WC tartály-vázba! frame Szerelje be az öblítőcsövet a WC-be! Install the flush pipe into the toilet Install toilet mat Tegye fel a WC csatlakozószövetet! Szerelje fel a WC-t!
- Page 74 Cut off extra part of the toilet mat Vágja le a WC szövet kiálló részét! Test half & full flush functions Tesztelje a félöblítés és teljes öblítés funkciókat!
-
Page 75: Karbantartás És Napi Gondozás
Maintenance & daily care Karbantartás és napi gondozás 1.1 Inlet valve removal 1.1 Bemeneti szelep eltávolítása 23mm Separate the hose from the stop Válassza szét egymástól a csövet valve és az elzárószelepet! Remove the top cover Távolítsa el a fedőlapot! Take out the inlet valve upwards Felfelé... - Page 76 1.2 Bemeneti szelep beállítás és tisztítás 1.3 Bemeneti szelep felszerelése 1.2 Inlet valve adjustment & clean 1.3 Inlet valve installation Emelje magasabbra az úszót a bemeneti térfogat Adjust the float upwards to increase the inlet növelése és helyezze alacsonyabbra a térfogat volume;...
- Page 77 2.1 Az öblítőszelep eltávolítása 2.1 Flush valve removal blue air hose Kék levegőcső white air hose Fehér levegőcső Távolítsa el a levegőcsöveket Remove the air hoses from the a levegőcső lyukakból! air hose holes Remove the lever Távolítsa el a WC tartály lehúzó kart!
- Page 78 Buckles on the cistern hunging Csatok a WC tartály függő lemezen plate Nyissa ki a csatokat a WC tartály függő lemezen és emelje felfelé Opening the buckles on the cistern hunging plate and lift upwards the az öblítőszelepet! flush valve...
- Page 79 2.2 Flush valve adjustment & clean 2.2 Öblítőszelep beállítása és tisztítása Float Úszó Adjust the float upwards to reduce the flush volume; Állítsa az úszót felfelé az öblítőtérfogat csökkentése, ill. lefelé az öblítőtérfogat növelése érdekében! or downwards to increase the volume Cover Fedőelem Rubber seal...
- Page 80 2.3 Fush valve installation 2.3 Öblítőszelep beszerelése “click” “bekattintó” Nyomja addig az öblítőszelepet, Press the flush valve until it amíg az be nem kattan a clicks in the correct position. megfelelő pozícióba! Re-install the lever Szerelje vissza a lehúzókart! Flush valve base Öblítőszelep tartó...
Need help?
Do you have a question about the CORSICA BLACK WF00073 and is the answer not in the manual?
Questions and answers