Advertisement
Quick Links
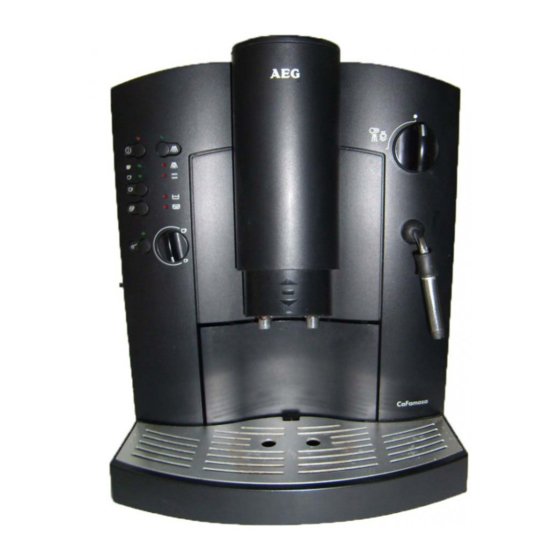
CaFamosa
Kaffee-Espresso-Vollautomat
Fully Automatic Espresso-Maker
Macchina per espresso completamente automatica
Volautomatische koffie- en espressomachine
Täysin automaattinen espressokahviasema
Gebrauchsanweisung
Operating instructions
Istruzioni per l'uso
Gebruiksaanwijzing
Käyttöohje
Advertisement

Summary of Contents for AEG CaFamosa
- Page 1 CaFamosa Kaffee-Espresso-Vollautomat Fully Automatic Espresso-Maker Macchina per espresso completamente automatica Volautomatische koffie- en espressomachine Täysin automaattinen espressokahviasema Gebrauchsanweisung Operating instructions Istruzioni per l’uso Gebruiksaanwijzing Käyttöohje...
- Page 3 11/A 11/B...
- Page 4 16/B 15/A 16/A 15/B 18/B 18/A 19/A 19/B...
- Page 5 D Bean Container with Lid (inside: grind- ance. ing texture adjustment) Selector Dial for Steam and Hot Water The form and function of your AEG Swivelling Nozzle for Steam and Hot coffee machine guarantee you Water • straightforward operation and G Height Adjustable Outlet •...
- Page 6 Table of Contents Safety Instructions Safety Instructions • The appliance may only be connected Before Using for the First Time to a mains supply on which the volt- age, type of supply, and frequency 1.1. Setting Up the Appliance match the information given on the 1.2.
- Page 7 • the dealer from whom you purchased the appliance, or 1.2. Cable compartment (Figure 3) • an AEG customer service centre. Your appliance has a cable compart- In no circumstance should the appli- ment on the rear. If the mains lead is...
- Page 8 The individual water hardness settings If a button is not pressed for more than (degrees German hardness, ° dH) are 30 sec., the procedure is automatically indicated as follows: ended without changing the value saved previously. “Descale“ indicator flashes ), in addition the following indica- The individual timer settings are indi- tors illuminate ( cated as follows:...
- Page 9 0 Turn the selector dial (Figure 1/E) anti- 2.2. Filling the Bean Container clockwise to the stop. (Figure 5) 0 Hot water runs out of the swivelling Open the lid of the bean container nozzle and is stopped automatically. (Figure 1/D) and fill the container with 0 Turn the selector dial clockwise back to roasted coffee beans (do not use fro- zen and caramelised beans).
- Page 10 To adjust the height, use the thumb 3.4. One Cup of Extra Strong and index finger to grip the ribbing on Coffee from Beans (Figure 11/B) the side of the outlet and move it up or The appliance is ready for use when the down (Figure 9/A).
- Page 11 0 Now press the 0 You can stop the outlet of steam by “1 Cup“ button for one cup or the “2 Cups“ button turning the selector dial clockwise to for two cups. the O-position (Figure 16/B). Note: If the “Ground Coffee“...
- Page 12 Important: Only use original AEG cleaning tablets! Incidentally: You can obtain original AEG cleaning tablets from AEG cus- tomer service (ET No. 663 910 480) or from your dealer (E No. 950 078 803). Your appliance has a cleaning program...
- Page 13 “Flush“ button (Figure 2/O) go out. 1/K) for approx. 3 seconds with the 0 Now place one original AEG cleaning appliance switched off. You can also tablet in the filler opening for ground continue to use your appliance and run coffee (Figure 1/B).
- Page 14 0 Empty the spent coffee container and After a certain amount of time, the the drip catcher, and refit them. The “Flush“ indicator (Figure 2/J) “Spent Coffee“ indicator (Figure flashes while the “Descale“ (Figure 1/O) goes out. All 4 green indicators 2/M) and “Spent Coffee“...
- Page 15 – Check the grinder for foreign bodies. If necessary, have the appliance – See Section 2.4. (Only when using checked by AEG customer service. the appliance for the first time). • the appliance is to be transported? – Switch off the appliance. Wait 1/2 –...
- Page 16 12. In the Case of Need for Service If repairs to the appliance become nec- essary, including the replacement of the mains lead, please contact an AEG customer service centre by telephone initially (in Germany please use the following hotline: 01805-306080*).
- Page 17 Verfügung. Nederland, 2400 AC Alphen aan den Rijn, 0172-468 300 Norge, 0516 Oslo, 22 72 58 00 AEG-Serviceline: 0 18 05 – 30 60 80 Poland, 02-034 Warszawa, 022 874 33 33 (Deutsche Telekom 0,12 Euro/Min.) Portugal, 2635-445 Rio de Mouro, (21) 926 75 75...
- Page 18 AEG Hausgeräte GmbH Postfach 1036 D-90327 Nürnberg http://www.aeg.hausgeraete.de © Copyright by AEG 822 949 052 - 0702...


Need help?
Do you have a question about the CaFamosa and is the answer not in the manual?
Questions and answers