Table of Contents
Advertisement
Advertisement
Table of Contents

Related Manuals for Sceptre X24WG-Naga


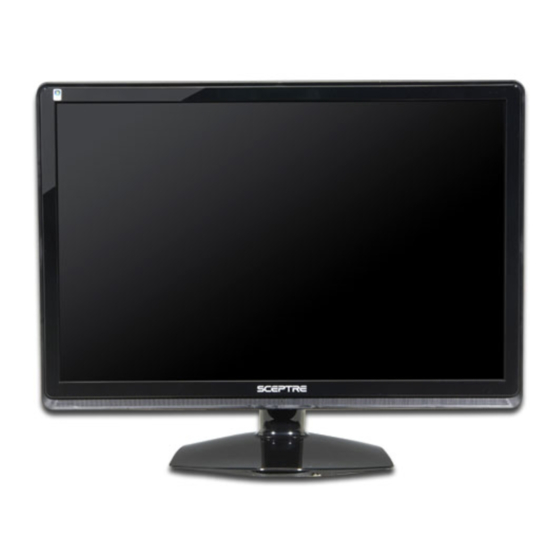
Summary of Contents for Sceptre X24WG-Naga
-
Page 1: Important Information
Important Information SCEPTRE X24 Page1... -
Page 2: Fcc Compliance Statement
The Federal communications Commission warns that changes or modifications to the unit not expressly approved by the party responsible for compliance could void the user’s authority to operate the equipment. Page2 SCEPTRE X24... - Page 3 Regulation of the Canadian Department of Communications. “Le présent appareil numérique n’èmet pas de bruits radioélectriques dépassant les limites applicables aux appareils numériques de la class B prescrites dans le Règlement sur le brouillage radioélectrique édicté par le ministère des Communications du Canada." SCEPTRE X24 Page3...
-
Page 4: Important Information
Page4 SCEPTRE X24... -
Page 5: Tips And Safety Precautions
X24 LCD MONITOR immediately after this to avoid causing fire, electric shock or component damage. • Do not place the X24 LCD MONITOR on an unstable cart, stand, or table. If the X24 LCD MONITOR falls, it can injure a person and cause serious damage to the appliance. - Page 6 The Display is exposed to rain or other moisture. The Display is dropped or damaged in any way. The performance of the Display changes substantially. • Operating environment: Temperature: 5°C ~ 35°C, Humidity: 10% to 90% non-condensing, Altitude: 0~10,000 ft. SCEPTRE X24...
-
Page 7: Table Of Contents
If You Have Component Connection on Your HD Box… ... 28 If You Have Component Connection on PlayStation® 3… ... 29 If You Have Component Connection on Xbox 360™…... 30 Connecting the LCD with (optional) HDMI ... 31 SCEPTRE X24 Page7... - Page 8 Supported PC Resolution... 45 Supported Video Resolution ... 46 Troubleshooting ... 46 How do I clean the LCD? ... 49 Specification... 50 Call Us If You Need Help!... 52 LIMITED PRODUCT WARRANTY... 53 Disclaimer & Copyright Information... 55 Page8 SCEPTRE X24...
- Page 9 Dear SCEPTRE Customer, Congratulations on your new SCEPTRE monitor purchase. Thank you for your support. To ensure safety and many years of trouble free operation of your LCD monitor, please read the manual carefully before making any adjustments, and keep them in a safe place for future reference. We hope you enjoy your new SCEPTRE monitor.
-
Page 10: Opening The Package
Opening the Package The SCEPTRE X24 is packaged in a carton together with standard accessories. The weight of the LCD display is approximately 13.1 lbs. Since the LCD panel can be easily scratched or broken, please handle the product gently. Never place the unit on a surface with the glass facing downwards unless it is on a protective padding. -
Page 11: Installing The Base
90 degrees above the base. Connect the monitor to the base by inserting the monitor into the base. 2. After the monitor is connected to the base, take a look at the bottom of the base. In the square opening of the metal plate, move the two plastic plates outwards to lock the stand. -
Page 12: Setting Up Your Monitor
The following are general short steps to setup and use the monitor with your PC under the Microsoft Windows XP operating system. After you have installed the base, connect your VGA or DVI cord to both the monitor and PC and turn on the PC and the monitor. -
Page 13: Mounting Preparations
Mounting Preparations 1. Place the monitor on a flat surface with cloth so the bezel does not get scratched. Unscrew the 4 screws that lock the arm to the monitor. 2. Once the 4 screws are removed, the stand will slide off. - Page 14 3. The monitor is ready for mounting. Please note : The mounting pattern of the monitor is 100mm x 100mm using M4 metric system screws. The screw depth of the mounting pattern should not exceed 8mm. Page14 SCEPTRE X24...
-
Page 15: Identifying Front And Rear Panel
Identifying Front and Rear Panel Front View POWER INDICATOR : If light is blue, the monitor is turned on. If the light is blinking blue, the monitor is turned on but not receiving a signal from the computer. NATIVE RESOLUTION : This monitor’s clearest picture is produced under its native resolution. -
Page 16: Side View Control Buttons
If you entered the function this button acts as the decrease adjustment button. This button also functions as a VOLUME adjustment hotkey for X24s with HDMI port. – This button allows you choose the source of the monitor between VGA and DVI. Page16 SCEPTRE X24... -
Page 17: Side View Tilt Angle
Side View Tilt Angle The LCD Monitor’s angle settings range from 0° to 10°. SCEPTRE X24 Page17... -
Page 18: Rear View
Rear View Mounting Specification : 100mm x 100mm using screw size M4 metric system screws. The Depth of the mounting pattern should not exceed 8mm. Page18 SCEPTRE X24... -
Page 19: Rear View Connections
480i, 480p, 720p, 1080i, and 1080p. DVI – DVI stands for Digital Video Interface. This connection is for computers to send video signals to the monitor digitally so that colors and video are more accurate and vivid. This connection supports HDCP video and regular video. -
Page 20: Understanding Your Cables & Connections
Cable Name HDMI to DVI (optional accessory) 3.5mm Mini-jack to Female RCA Audio (optional accessory) VGA to Female Component YPbPr (optional accessory) *The optional HDMI port is only available in certain models. Page20 Corresponding Connection Picture Conversion Cable Picture SCEPTRE X24... -
Page 21: Connecting The Lcd To Your Pc
Obtain a DVI cable and connect to the DVI connection on your PC. Connect the other end of the cable to your X24 LCD MONITOR. Turn on the power of both the X24 LCD MONITOR and the PC. Please Note : •... -
Page 22: If You Have Vga Connection On Your Video Card
If you were previously using a CRT (bulky) monitor, please hook up your old monitor first and make sure your refresh rate is set to 60 Hz frequency before using the X24 LCD MONITOR. You can find the refresh rate information and change it by RIGHT CLICKING on the desktop with nothing selected. -
Page 23: Connecting The Lcd To Your Video Device
If you have HDMI connection on your DVD player, purchase a HDMI to DVI video conversion cable and connect the HDMI end to the DVD player. Connect the DVI end to the X24 LCD monitor. Make sure to match the shapes on both connections. Turn on the X24 LCD MONITOR and your video device. -
Page 24: If You Have Hdmi Connection On Your Hd Box
If you have HDMI connection on your HD set-top box, purchase a HDMI to DVI video conversion cable and connect the HDMI end to the HD set-top box. Connect the DVI end to the X24 LCD monitor. Make sure you match the shapes on both connections. -
Page 25: If You Have Hdmi Connection On Playstation® 3
• Please reference your PlayStation® 3’s manual to make sure the proper settings are configured for your video device. • Since this monitor does not feature audio, you need to have your own speaker setup for audio. SCEPTRE X24 Page25... -
Page 26: If You Have Vga Connection On Xbox 360
Xbox 360™. Connect the VGA end to the X24 LCD monitor. Make sure you match the shapes on all connections. Turn on the X24 LCD MONITOR and your Xbox 360™. -
Page 27: If You Have Component Connection On Your Dvd Player
DVD player. Connect the VGA end to the X24 LCD monitor. Make sure you match the colors on the component connection. -
Page 28: If You Have Component Connection On Your Hd Box
HD set-top box. Connect the VGA end to the X24 LCD monitor. Make sure you match the colors on the component connection. Turn on the X24 LCD MONITOR and your video device. -
Page 29: If You Have Component Connection On Playstation® 3
PlayStation® 3. Connect the VGA end to the X24 LCD monitor. Make sure you match the colors on the component connection. Turn on the X24 LCD MONITOR and your PlayStation® 3. -
Page 30: If You Have Component Connection On Xbox 360
Xbox 360™. Connect the VGA end to the X24 LCD monitor. Make sure you match the colors on the component connection. Turn on the X24 LCD MONITOR and your Xbox 360™. -
Page 31: Connecting The Lcd With (Optional) Hdmi
Connecting the LCD with (optional) HDMI If You Have HDMI Connection on Your DVD Player… Make sure the power of X24 LCD MONITOR is turned off. If you have HDMI connection on your DVD player, purchase a HDMI cable and connect the HDMI end to the DVD player. -
Page 32: If You Have Hdmi Connection On Your Hd Box
If You Have HDMI Connection on Your HD Box… Make sure the power of X24 LCD MONITOR is turned off. If you have HDMI connection on your HD set-top box, purchase a HDMI cable and connect the HDMI end to the HD set-top box. Connect the other HDMI end to the X24 LCD monitor. -
Page 33: If You Have Hdmi Connection On Playstation® 3
If You Have HDMI Connection on PlayStation® 3… Make sure the power of X24 LCD MONITOR is turned off. If you have HDMI connection on your PlayStation® 3, purchase a HDMI cable and connect the HDMI end to your PlayStation® 3 and connect the other HDMI end to the X24 LCD monitor. -
Page 34: Connections To Pc On The Lcd With (Optional) Hdmi
X24 LCD MONITOR. Obtain the audio cable and connect the 3.5 mm Mini-jack cable to the Audio Line In connection of the monitor. Connect the other end of the 3.5 mm Mini-jack cable to your PC’s audio line out connection. -
Page 35: If You Have Vga Connection On Your Video Card
If you were previously using a CRT (bulky) monitor, please hook up your old monitor first and make sure your refresh rate is set to 60 Hz frequency before using the X24 LCD MONITOR. You can find the refresh rate information and change it by RIGHT CLICKING on the desktop with nothing selected. -
Page 36: On Screen Display (Osd) Menu
The OSD menu of the monitor provides various adjustments for the monitor such as color, brightness, contrast, screen settings…..etc. When you press the M button on the side of the monitor, the OSD screen will appear. Select each of the functions with the button to enter each of the function or when you’re in the function already, use the... -
Page 37: Luminance
• While DCR is turned on, BRIGHTNESS adjustments will be disabled. If you see BRIGHTNESS function grayed out, you will not be able to adjust it. SCEPTRE X24 (▲/+) (▼/–) button to select BRIGHTNESS or CONTRAST to (▼/–) button to adjust the values. -
Page 38: Geometry
When using VGA connection, you need to use this option for changing the resolutions below then use AUTO ADJUST after changing the format option. Page38 buttons. (▼/–) buttons to select the option you want to adjust. (▲/+) (▼/–) buttons to adjust the SCEPTRE X24... - Page 39 16:10 – This format sets the monitor for 16:10 ratio ii. 16:9 – This format sets up the monitor for 16:9 ratio iii. 4:3 – This format sets up the monitor for 4:3 ratio Please Note : • It is always suggested for the USER to use the AUTO ADJUST function instead of manual adjustments.
-
Page 40: Color
USER PRESET – This option lets the user adjust the white balance by tweaking the RED, GREEN, and BLUE color. Page40 (▼/–) button to select the option you want to adjust to. (▲/+) SCEPTRE X24... -
Page 41: Volume (Optional)
AUTO COLOR – This option automatically adjusts the overall balance of white colors in a picture automatically. VOLUME (optional) This optional function changes the X24 LCD MONITOR’s speaker volume. 1. Press M to open the OSD then highlight OSD SETTING by pressing the (▲/+) (▼/–) -
Page 42: Osd
Press the (▲/+) or (▼/–) buttons to select the language you want to change to and press M to finalize the change. Please Note : • Changing the language of the OSD will alter all the messages and OSD language of the monitor. There is no reset for this function. Page42 SCEPTRE X24... -
Page 43: Recall
RECALL This function recalls adjustments to the monitor. 1. Press M to open the OSD then highlight RECALL by pressing the (▼/–) buttons. 2. Press M to enter the function. (▲/+) 3. Press the 4. Press M to enter the option and with the Yes to recall. -
Page 44: Miscellaneous
You can switch sources easily by using the SOUCE button on the side of the monitor. • The DCR function automatically controls the BRIGHTNESS of the monitor, therefore, when this function is enabled, you will not be able to adjust the values in the BRIGHTNESS function. -
Page 45: Supported Pc Resolution
VESA VESA VESA VESA *Once a mode is optimized, there is no need to make any further adjustment as long as the VGA card remains unchanged. **Specifications are subject to change without notice. SCEPTRE X24 Clock (MHz) 640x480 30.24 1024x768... -
Page 46: Supported Video Resolution
Check your video cable. It might be corrupt. Swap out the video cable for another one to see if the monitor will work. Check your power plug. See if it is fully plugged in on both the monitor and the wall. - Page 47 If your VGA can then, your video card’s DVI cannot support widescreen resolutions. Sometimes your video card will not read the monitor correctly and will not allow you to achieve the resolution you want. Rebooting your computer will solve the situation.
- Page 48 If your sound is too low, this might be because the HDMI’s sound output is a pure digital signal. This is the design of digital sound signals and you’ll need to have an independent set of self powered speakers to hear well. SCEPTRE X24...
-
Page 49: How Do I Clean The Lcd
Wipe the display with a dry micro-fiber cloth or 100% cotton cloth afterwards. SCEPTRE X24 Make sure you wring the water out of the cloth before cleaning the bezel in order to prevent water from penetrating into the electronics. -
Page 50: Specification
300 nits 4000:1 (DCR) 1000:1 (NATIVE) 2ms (Gray to Gray) Typical 160/160 Degree (Horizontal/Vertical) > 50,000hrs Monitor Display 22.3(W)X15.3(H)X8(D) inches 546.35(W)X374.85(H)X196(D) mm 13.12 lbs (5.96 Kgs) 100V to 240VAC @ 50/60 Hz Max, 50W Features 2w + 2w SCEPTRE X24... -
Page 51: Video Support
VIDEO SUPPORT PC timing (5)I/O *Specifications are subject to change without notice. SCEPTRE X24 Features (continued) 480i @ 30 Hz 480p @ 60 Hz 720p @ 60 Hz 1080i @ 30 Hz 1080p @ 60 Hz 640 * 350 @ 70 Hz... -
Page 52: Call Us If You Need Help
For more information on warranty services or repairs after the warranty period, please contact our support department at the number below. For technical help, contact our SCEPTRE Technical Support Group via email or phone. Please have your SCEPTRE p/n number, serial number, and date of purchase available before you call. -
Page 53: Limited Product Warranty
Service Labor During a period of one (1) year from the effective warranty date, SCEPTRE will provide, when needed, service labor to repair a manufacturing defect at SCEPTRE’s own Service Center. To obtain warranty service in the Untied States, you must first call our Customer Support at (800) 788-2878. - Page 54 There are millions of pixels on a LCD screen. Therefore, there is industry standard specification regarding dead or bad pixels. SCEPTRE sets limit on the LCD at 3 dead pixels in a cluster adjacent to each other, 5 dead pixels of the same brightness and color, or 8 total in a combination of color and brightness of dead pixels.
-
Page 55: Disclaimer & Copyright Information
Corporation. Blu-ray Disc is a registered trademark of the Blu-ray Disc Association. Sceptre, Inc. shall not be liable for technical or editorial errors or omissions contained herein; nor for incidental or consequential damages resulting from furnishing this material, or the performance or use of this product.
Need help?
Do you have a question about the X24WG-Naga and is the answer not in the manual?
Questions and answers