
Related Manuals for Xpelair Natural Air PH 180


Summary of Contents for Xpelair Natural Air PH 180
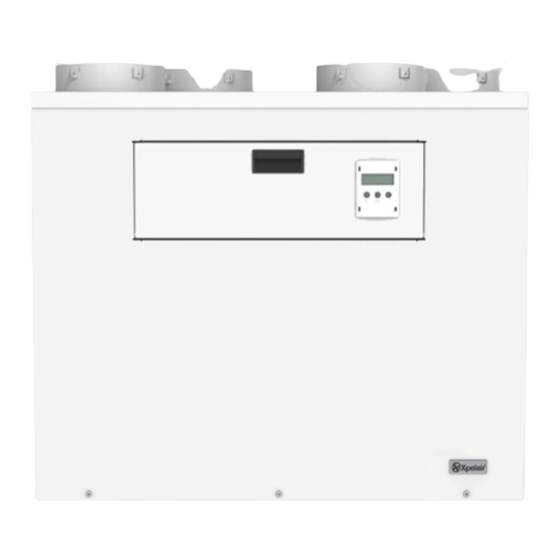
- Page 1 Natural Air Natural Air PH Natural Air Plus 180 and 350 Models Ventilation Unit With Heat Recovery Installation manual IMPORTANT: In this installation manual, especially important notes are marked as WARNING! or NOTE!
-
Page 2: Table Of Contents
Installation Manual Contents Section 1 – Important notes Section 5 – Setting up 1.1 Intended use 5.1 Requirements for the building 1.2 Safety instructions 5.2 Requirements for ventilation system Section 2 – Description of the device 5.3 Requirements for the technician 2.1 Purpose 5.4 Setting up procedure 2.2 Package contents... -
Page 3: Section 1 - Important Notes
Section 1 – Important notes In this user manual, especially important notes are marked as WARNING! or NOTE! WARNING: Warnings against hazards and errors that can cause severe or fatal injuries or can have serious consequences for the product. NOTE! Useful notes and additional information. -
Page 4: Section 2 - Description Of The Device
Section 1 – Important notes / Section 2 – Description of the Device 1.2.3 Start-up, use, interruption The completed installation must be tested to ensure the unit works correctly. The user must read the User manual in order to understand the procedures for use and maintenance. WARNING: The unit contains rotating fans. -
Page 5: System Design
Section 2 – Description of the Device Fig. 2.1 Supply-air/extract-air system with heat recovery 1 Fresh air* 6 Air diffuser NOTE! 2 Supply air 7 Air transfer opening * Outside installation points for the Fresh Air 3 Extract air A Supply-air area intake (1) and the Exhaust Air outlet (4) MUST be 4 Exhaust air* B Extract-air area... -
Page 6: Design
Section 2 – Description of the Device NOTE! See Table 3.1 on Page 7 for Factory set Supply and Extract flow rates. See Section 6.3 Installer menu – Change the Air flow rates. (As determined by the design). NOTE! The following documents are needed for correct designing of the system: •... - Page 7 Section 2 – Description of the Device Natural Air 180 Natural Air 350 Fig. 2.3 Structure in detail...
-
Page 8: Section 3 - Technical Data
Section 2 – Description of the Device / Section 3 – Technical data Fig. 2.3 Key to structure in detail 1 Rear cover 7 Control PCBs area 13 Control panel and display 2 Actuator cover 8 Filter 14 Heat exchanger cover 3 Bypass actuator assembly 9 Installer connections 15 Filter access door... -
Page 9: Characteristic Curves
Section 3 – Technical data See limitations of Flow Rate vs. External Pressure Loss in the graph below (Fig. 3.2) 3.2 Characteristic curves 180 and 350 Series Fig. 3.2 Characteristic curves Natural 180 / 350 ranges (Dotted lines represent Factory defaults) Key to Characteristic curves ①... - Page 10 Section 3 – Technical data 3.3 Dimension drawings (continued) Fig. 3.3a Dimensional drawing, Natural Air 180 ventilation unit...
- Page 11 Section 3 – Technical data 3.3 Dimension drawings (continued) Fig. 3.3b Dimensional drawing, Natural Air 350 ventilation unit...
-
Page 12: Section 4 - Installation
Section 4 – Installation 4.1 Requirements at the installation site The location must be frost-free. The room temperature should not fall below +5°C. The Fresh air intake must be sited in an area free from unwanted odours and far enough away from the Exhaust air outlet to prevent re-circulation. -
Page 13: Installation Of The Unit
Section 4 – Installation 4.2 Installation of the unit The ventilation unit cannot be mounted on a floor. Condensation drains must be fitted to the unit. It is designed to be wall mounted. Below is backplate on the wall, ready for remounting the unit: Fig. -
Page 14: Air-Duct System
Section 4 – Installation 4.3.1 Air infiltration and Infiltration of sewer gases Any air infiltration into the ventilation unit via the condensate hose must be prevented. Both condensate hoses must be looped and inclined as shown in Fig 4.3 in order to trap a loop of water and prevent air getting back into the unit via the hoses. - Page 15 Section 4 – Installation Key to Figure 4.4 (above) : 1 Fresh air (outside air being drawn in) NOTE! Connecting exhaust hoods or vented dryers 2 Supply air (air going into the rooms) to the ventilation unit is not permitted! We 3 Extract air (air extracted from the rooms) recommend using exhaust hoods with 4 Exhaust air (air going into outside space)
-
Page 16: Electrical Installation
Section 4 – Installation 4.5 Electrical installation Natural Air 180/350 and Natural Air 180/350 Plus : Connect the ventilation unit to a 230V/50Hz power supply, 5A fuse protection. Natural Air 180 PH : Connect the ventilation unit to a 230V/50Hz power supply, 13A fuse protection. Natural Air 350 PH : Connect the ventilation unit to a 230V/50Hz power supply, 20A fuse protection. -
Page 17: Connecting The Unit To Power Supply
Section 4 – Installation 4.5.2 Connecting the ventilation unit to the power supply, external sensors and heaters Key to parts : 1 Cable inlets for sensors Remove a grommet and make a suitable hole through the exposed EPP insulation to the wiring chamber. -
Page 18: Electronics Boards Inside The Unit
Section 4 – Installation Fig. 4.7a Wiring configuration: PCB Termination Fig. 4.7b Wiring configuration: Termination for all Natural Air 180 & 350 units. for Natural Air 350 PH units only. (except 350 PH – see Fig. 4.7b) (Note : Pre-heater and Boost Heater outputs are only available on the Natural Air PH models) 4.5.3 Electronics boards in the ventilation unit... - Page 19 Section 4 – Installation Fig. 4.8 Main Connector PCB External Sensors PCB Key to connections : Connection to 4 internal temperature X1 block 1 External 0 – 10V output Humidistat sensors to 7 sensors. (Model 180V - Only 1, 2 and 3 available) External Volt free smoke detector X1 block External 0 –...
-
Page 20: Electrical Circuit Diagram
Section 4 – Installation 4.5.4 Electrical circuit diagram : Natural Air 180 Fig. 4.9a Electrical circuit diagram, internal wiring Natural Air 180 NOTE! Defrost Power, Boost Power output and external NTC available on Natural Air PH Models only. External Sensors PCB on Natural Air Plus Models only. (Other models, available as an accessory). - Page 21 Section 4 – Installation 4.5.4 Electrical circuit diagram : Natural Air 350 Fig. 4.9b Electrical circuit diagram, internal wiring Natural Air 350 NOTE! Defrost Power, Boost Power output and external NTC available on Natural Air PH Models only. External Sensors PCB on Natural Air Plus Models only. (Other models, available as an accessory).
-
Page 22: Sensors
Up to 7 external humidity sensors can be used with the 350 range. The external inputs MUST be used with the Xpelair humidistat QHS (Part number 93320AA). For an external CO sensor use Xpelair accessory, part number 93330AA. -
Page 23: Installation Air-Quality Sensor
Section 4 – Installation 4.5.7 Installation of the air-quality sensor (optional). (Optional Sensors Board Kit required) An optional air-quality controller (AQS) can be used in order to control the ventilation unit automatically. The AQS Controller (RXG Part N° 92097AW) is wall mounted and is supplied with a surface box. Connect : ... -
Page 24: Installation Of Duct Heaters (Optional)
Section 4 – Installation The smoke detector is installed in the Extract duct. Alternatively, an external fire alarm system can be used. NOTE! If an external smoke detector is not used then a link wire must be fitted across the “Smoke Detector”... -
Page 25: Installation Of Ventmiser (Optional)
Section 4 – Installation 4.5.10 Installation of Ventmiser Automatic Fan Controller An Xpelair Ventmiser controller (Xpelair Part N° 92630AA) can be used to : Automatically switch the Natural Air unit from Automatic mode to Speed 2. Connect the Ventmiser to the Natural Air unit : Install the Ventmiser as required, using the Instructions supplied with the Ventmiser controller. -
Page 26: Installation Of Ext. Filter Box
Section 4 – Installation 4.5.11 Installation of an External filter box. (Natural Air 180 models only) Note : The filter already fitted inside the Natural Air 350 range of units can be changed for different types, without the need for an external filter box. If required on the Natural Air 180 models only, an external filter box can be fitted into the fresh air inlet duct work. -
Page 27: Section 5 - Setting Up
Section 5 – Set up 5 Set up After completing the installation, system setup must be carried out by a qualified technician in order to check the correct functionality. 5.1 Requirements for the building Set up must only be carried out when the building and rooms are ready for occupation. Ensure that the rooms are free of dust, eg. -
Page 28: Section 6 - Control
Section 5 – Set up NOTE! Changes made using the Installer menu can have a significant effect on the operation of the ventilation system. • The setting up procedure should only be made by a qualified technician. Incorrect settings can affect the efficiency and noise of the system and can cause system failures. NOTE! A log of all the settings can be made using the Settings Log table in Section 10. -
Page 29: Operating Modes
Section 6 – Control and Service menu 6.1.1 Standard display The standard display shows information on the current operating status of the ventilation unit. Fig. 6.2 Standard display Key to Fig. 6.2 : 1 Bypass feature is On 4 Operating status and Time 7 Program Timers are On 2 Holiday Mode is On 5 Middle button: OK (Enter) - Page 30 Section 6 – Control and Service menu 6.2.3 Favourite User adjustments The Favourites menu is used to make adjustments to the more commonly used features : Set Speed 3 (Boost) timer, Timed Stop Bypass, Program timers, Night timer and Holiday mode. Access: Press the OK button Fig 6.4 Favourite User adjustments : and keep pressed for 5 sec :...
-
Page 31: Installer Menu
Section 6 – Control and Service menu 6.3 Installer menu Access: Press the and OK buttons Fig 6.6 Installer menu : simultaneously and keep pressed for 5s The Installer menu is used to make and change the settings for the operation of the ventilation system. -
Page 32: Change Settings
Section 6 – Control and Service menu 6.3.2 Use the “Change settings” menu to alter various settings : Fig. 6.8 Installer menu: Change settings Set Internal and External Humidistats: The Ramp trigger % sets how rapidly the humidity changes before it triggers the speed from 1 to 2. E.g. - Page 33 Section 6 – Control and Service menu Set Volt free inputs: There are 2 volt free inputs that can be configured for use with external controls : For each input: designate for Enabled or Disabled. (Default is Enabled). When the input is Enabled it will trigger when the connections are closed by an external volt free relay. Volt free input 1 closed sets the unit to Speed 2.
- Page 34 Section 6 – Control and Service menu When the selected input is : NOTE! L13 is removed : The default Open : The fans run at Flue speed. “Flue in Use Activation” method is Closed : The fans run at Normal speed. Flue speeds always apply.
-
Page 35: Load And Save And Reset Parameters
Section 6 – Control and Service menu 6.3.3 Installer menu – Save and Load and Reset Parameters Fig. 6.9 Installer menu: Parameters Save parameters Used to save the currently programmed volume flow rates and all settings for inputs and outputs. Before making any changes it is recommended that the existing parameters are saved using “Save Parameters”... -
Page 36: Autocheck Routine
Section 6 – Control and Service menu Bypass shutter Motor Set the Bypass shutter to Open or Closed. Defrost Heater When fitted, the external defrost heater output can be switched On or Off. Note: The heater output will not switch ON if the fans are not running. Boost Heater ... -
Page 37: Filter Monitoring / Filter Message
Section 6 – Control and Service menu The bypass is closed (heat recovery is enabled), when all of the following conditions are fulfilled: Extract-air temperature is at least 3°C below the set switching temperature and Fresh-air temperature is 1°C above Extract-air temperature 6.4.2 Filter monitoring / filter message The filter is monitored on the basis of a time interval. -
Page 38: Frost Protection Of Heat Exchanger
Section 6 – Control and Service menu Jumper L13 installed : safety function disabled Jumper L13 removed : safety function enabled Fig. 6.12A Display circuit board with jumper L13 Fig. 6.12B Display circuit board without jumper L13 6.5.2 Frost protection of the heat exchanger When the outdoor temperatures are very low and the property is left unheated, a frost protection function will operate in order to prevent freezing of the heat exchanger. -
Page 39: Safety Cut-Out
Section 6 – Control and Service menu During Frost protection of the property, the display will read Frost Protection, UNIT OFF. NOTE! In order to enable setting up, this function is not available for 60min after energizing the ventilation unit. 6.5.4 Safety cut-out function (See also Section 4.5.8) The Smoke Detector terminal on the Main Connector PCB is used to connect to an external smoke detector. -
Page 40: Section 7 - Fault Finding
Section 7 – Fault Finding WARNING: Repairs must only be carried out by qualified technicians. Use only original spare parts from the manufacturer. Filter, status and fault messages are shown on the display and control panel of the ventilation unit. If there are any active fault messages, the display message will flash the error. -
Page 41: Section 8 - Map Of The User Menu
Section 8 – User Menu 8 Map of the user menu Access: Press the and OK buttons simultaneously and keep pressed for 5s : User menu continued on next page. - Page 42 Section 8 – User Menu User menu continued on next page.
-
Page 43: Section 9 - Map Of The Installer Menu
Section 8 – User Menu Fig. 8.1 Map of User Menu Section 9 – Installer Menu 9 Map of the Installer menu... -
Page 44: Section 10 - Settings Log Table
Section 9 – Installer Menu Fig. 9.1 Map of Installer Menu Section 10 – Settings Log table Use the table below to record the settings of the installed system. 10.1 User Settings Setting Menu Title Factory Default New Value Set Speed 3 30 minutes Boost Timer Program Timers... -
Page 45: Installer Settings
Section 10 – Settings Log table 10.2 Installer Settings Setting Menu Title Factory Default New Value Supply Speed 1 30 % of full scale speed Supply Speed 2 46 % of full scale speed Supply Speed 3 58 % of full scale speed Extract Speed 1 30 % of full scale speed Extract Speed 2... -
Page 46: Section 11 - Customer Service & Warranty
Please therefore retain your receipt as proof of purchase. If you do experience a problem with your Xpelair product please call the helpline on +44 344 879 3588 or at the address below. We will need details of your Xpelair product, and a description of the fault which has occurred. -
Page 47: Section 12 - Environment And Disposal
The Xpelair warranty does not entitle you to recover of any indirect or consequential loss or damage including but not limited to loss or damage to any other property. The Xpelair warranty is in addition to your statutory rights as a consumer and you statutory rights are not affected by this Xpelair warranty. - Page 48 Millbrook House, Grange Drive, Hedge End, Southampton, SO30 2DF Tel: +44 (0) 344 879 3588 UK Technical Service Tel: +44 (0) 344 879 3588 UK Technical Service Email: customer.services@glendimplex.com © Glen Dimplex (Glen Dimplex reserves the right to alter product specification or appearance without notice). (A3) Part N°...
Need help?
Do you have a question about the Natural Air PH 180 and is the answer not in the manual?
Questions and answers