Sign In
Upload
Download
Table of Contents
Contents
Add to my manuals
Delete from my manuals
Share
URL of this page:
HTML Link:
Bookmark this page
Add
Manual will be automatically added to "My Manuals"
Print this page
×
Bookmark added
×
Added to my manuals
Manuals
Brands
Grundig Manuals
Clock Radio
SCC 240
Manual
Grundig SCC 240 Manual
Hide thumbs
Also See for SCC 240
:
User manual
1
2
3
4
5
6
7
8
9
10
11
12
13
14
15
16
17
18
19
Table Of Contents
20
page
of
20
Go
/
20
Contents
Table of Contents
Bookmarks
Table of Contents
Safetyandset-Up
Power Supply
Mains Operation
Environmental Note
Radio-Controlledclock
Setting the Time Zone
Settingalarmtime
Operation
Radio Mode
Alarm Mode
Timer Mode
Compliance with Rohs Directive
Technical Data
Package Information
Advertisement
Quick Links
1
Alarm Mode
Download this manual
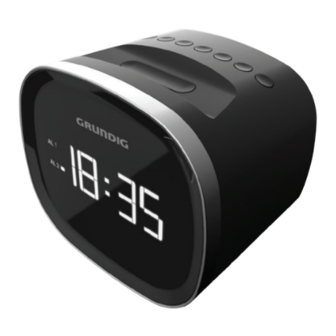
CLOCK RADIO
SCC 240
SCN 230
Sonoclock 2000
Sonoclock 2500 BT
EN
DE
FR
IT
DA
SV
PL
ES
TR
Table of
Contents
Previous
Page
Next
Page
1
2
3
4
5
Advertisement
Table of Contents
Need help?
Do you have a question about the SCC 240 and is the answer not in the manual?
Ask a question
Questions and answers
Related Manuals for Grundig SCC 240
Grundig SCC 240, SCN 230 - Clock Radio Manual
(article)
Clock Radio Grundig Sonoclock SC 755 User Manual
(10 pages)
Clock Radio Grundig SC- 660 PLL User Manual
(39 pages)
Clock Radio Grundig NOCTUS Manual
Electronic clock radio (19 pages)
Clock Radio Grundig SONOCLOCK SC 910 Manual
(11 pages)
Clock Radio Grundig SC 990 Manual
(20 pages)
Clock Radio Grundig Sonoclock 55 SC 5305 User Manual
Clock radio (14 pages)
Clock Radio Grundig Sonoclock 53 SC 5303 DCF User Manual
Clock radio (12 pages)
Clock Radio Grundig Sonoclock 51 SC 5301 User Manual
Clock radio (14 pages)
Clock Radio Grundig Sonoclock 54 SC 5304 DCF User Manual
Clock radio (17 pages)
Clock Radio Grundig Sonoclock SC 3300 User Manual
(9 pages)
Clock Radio GRUNDIG SONOCLOCK 610 User Manual
Clock radio (10 pages)
Clock Radio Grundig Sonoclock 1000 Manual
(18 pages)
Clock Radio Grundig Sonoclock 52 Manual
(18 pages)
Clock Radio Grundig Sonoclock 54 Manual
(17 pages)
Clock Radio Grundig SC220BL Quick Start Manual
(18 pages)
This manual is also suitable for:
Scn 230
Sonoclock 2000
Sonoclock 2500 bt
Table of Contents
Print
Rename the bookmark
Delete bookmark?
Delete from my manuals?
Login
Sign In
OR
Sign in with Facebook
Sign in with Google
Upload manual
Upload from disk
Upload from URL


Need help?
Do you have a question about the SCC 240 and is the answer not in the manual?
Questions and answers